
CINEMOD FOCUSING RING
Print Profile(1)
Description
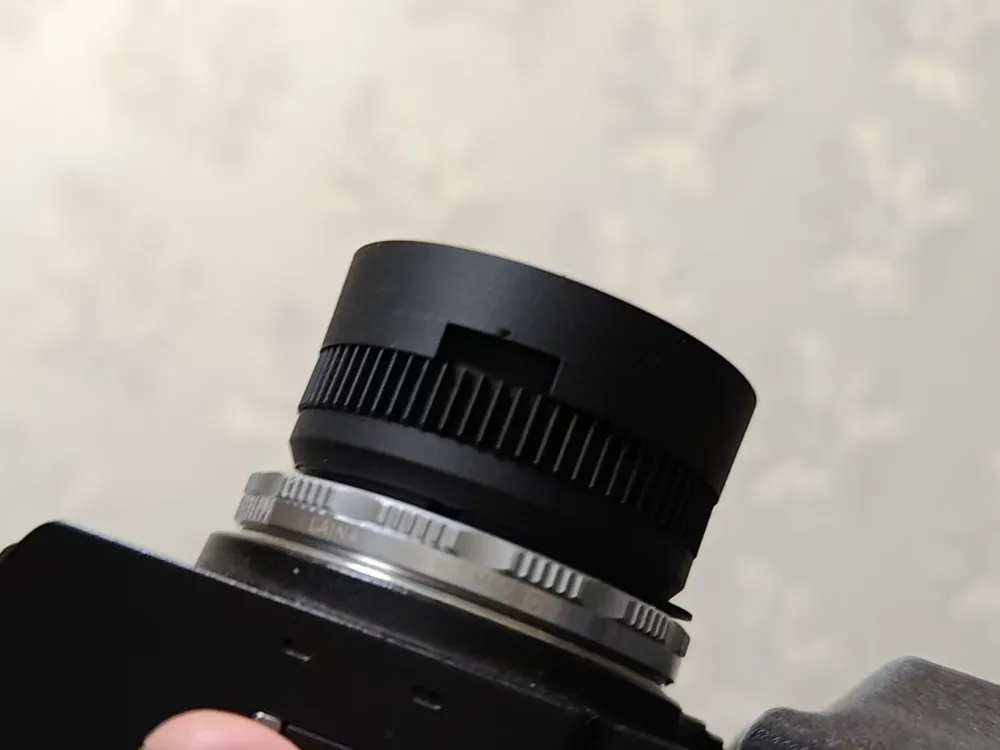
Rangefinder disassembly lens adapter kit(It is recommended to use matte consumables,Recommended: bambu matte black,Other consumables may have shrinkage deviations. If they cannot be installed smoothly, please manually debug them)
Split-mount head CINEMOD kit
Style design of film camera shots
Fully 3D printed structure without hardware components
The maximum focusing range is 9.5mm, covering basically from infinity to 10cm
The focusing ring rotates through a 135-degree angle, specifically designed for precise focusing
0.8 modulus focusing gear, allowing both manual and electronic focusing
Supported lens range: Rangefinder or industrial lenses with a maximum lens core diameter of less than 36mm and a flange distance (rear lens) greater than 28.8mm are supported (preferably less than 34mm)
Front thread for 58mm filters
Supported focal length: equivalent to full-frame 28mm and above
As for adjusting the aperture with the aperture group lens core (each specific lens core needs to be designed individually and cannot be made into a kit)
Supported cameras: The rear mount is a Leica M mount, supporting medium/full/half-frame mirrorless cameras from Sony, Nikon, Fujifilm, Canon, Panasonic, and more
After finishing the collation, the Tozhu MW will be made open source. Those who have printers can print it themselves, and those who don't can also have it printed on their behalf. Just buy me a cup of coffee as a reward.
User Guide (3D printed structures are prone to damage, please install carefully)
1. Use a vernier caliper to measure the diameter of the front lens and the outer diameter of the lens front opening, and enter the parameters into the two corresponding negative parts of the focusing and fixing ring (to ensure smooth installation, add 0.05 to 0.2mm to the straight parameters).
for example
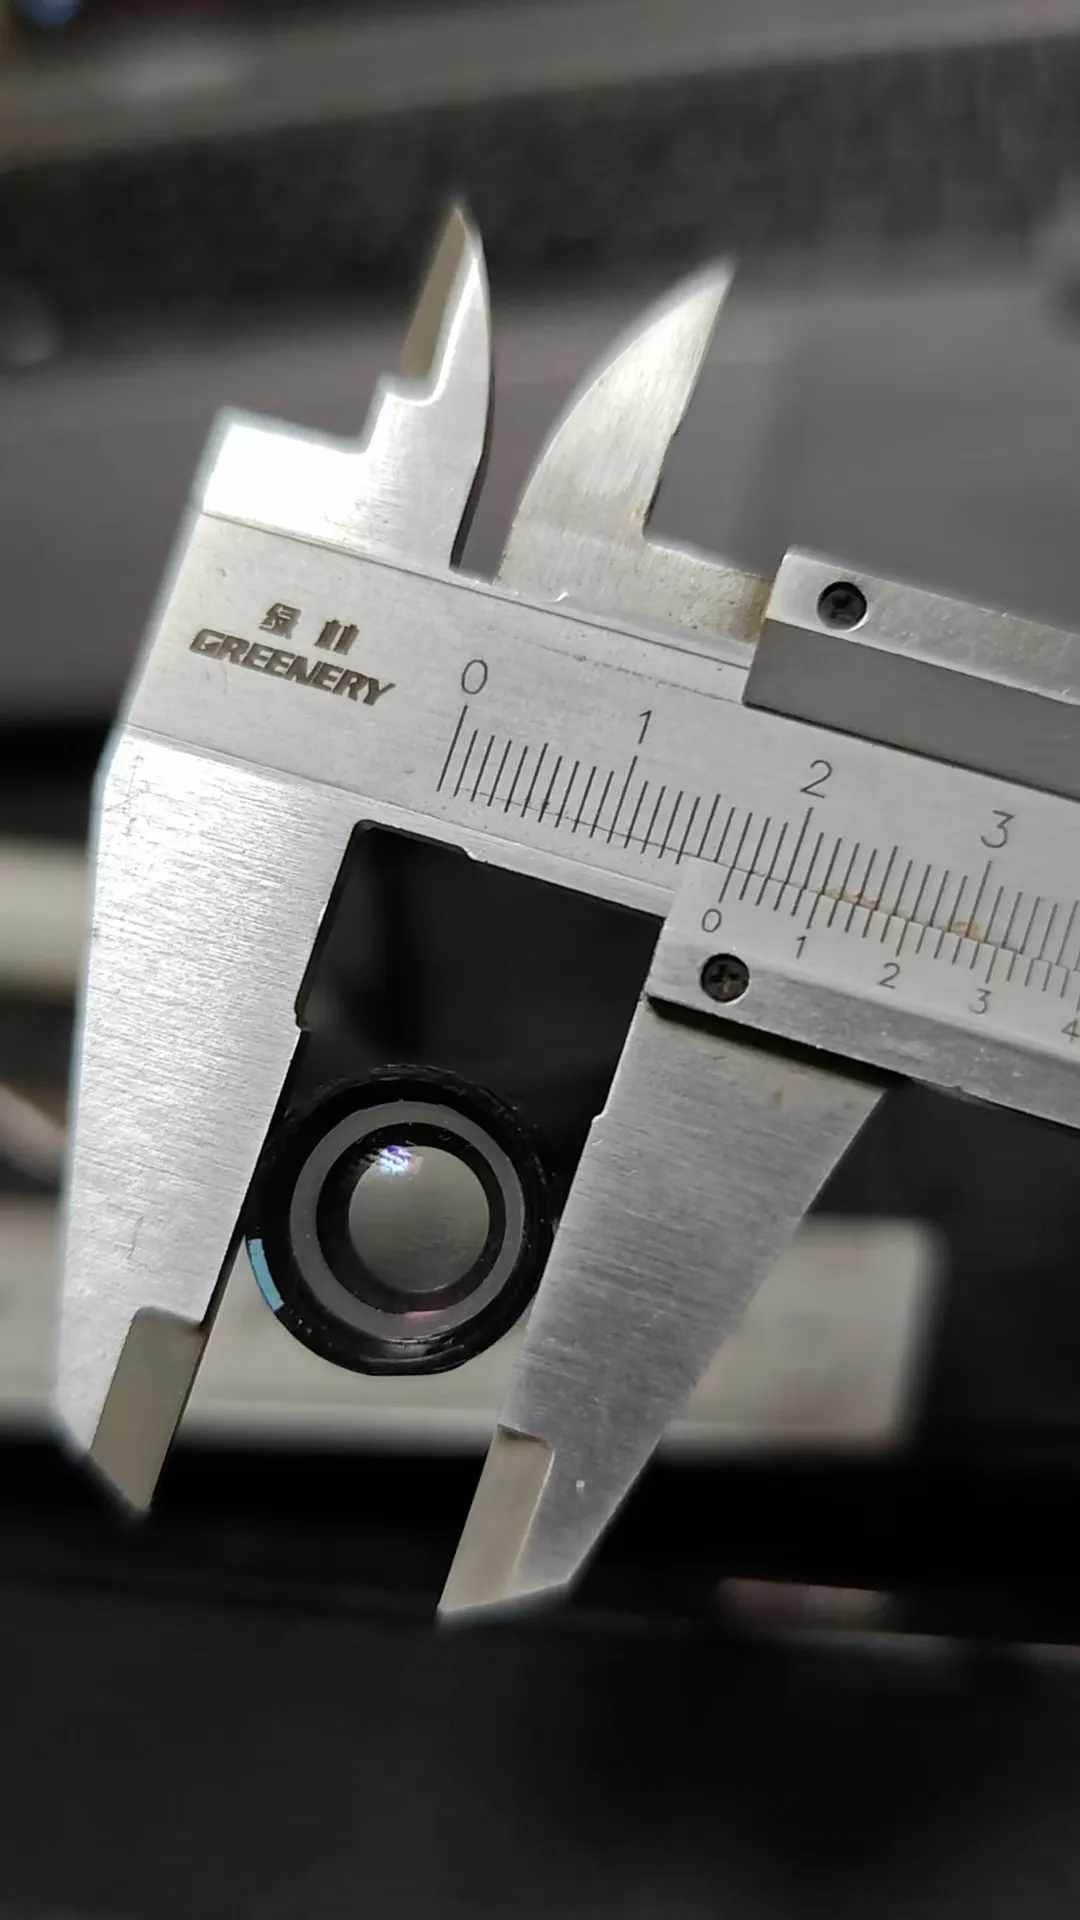
The outer diameter of this lens is 17mm
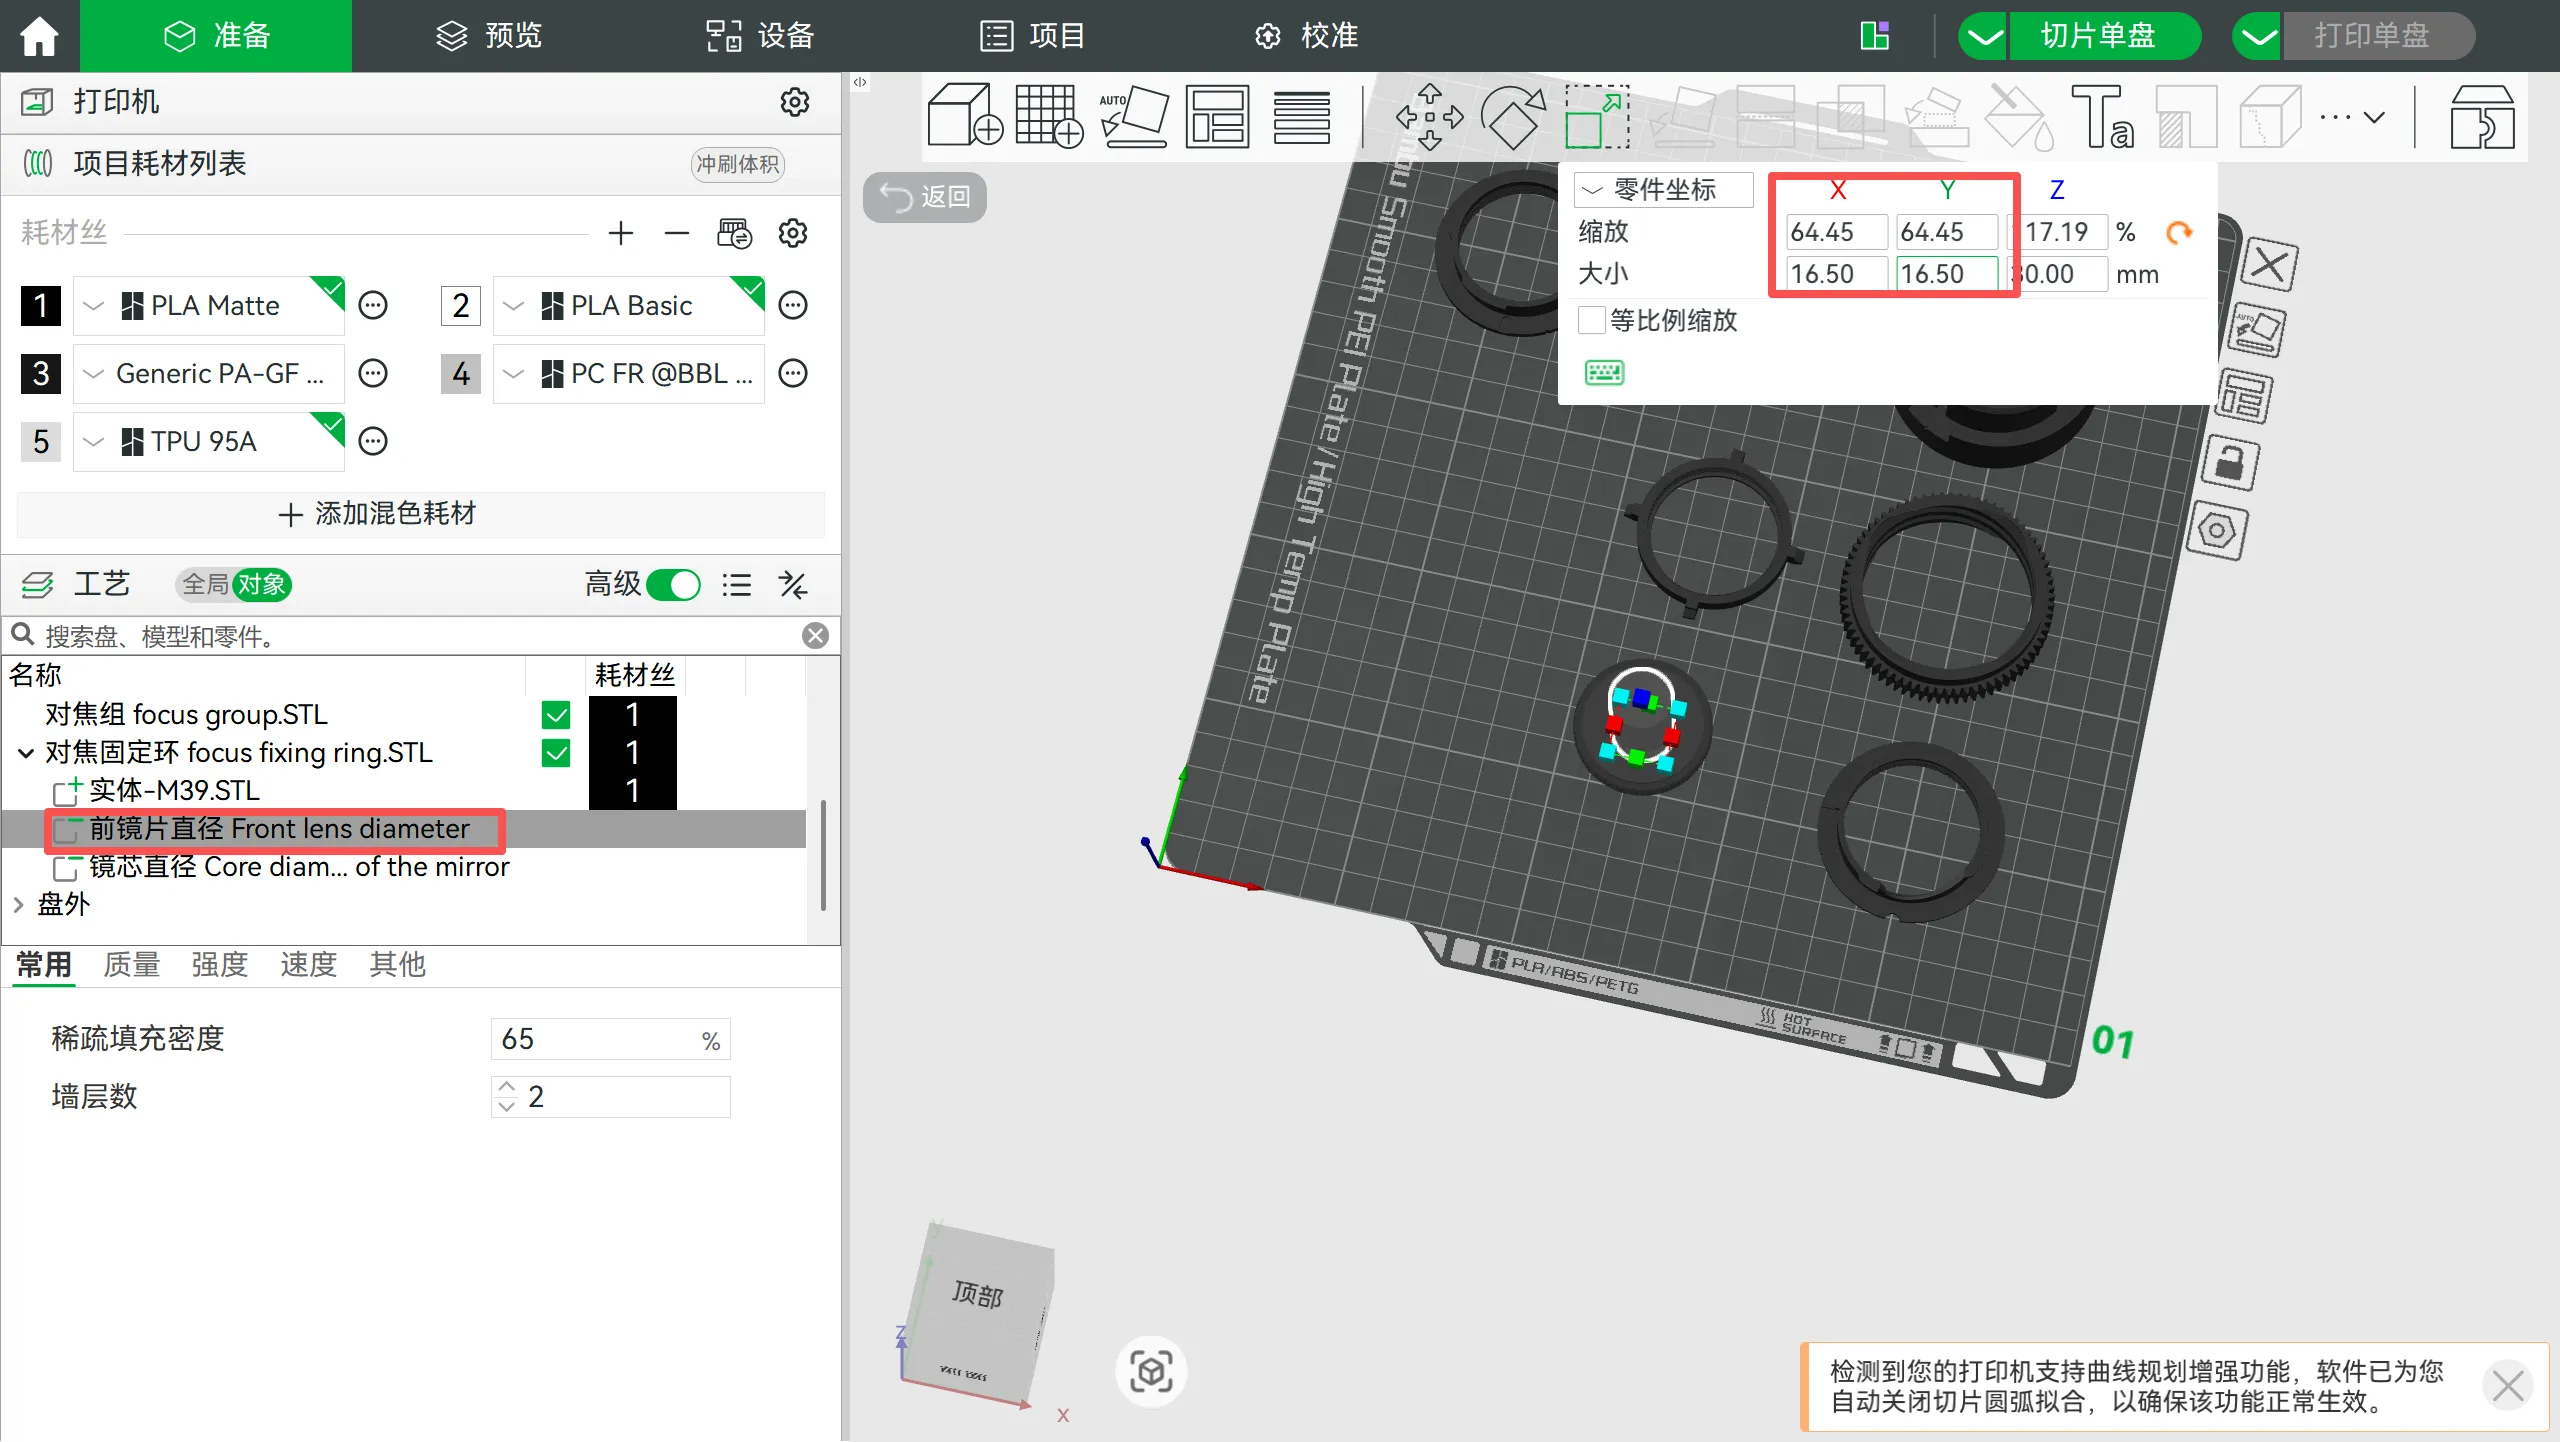
Front lens diameter Both X and Y parameters are set to 16.5mm, used for positioning the front end of the lens
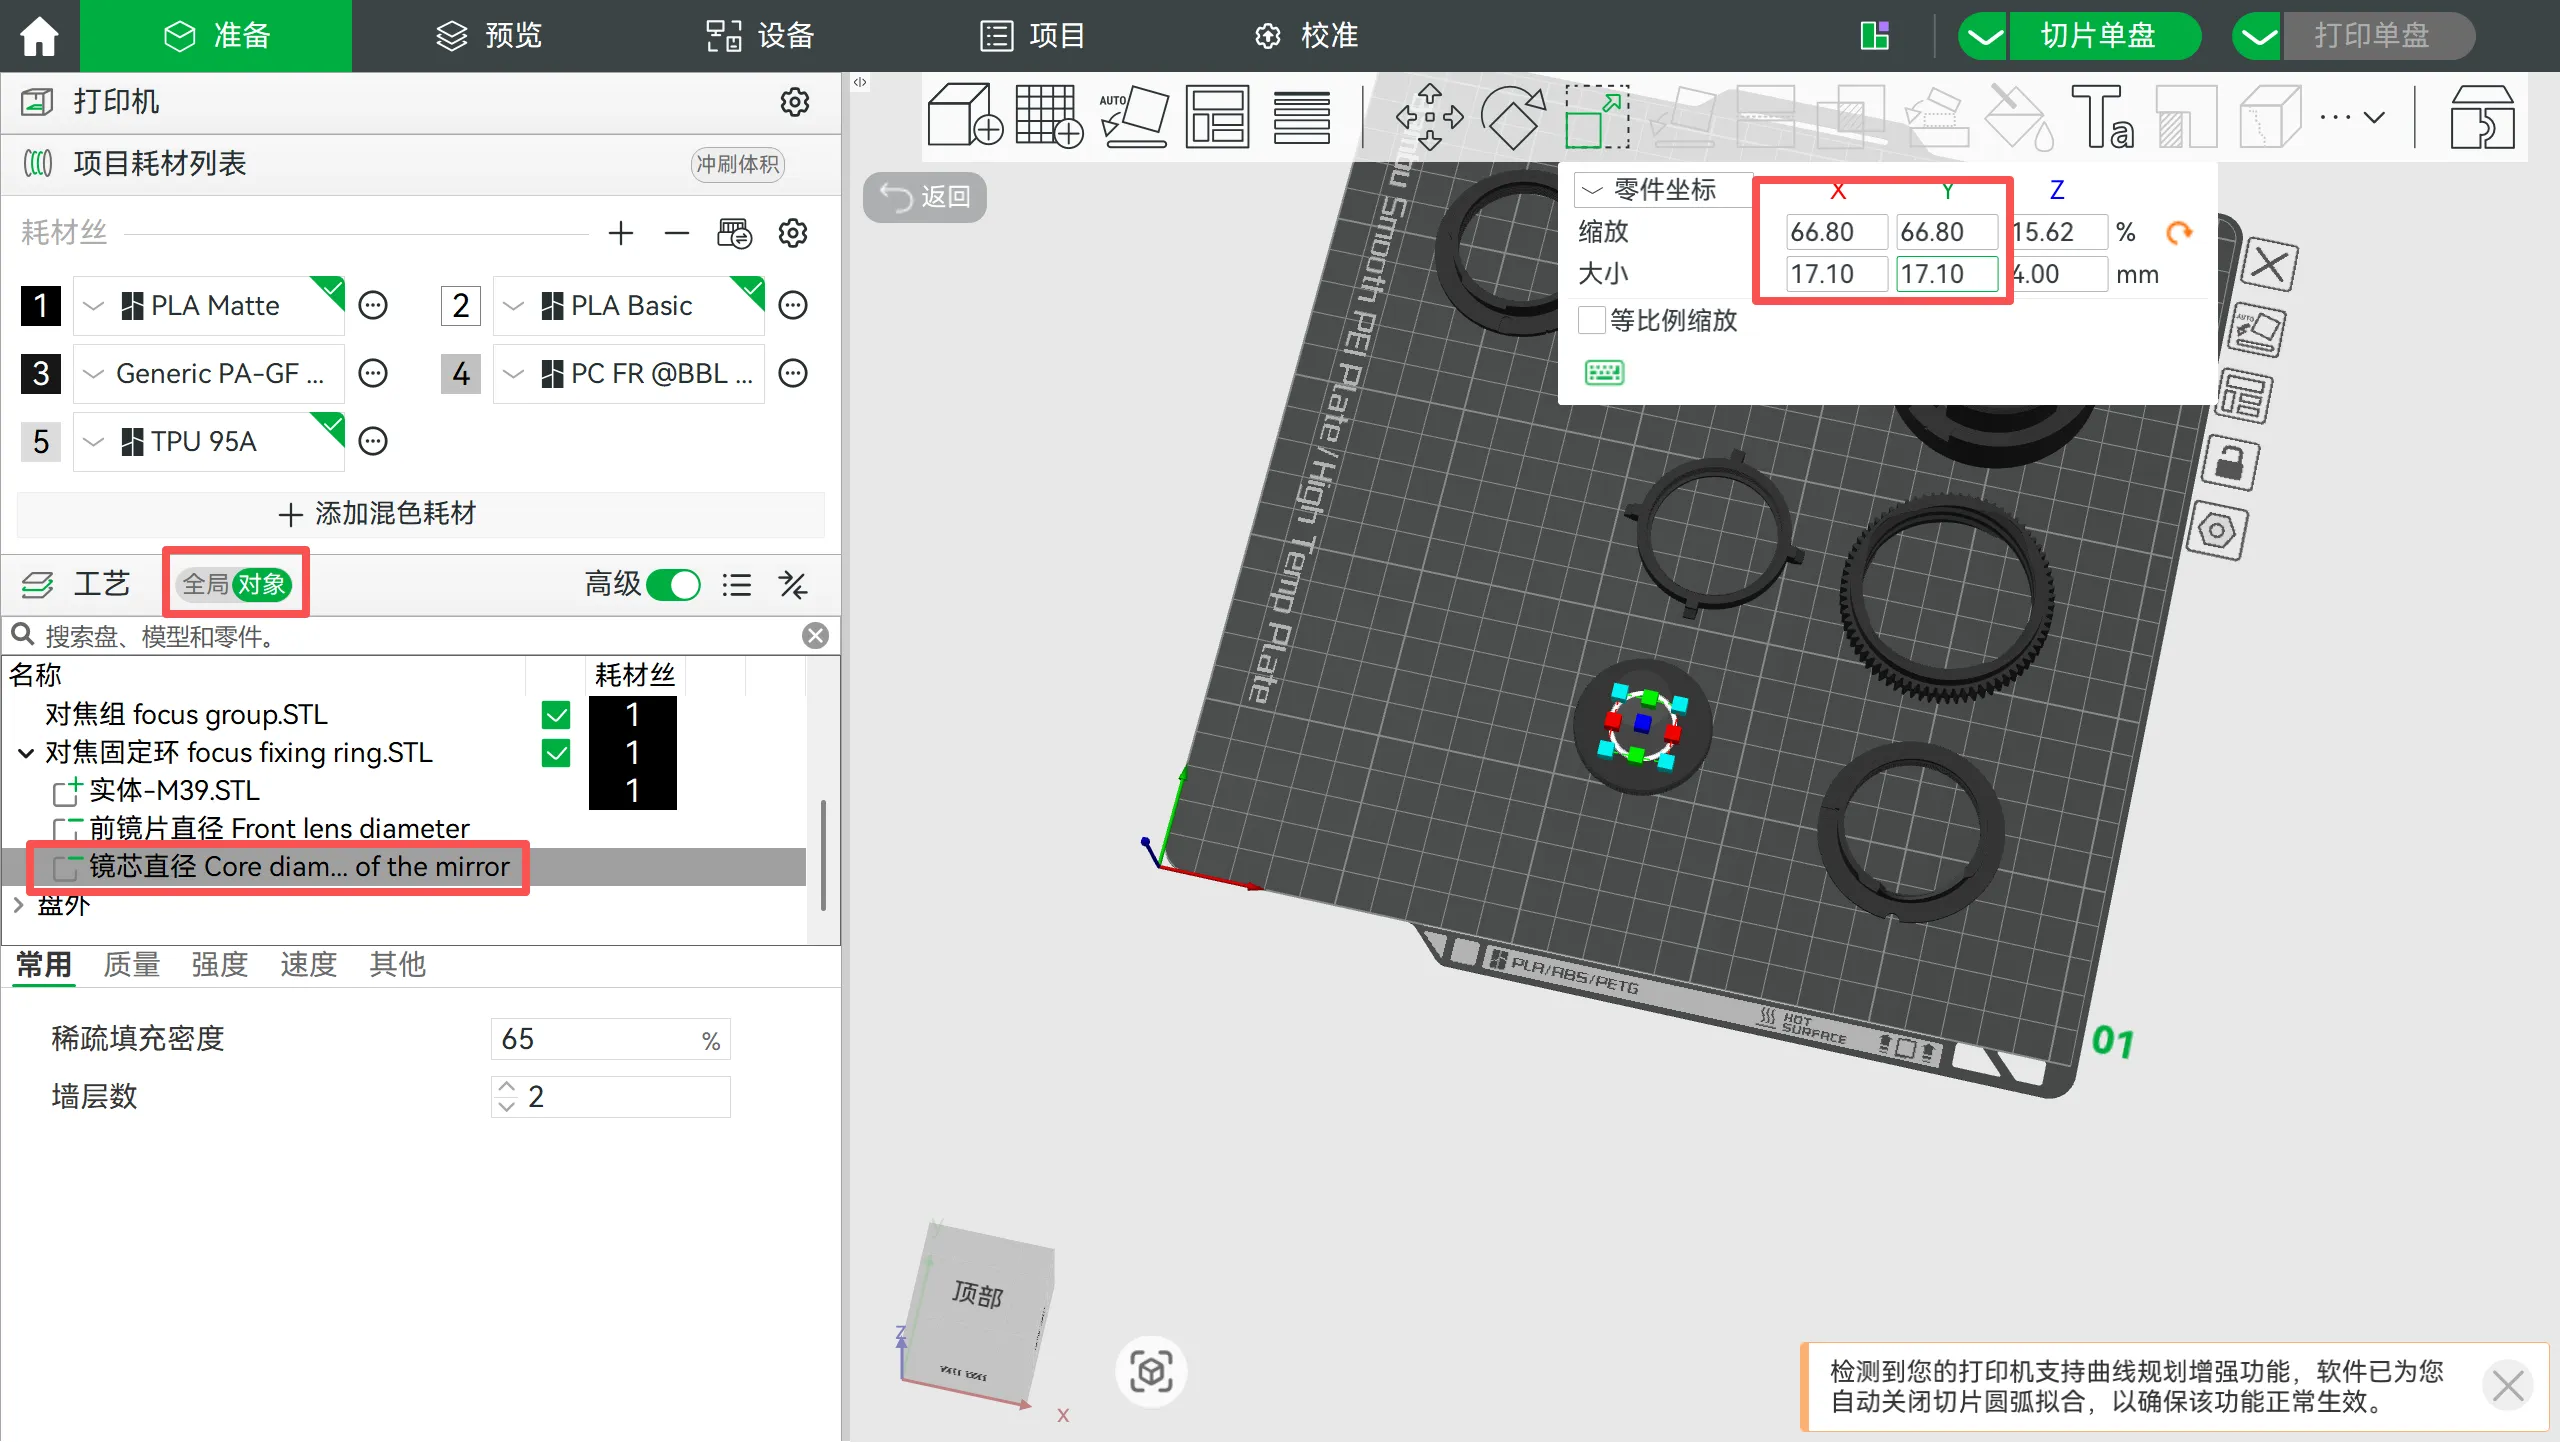
Core diameter of the mirror Both X and Y parameters are filled in as 17.1mm for installation
2. After printing is completed, remove the support and apply an appropriate amount of lubricating grease into the slot of the main component.
3. Install the lens into the focusing group, and apply an appropriate amount of glue in the gaps if necessary.
4. Install the focusing ring onto the main body, place the focusing group into the slot, and rotate the focusing ring. If it feels as smooth as butter, you have completed the most important step.
5. Connect the main body with the M39 rear port ring thread. Ensure smooth rotation of the focusing ring before tightening the installation. If necessary, use glue to secure it. To avoid the possibility of being unable to adjust, do not use instant glue.
Install the M39-Leica M ring, adjust it to the appropriate angle, and fix it with glue if necessary. To avoid being unable to adjust, do not use instant glue.
License

You shall not share, sub-license, sell, rent, host, transfer, or distribute in any way the digital or 3D printed versions of this object, nor any other derivative work of this object in its digital or physical format (including - but not limited to - remixes of this object, and hosting on other digital platforms). The objects may not be used without permission in any way whatsoever in which you charge money, or collect fees.


Comment & Rating (0)