
Bambu Lab X2D 100mm Exhaust Adapter with Decoupler

Print Profile(2)
![X2D Adapter For 100mm Ducting [PETG/ PLA]](https://makerworld.bblmw.com/makerworld/model/USd34d98d55ac703/788475723/instance/6fac6a914641ba4b.jpg?x-oss-process=image%2Fresize%2Cw_100%2Fformat%2Cwebp)
![Universal Adapter for 100mm Ducting [PETG/ PLA]](https://makerworld.bblmw.com/makerworld/model/USd34d98d55ac703/788473848/instance/09e936b8bc45d35c.png?x-oss-process=image%2Fresize%2Cw_100%2Fformat%2Cwebp)
Description
Boost Me (for free)
Keep the heat, kill the smell! If this decoupler helped save your bedroom from Styrene fumes while keeping those chamber temps rock solid, I’d really appreciate a boost. Cheers for the support!
If you’re anything like me, you’re probably printing in a bedroom or a small home office. That means you’ve definitely spent time hunting for a way to get rid of the VOCs and smells that come with ASA or ABS.
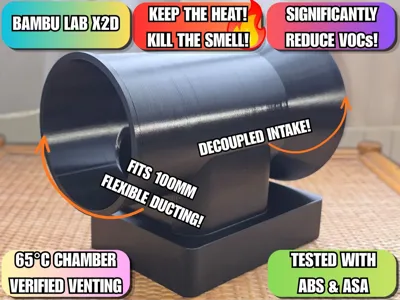
The best way to do it is always an inline fan venting straight out a window. The trouble is, those fans are powerful. They move so much air that they essentially vacuum the heat right out of your printer. Your chamber heater just can't keep up, and your temps plummet. I wanted a way to have full extraction power without turning my 65°C chamber into a cold, breezy mess.
The Science
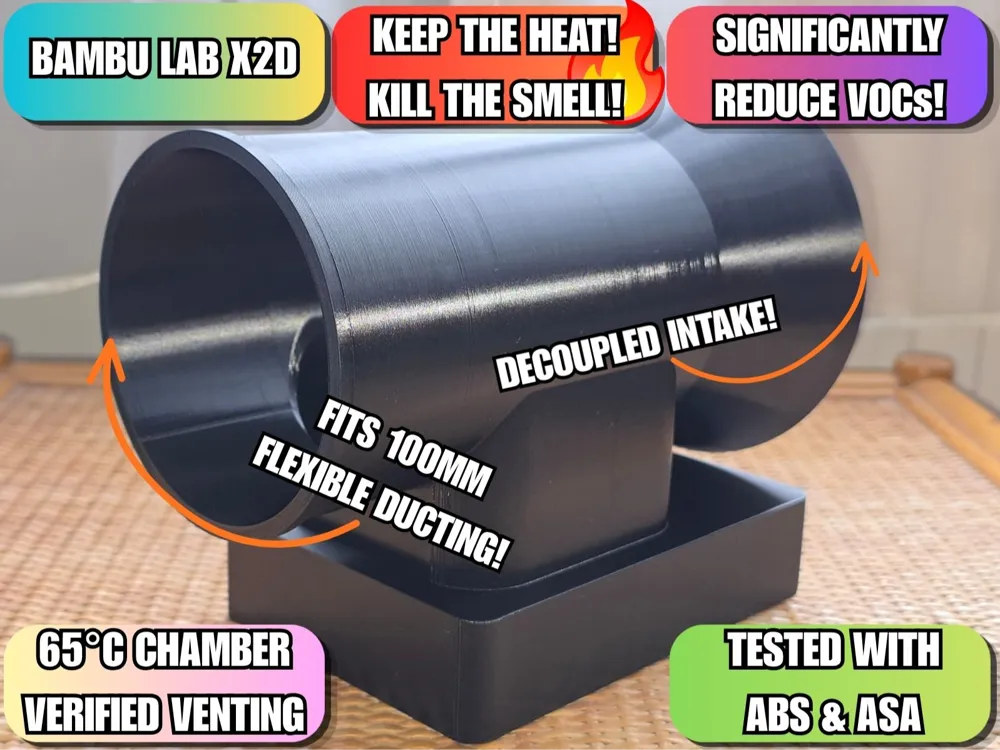
I took inspiration from a bit of kit used in professional science labs called a Thimble Connector. These are used on Class II Type A2 Biosafety Cabinets to stop a building's massive exhaust system from sucking air too hard and ruining the delicate "air curtain" inside the cabinet where samples are kept.
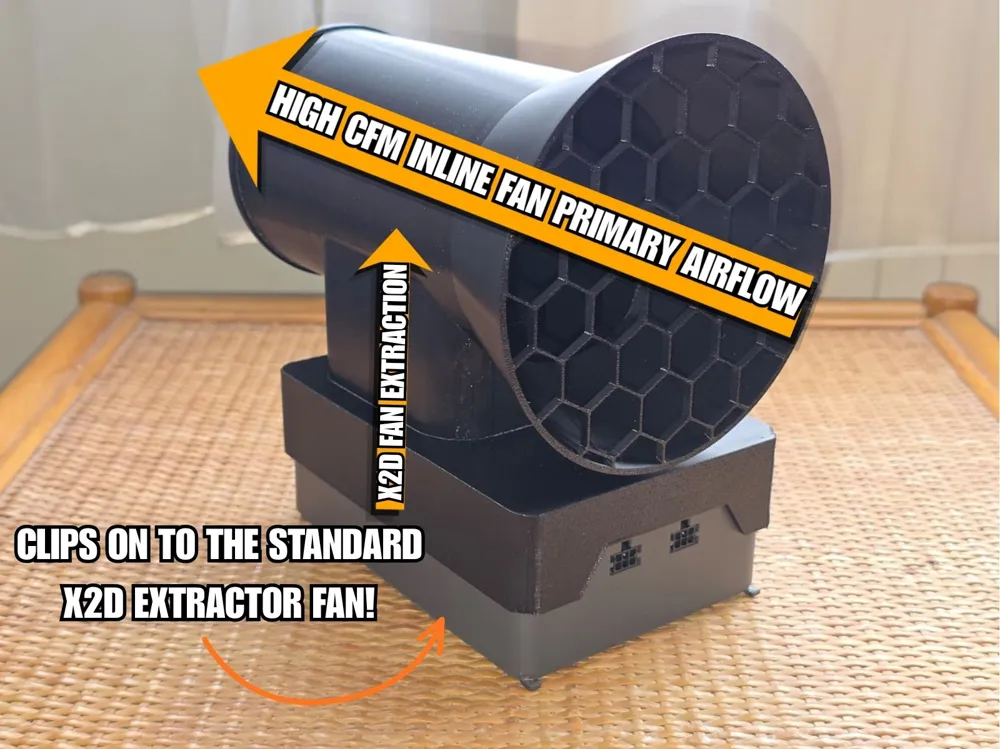
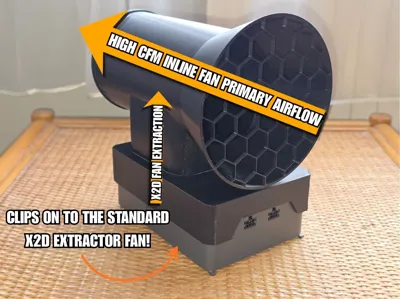
By using that same logic here, the high-power inline fan pulls a constant stream of air through the cylinder and out of the room. Meanwhile, the X2D exhaust fan simply "pushes" the fumes into that stream to be carried away. Because they aren't physically sealed together, the big fan is decoupled from the printer. It catches 100% of the fumes without "tugging" on the hot air inside your chamber.
Why not just use a second enclosure?
Most people will tell you that the only way to use a big fan is to put your entire printer inside a second, larger tent or box and vent that. I absolutely hated that idea. It doubles the footprint of the machine, looks messy, and makes it a total nightmare to actually work on the printer.
I wanted a low-profile solution that kept the printer's footprint exactly the same but offered the same performance as a full industrial setup.
Thermal Performance
After a lot of testing, I found that the smells were completely undetectable in my bedroom. More importantly, the chamber stayed rock solid.
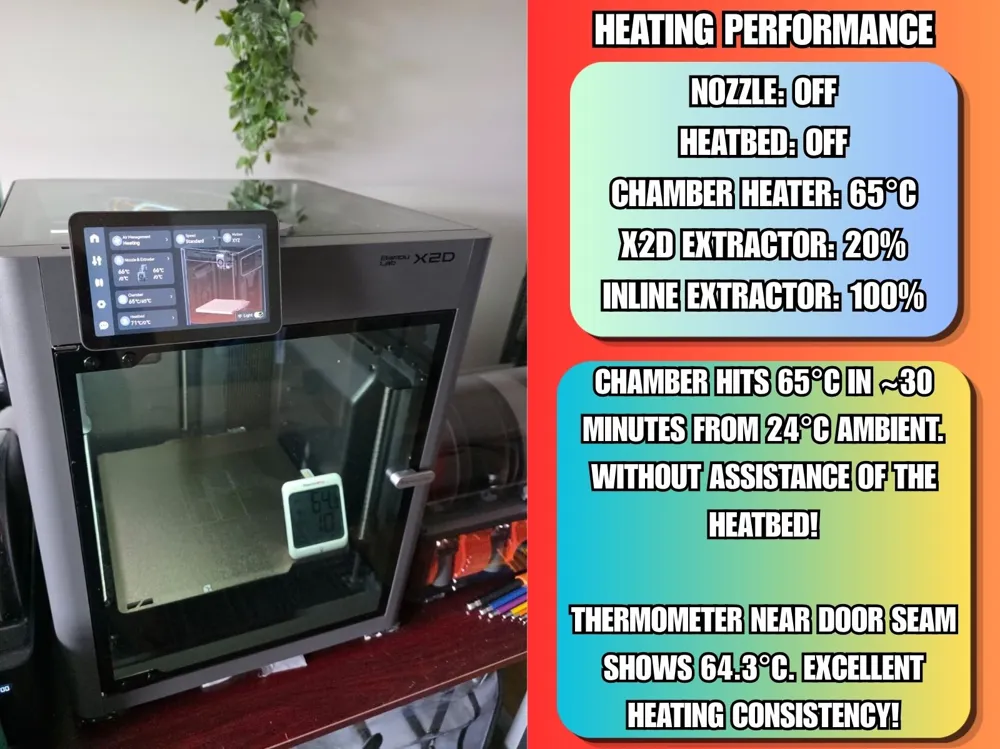
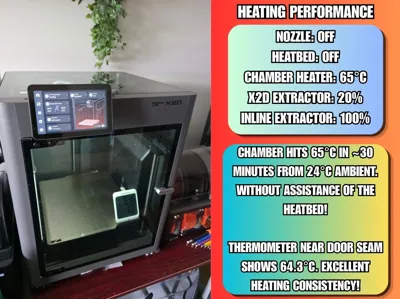
- The Heater-Only Test: Starting at a 24°C ambient, the chamber hit 65°C in 30 minutes without any help from the heatbed.
- The Stability: With the inline fan at 100%, a thermometer at the door seam (the leakiest spot) read 64.3°C. That is a delta of only 0.7°C.
- The Difference: Without this part, a direct connection to an inline fan would pull the chamber down to 35°C. With this, you stay at a perfect 65°C.
The ASA Stress Test
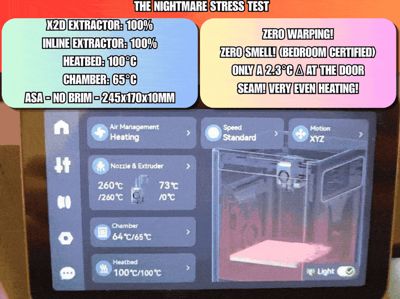
To really prove it works, I printed a massive ASA block (245mm wide) with zero brim. I ran the heatbed at 100°C, the chamber at 65°C, and cranked both the X2D fan and the inline fan to 100%.
As you can see in the GIF, there was no warping, no smell, and even under those extreme conditions, the temperature at the door only dipped by 2.3°C. If it can handle a huge ASA print with no brim at full extraction, it can handle anything you throw at it.
Assembly
Getting this set up is simple and takes about two minutes.
- Slide the adapter onto the X2D exhaust housing.
- Make sure the clips are fully seated into the recesses on the exhaust housing.
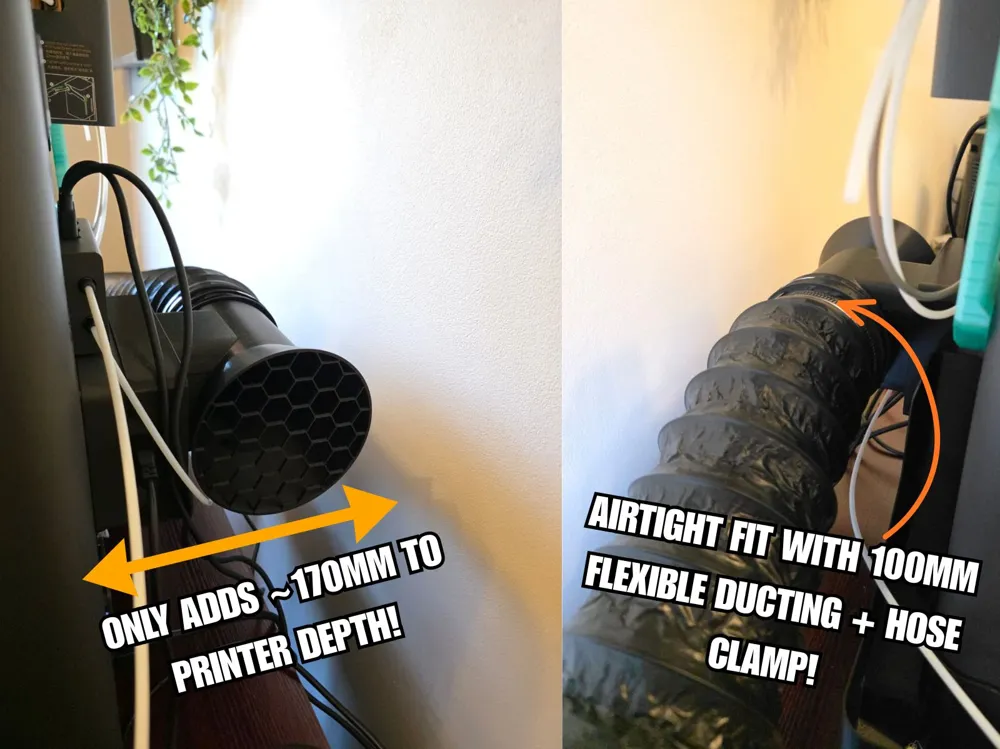
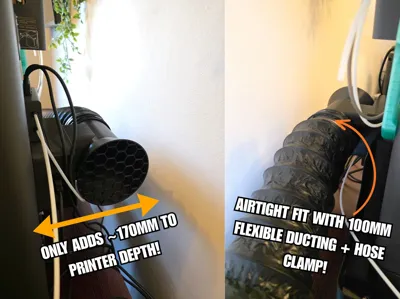
- Slide your 100mm ducting over the lip and onto the cylinder.
ATTENTION: I highly recommend using a hose clamp to ensure an airtight, secure seal between your ducting and the adapter.
How to Print This
I’ve put a lot of work into the .3mf file included here, so I highly recommend using it. It has all the right orientations and supports ready to go.
- Material: Use PETG at a minimum (ASA is even better). Do not use PLA as it will soften near the exhaust.
- Supports: Use PLA for the support interface with a Top Z distance of 0mm. This ensures the internal overhangs are perfectly smooth for the best airflow.
- Plate Prep: It’s a long print with a decent bit of weight, so make sure your build plate is properly clean before you start.
Poop Chute Compatibility
The back of the X2D gets cluttered especially once you have a 100mm hose connected. I know space is tight, so I wanted to make sure this wouldn't block your existing setup.
While I haven’t had the chance to test every single design on MakerWorld, I can confirm that the following model fits like a glove and clears the adapter perfectly. It’s a great low-profile design that plays nicely with the extra depth of the decoupler.
- Verified Fit: The Bambu X2D Poop Chute Slide by @jayritchie.
If you are using a different chute and find that it fits, please drop a comment and let me know! I’ll keep this list updated so other users know what works before they start a long print.
Credits
A huge thanks to @CrazyJN for the original measurements of the X2D exhaust mount. I used those as a base and designed this version from the ground up to be more robust, with better clips and extra strength to handle the weight of the 100mm ducting.
License

You may create derivative works based on this object, provided that all such derivative works are published exclusively on the MakerWorld platform and include proper attribution to the original creator. You may not share, upload, host, distribute, or publish this object—or any derivative work of this object—on any other digital platform, marketplace, or distribution channel. Commercial use of this object and any derivative works is strictly prohibited. This includes, but is not limited to, selling, renting, sublicensing, or using the object in any context in which you receive monetary compensation or other financial benefits.


Comment & Rating (54)