
JL Wrangler Third Brake Light LED Pod/Camera Mount
Print Profile(11)
Description
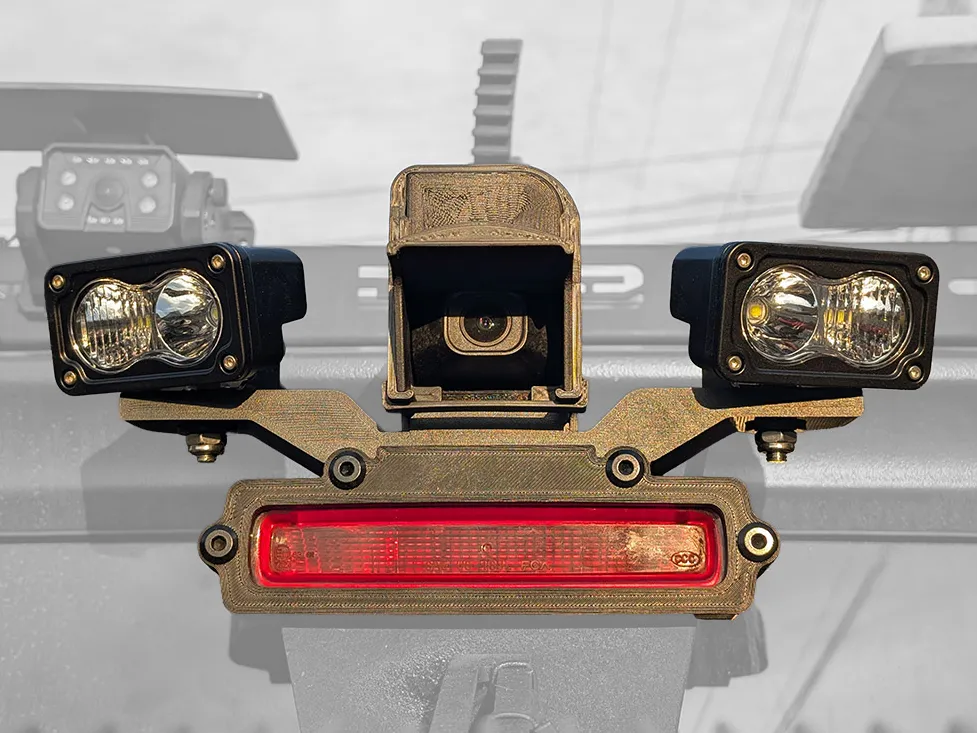
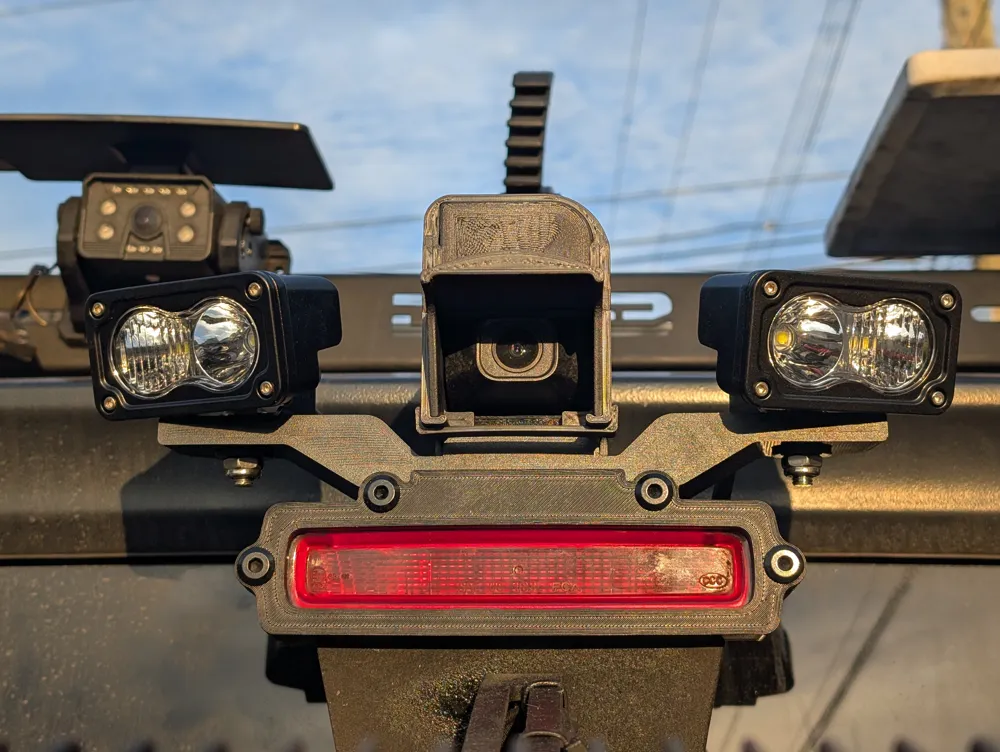
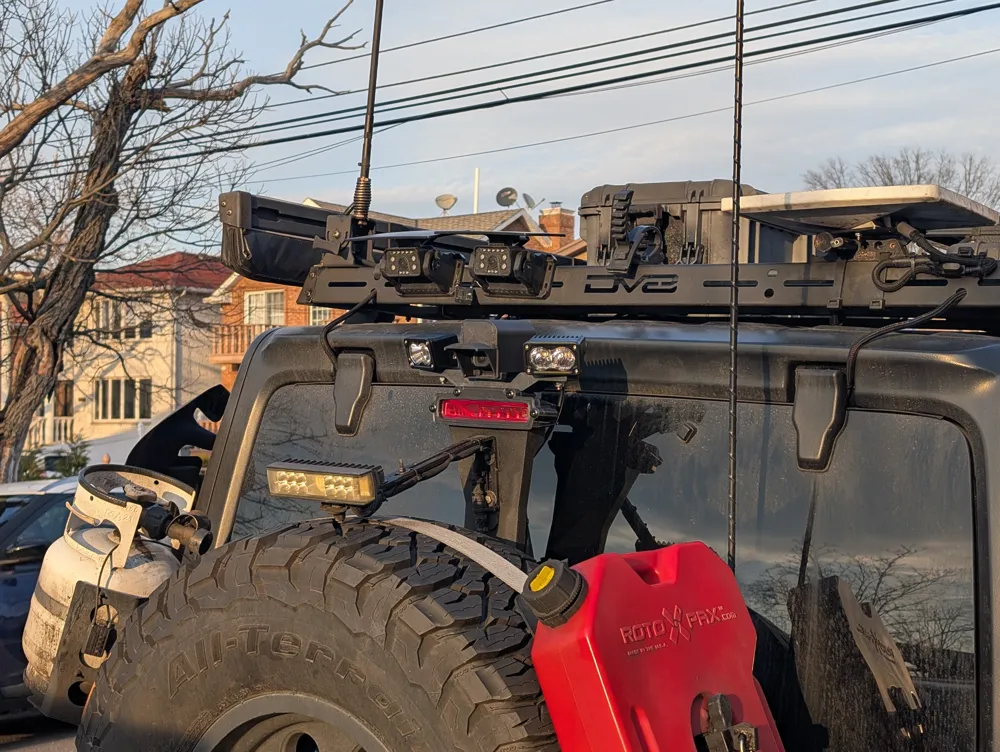
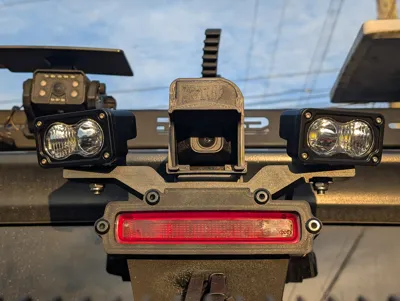
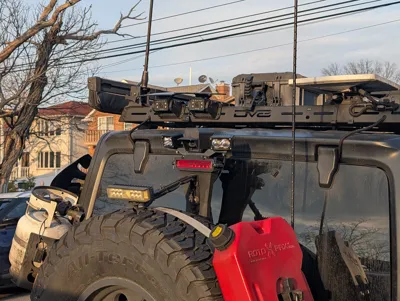
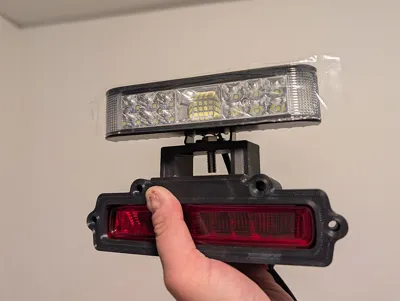
This is a bolt on bracket system for the Center High-Mounted Stop Lamp (CHMSL) or third brake light to allow for installation of small LED light pods or bars, and/or reverse camera for one of those digital rear view mirror cameras like the Wolfbox or Pelsee.
WARNING: This will only fit a factory style CHMSL. If you have an aftermarket one with different design, this won't work.
Introduction
Previous Wrangler generations (TJ & JK) have third brake lights with bolts or screws that can be used to attach a bracket for LED light pods and such. JL's CHMSL, however, does not (at least ones that are exposed), so mounting option is pretty much non-existent. This bolt-on bracket system attempts to change that by using a modular system to allow for flexible mounting options, be it for a small LED light bar, two small LED light pods, one of those reverse cameras for digital rear view dash cam mirrors, or a combination.
This system consists of three core components:
- Main body
- 4 washers
- Faceplate
- Mounting plate
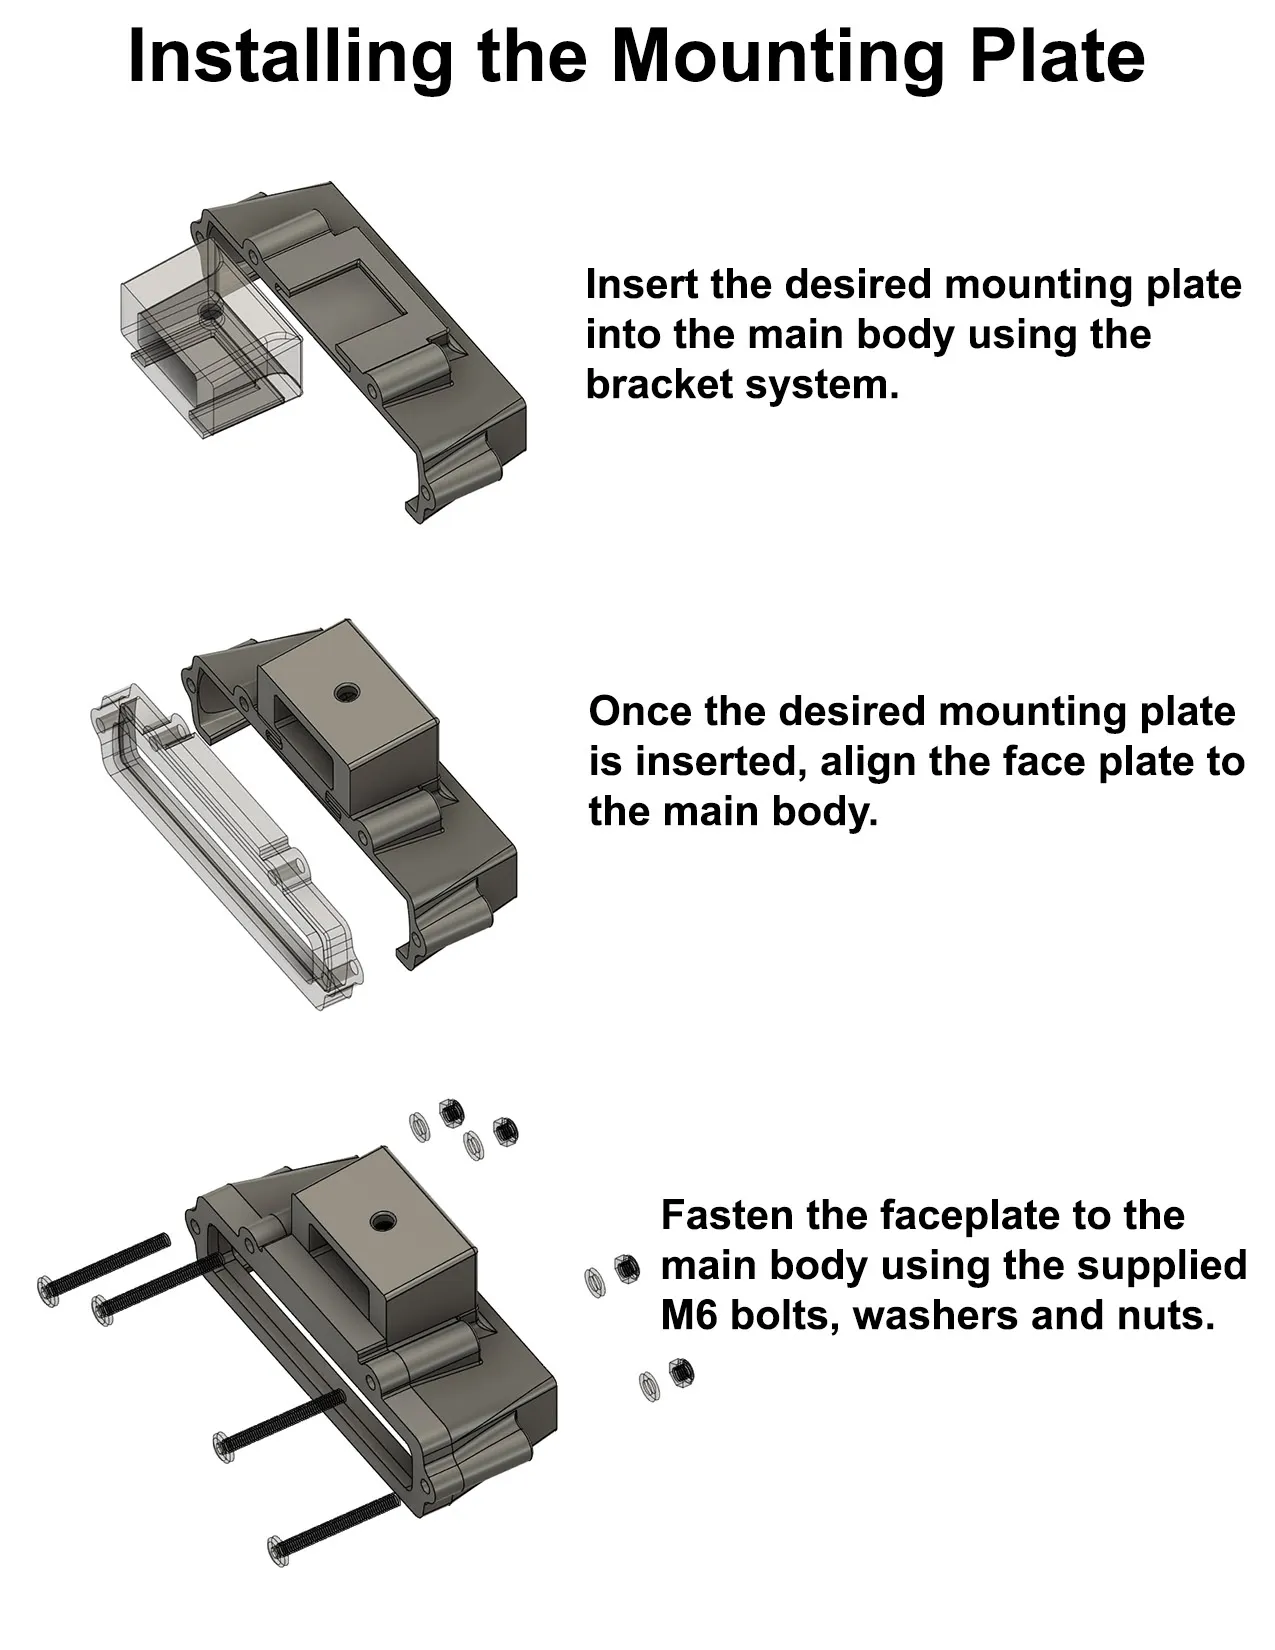
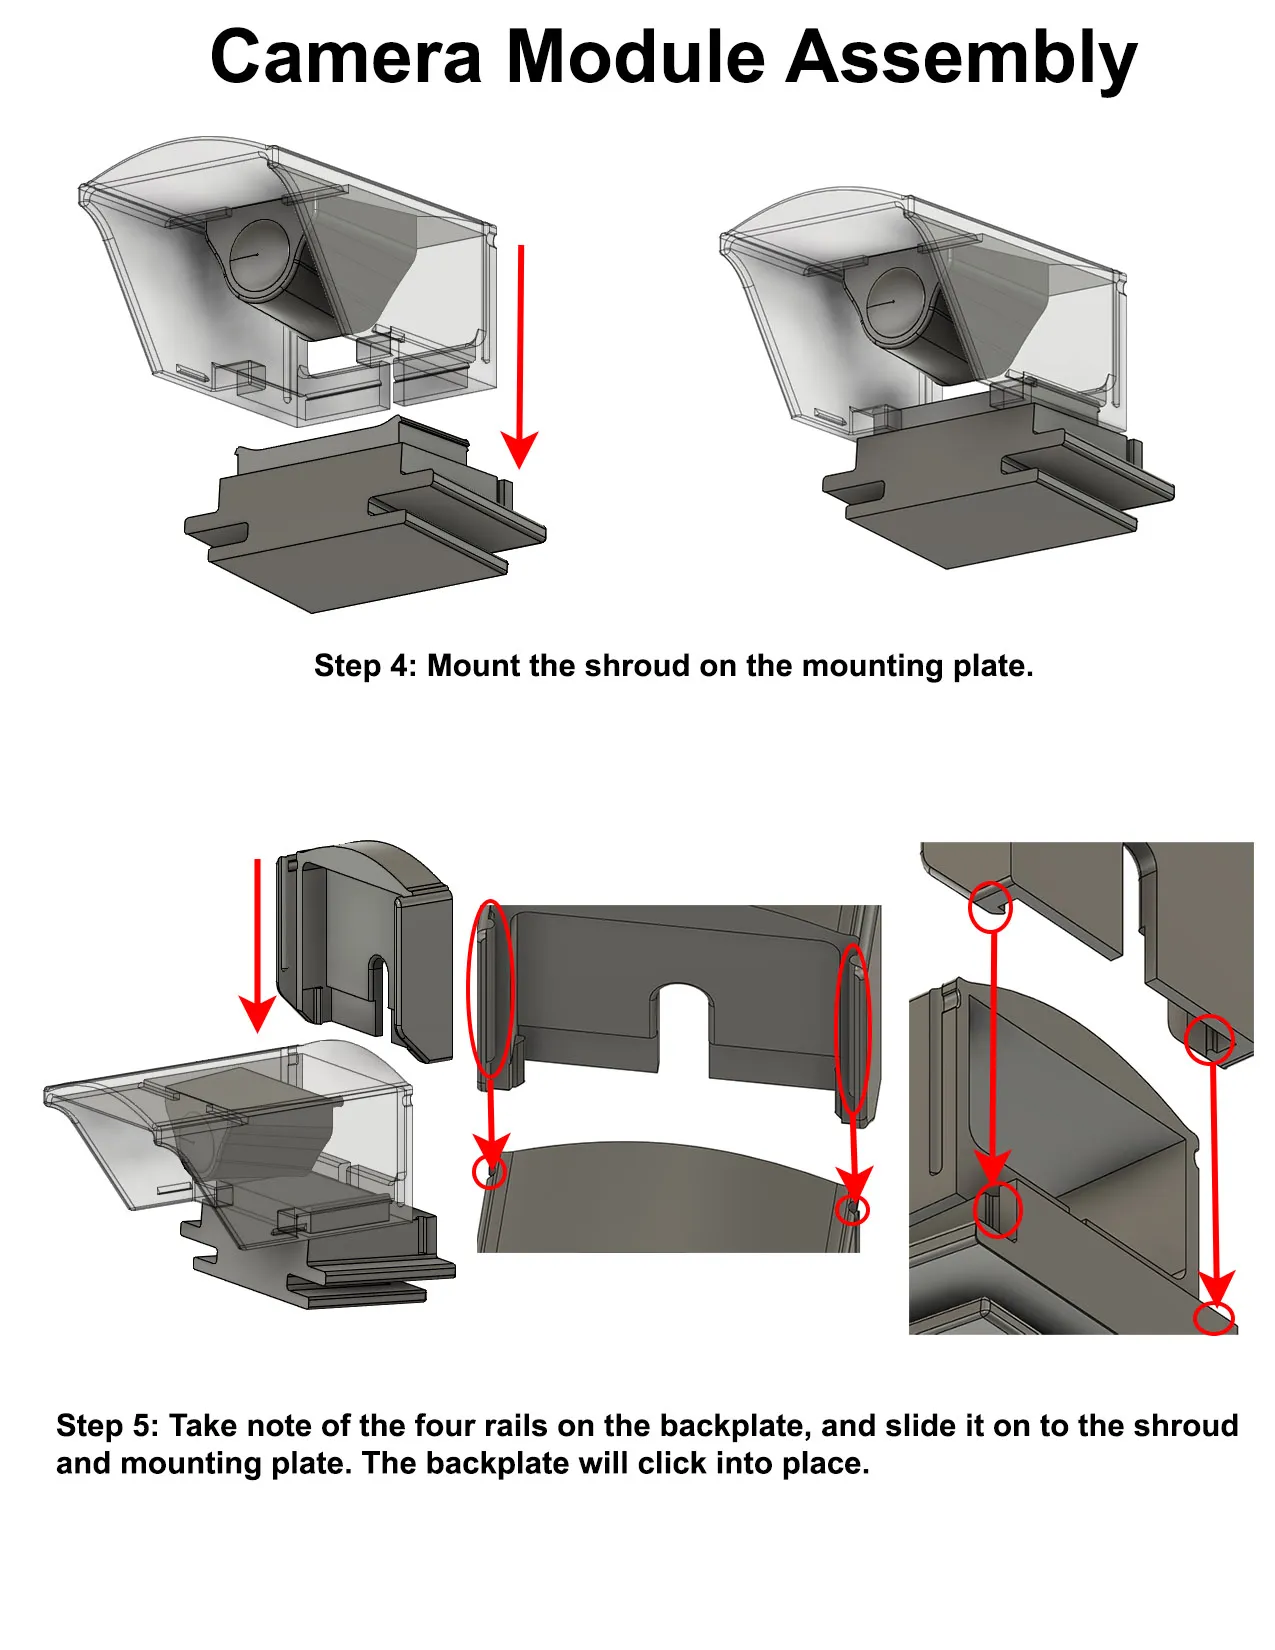
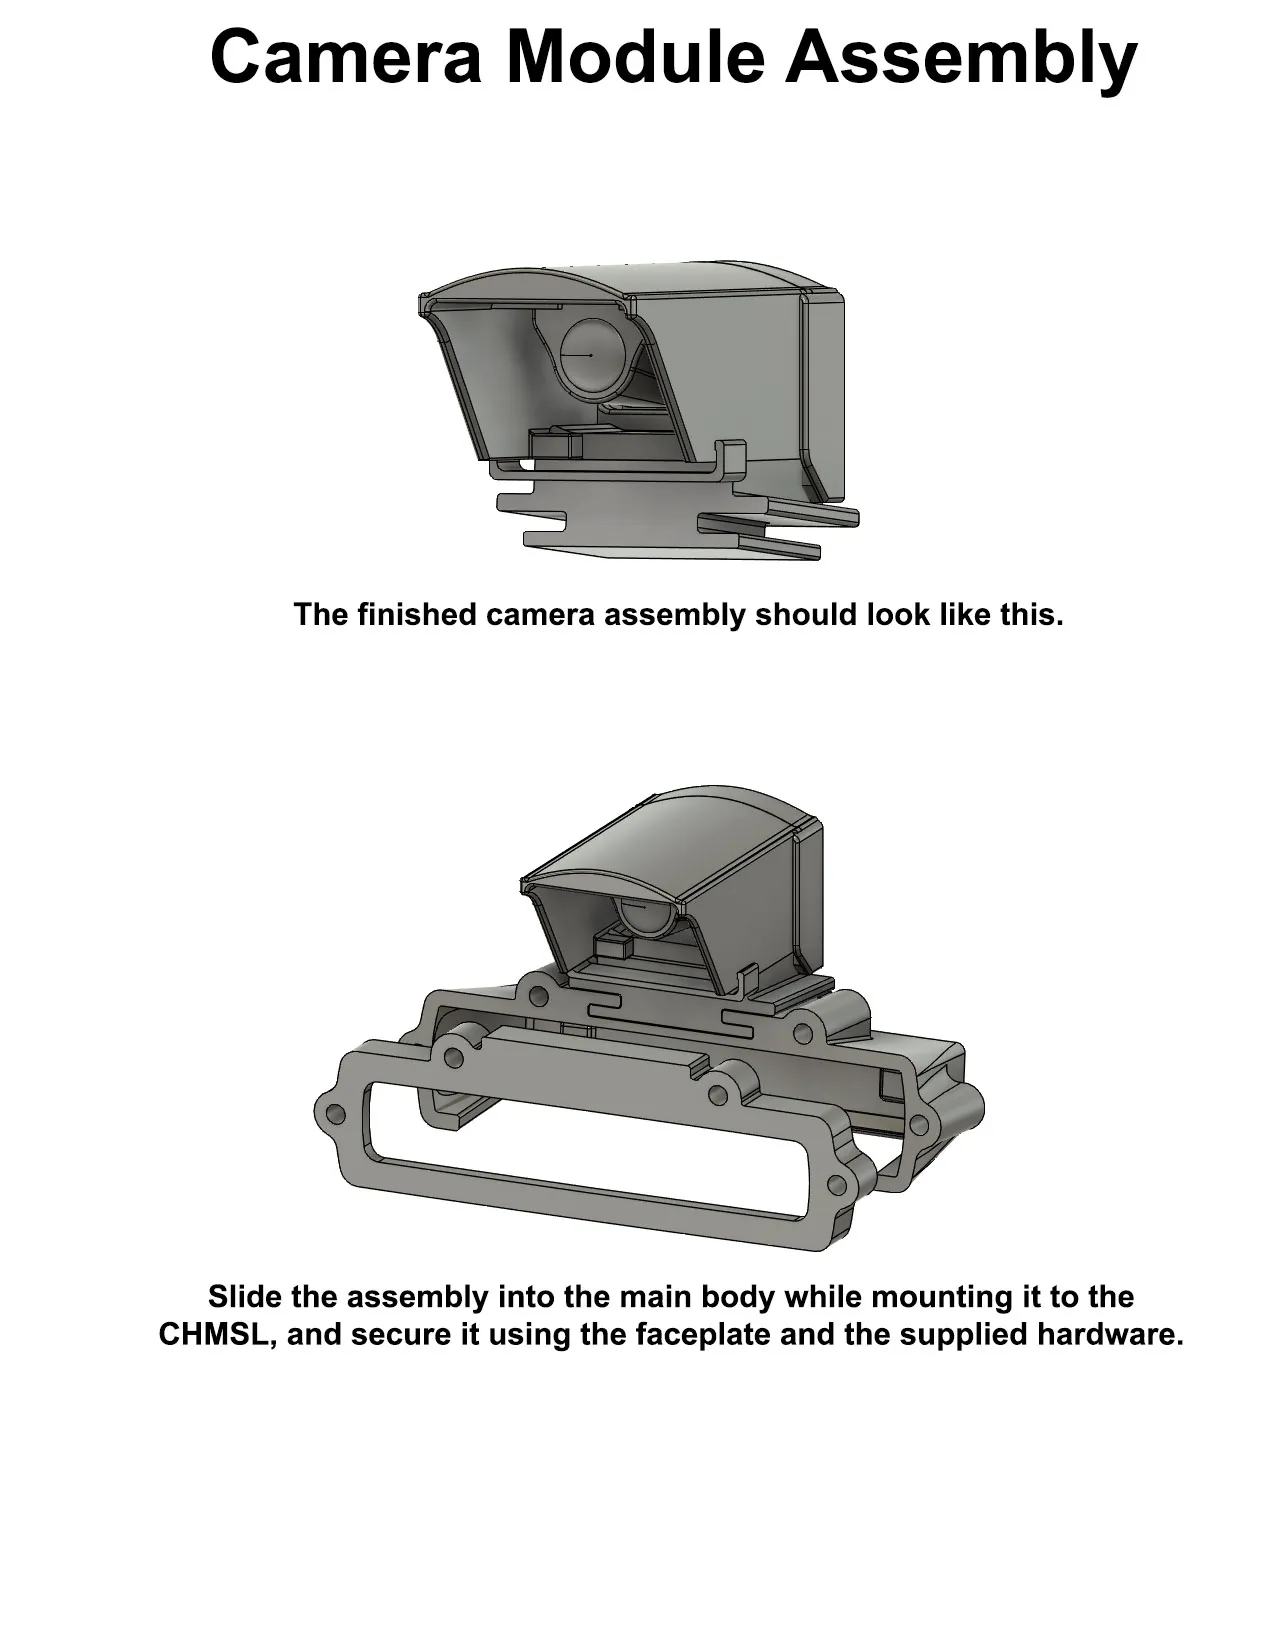
The system uses T-slot to mate the mounting plate to the main body, with the faceplate securing them together.
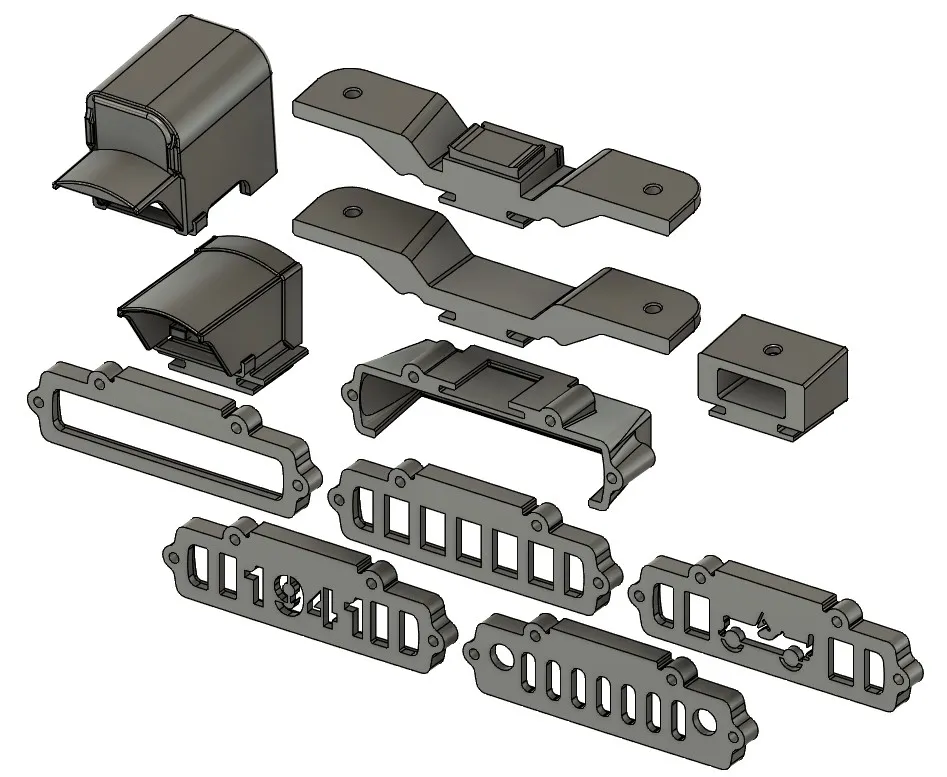
This makes it possible to swap out the plates as you see fit, so you won't have to print the entire thing out if you decide to go from one mount to the other.
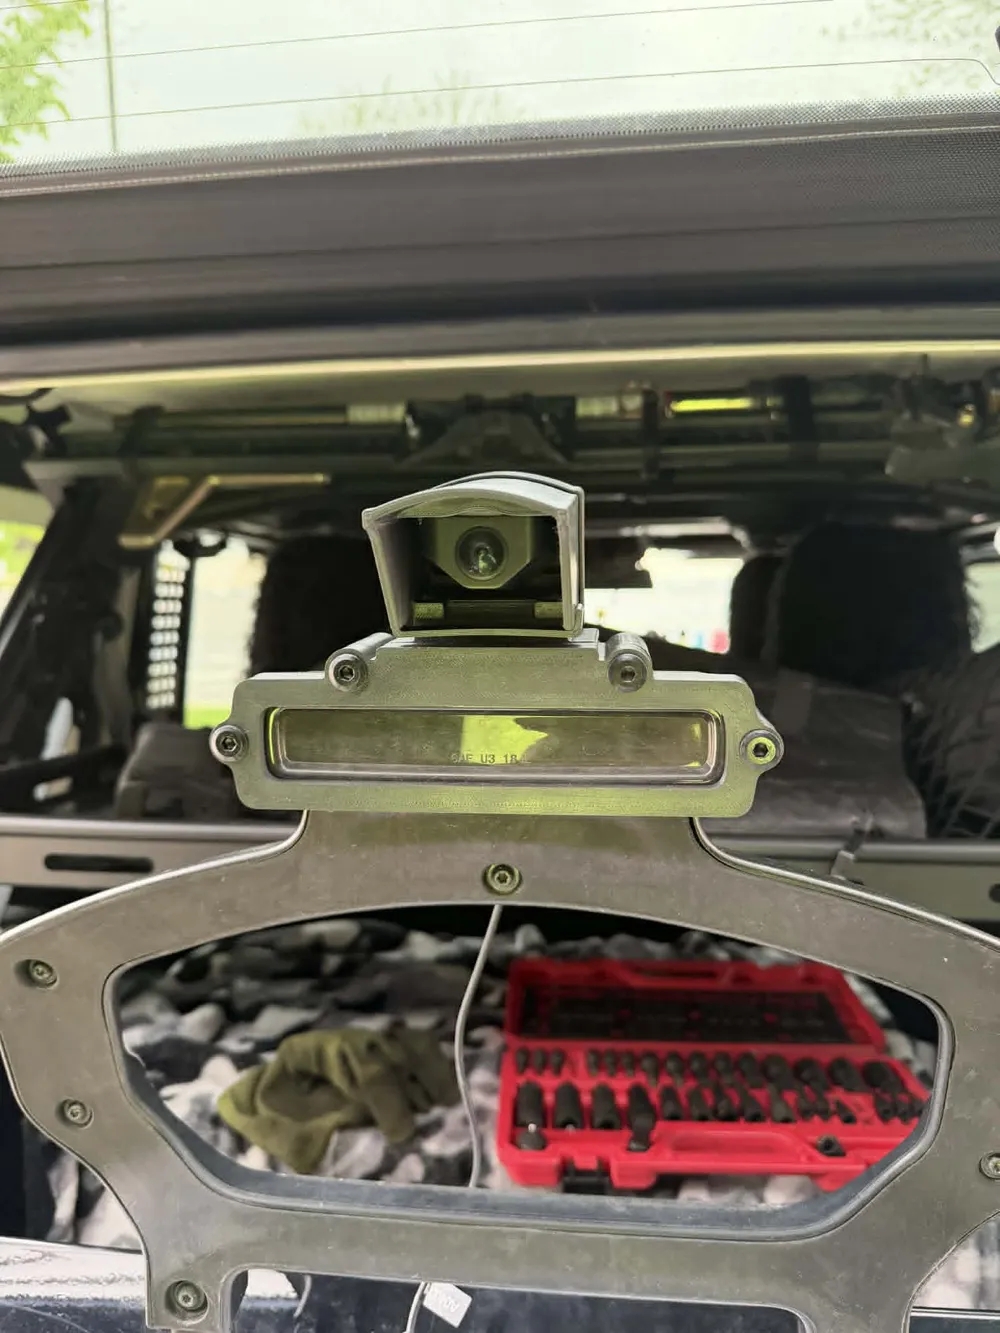
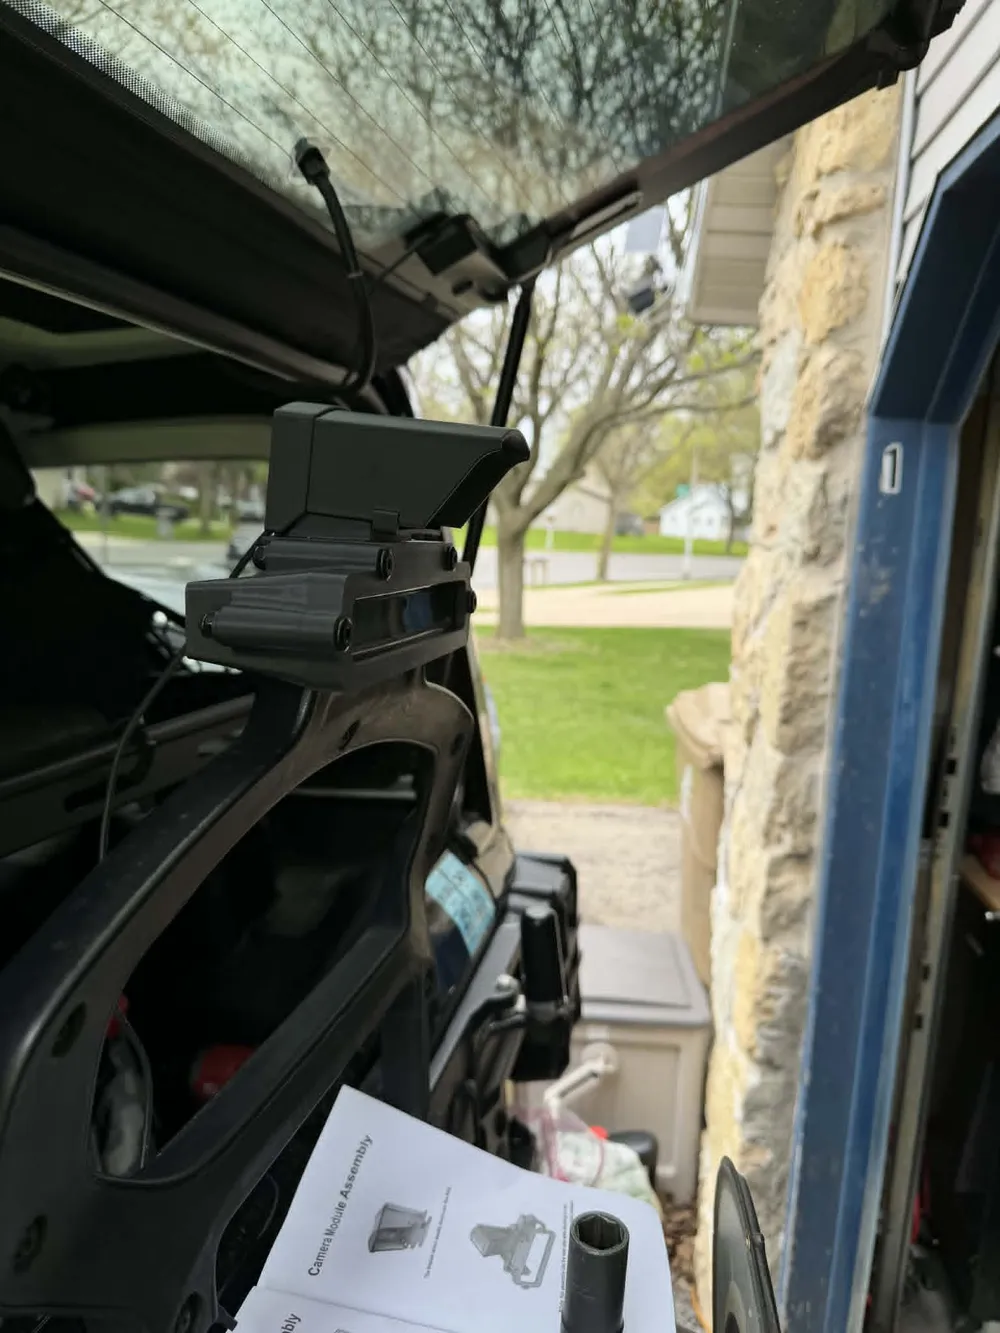
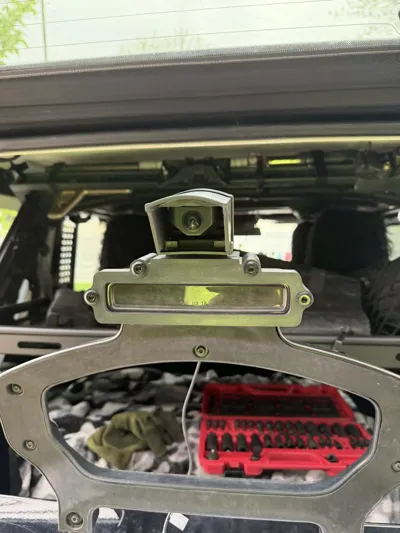
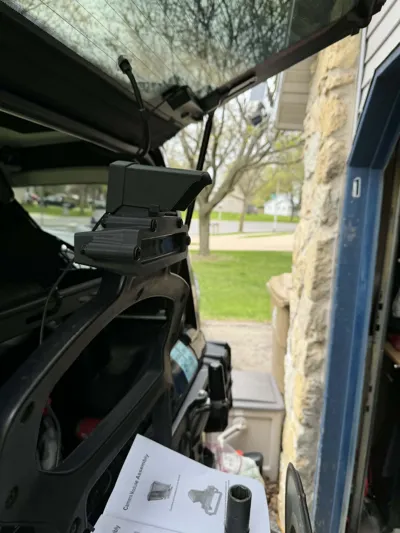
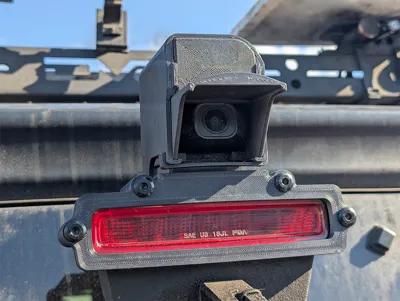
The reverse camera mount has been confirmed to fit the ones from Pelsee P10 Plus (smaller) and Pelsee P12 Pro Max (larger). Wolfbox cameras are similarly sized, so they should also fit without any issues.
Mount Options
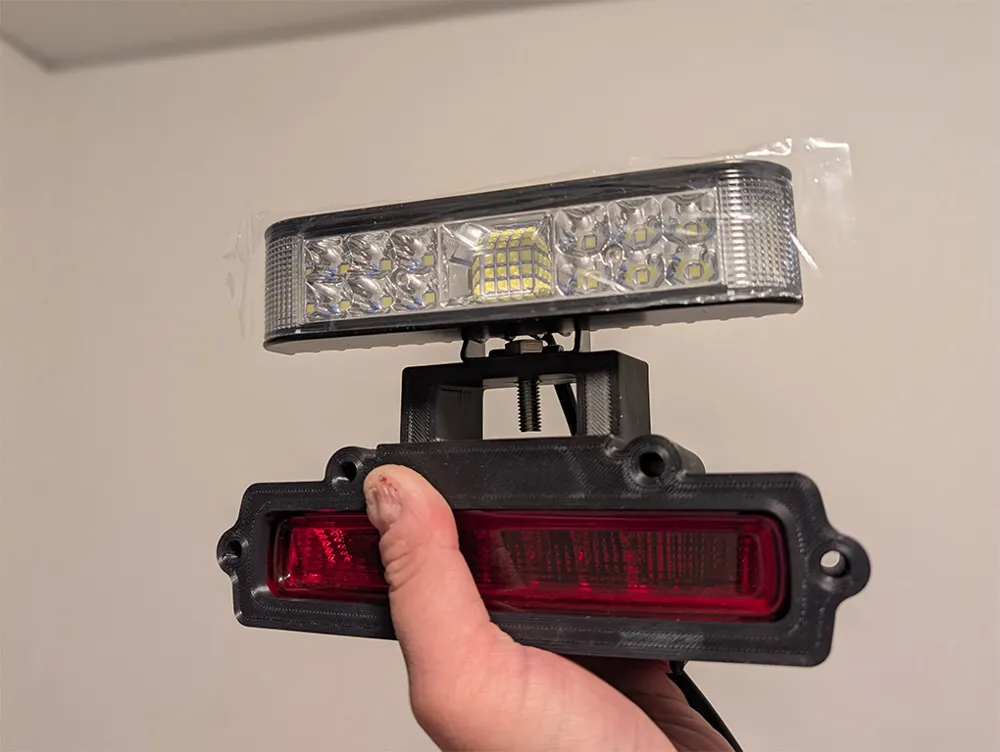
- One LED light pod or light bar
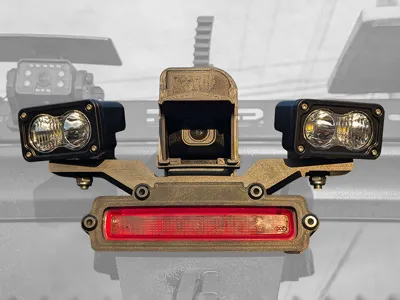
- Two LED light pods (3 or 4 inches)
- Two LED light pods and reverse camera
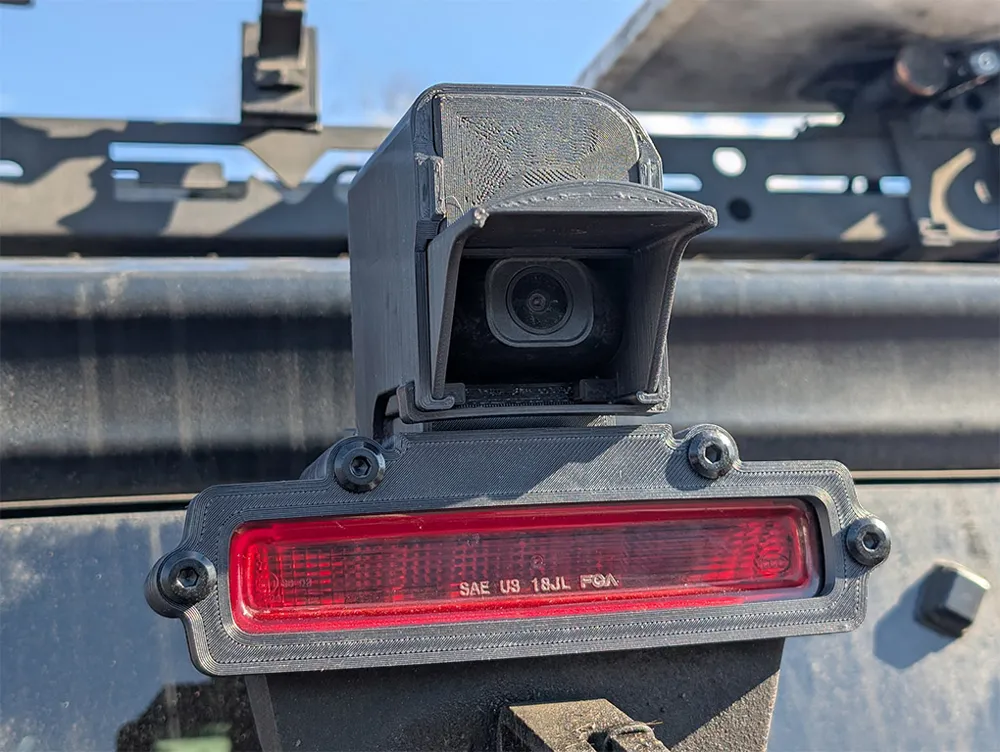
- Reverse camera (ones that come with Wolfbox and Pelsee digital rear view mirror dash cams)
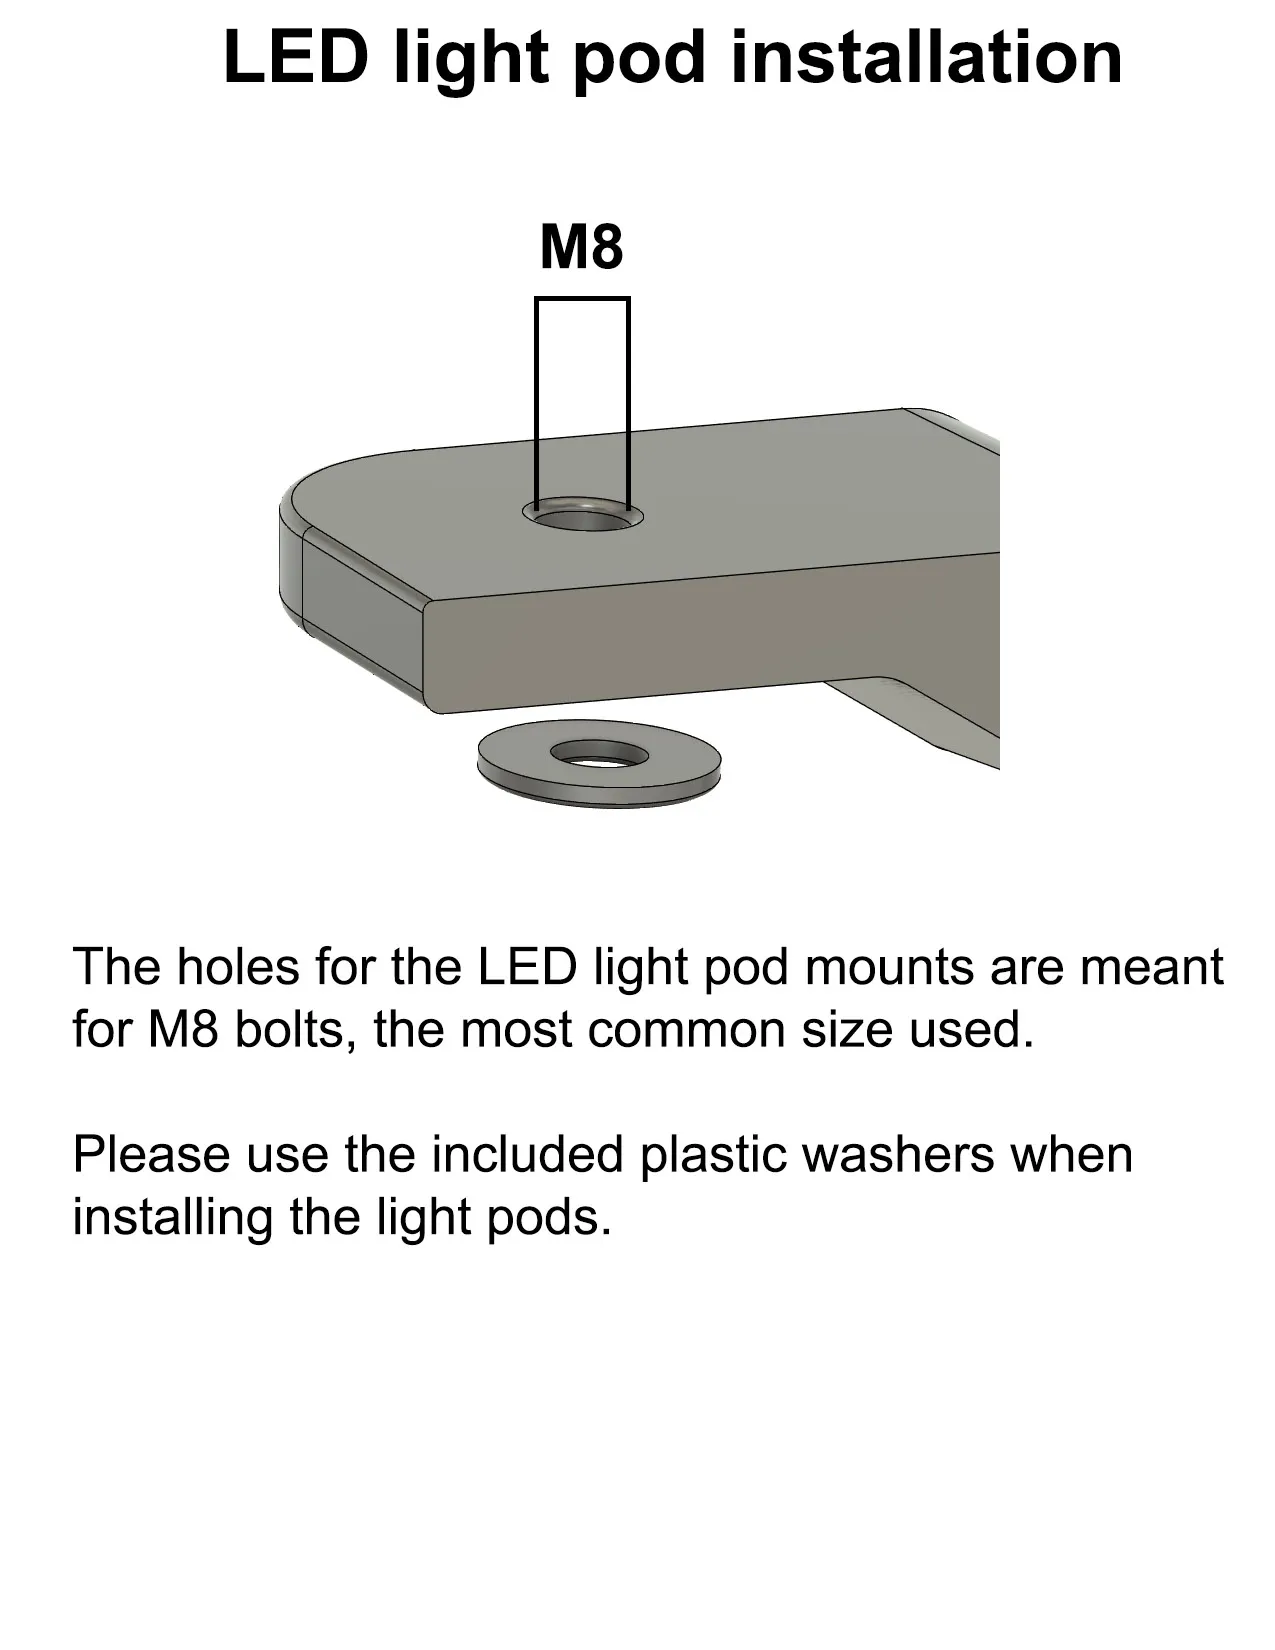
For the light pod(s)/bar(s), the holes are meant for 8mm bolts, which seems to be the most common for 3-4 inch light pods and 6-7 inch light bars. The light pod/bar mount is angled downward at about 6 degrees. This aids with aiming light pods/bars that come with bracket that offer little to no depression.
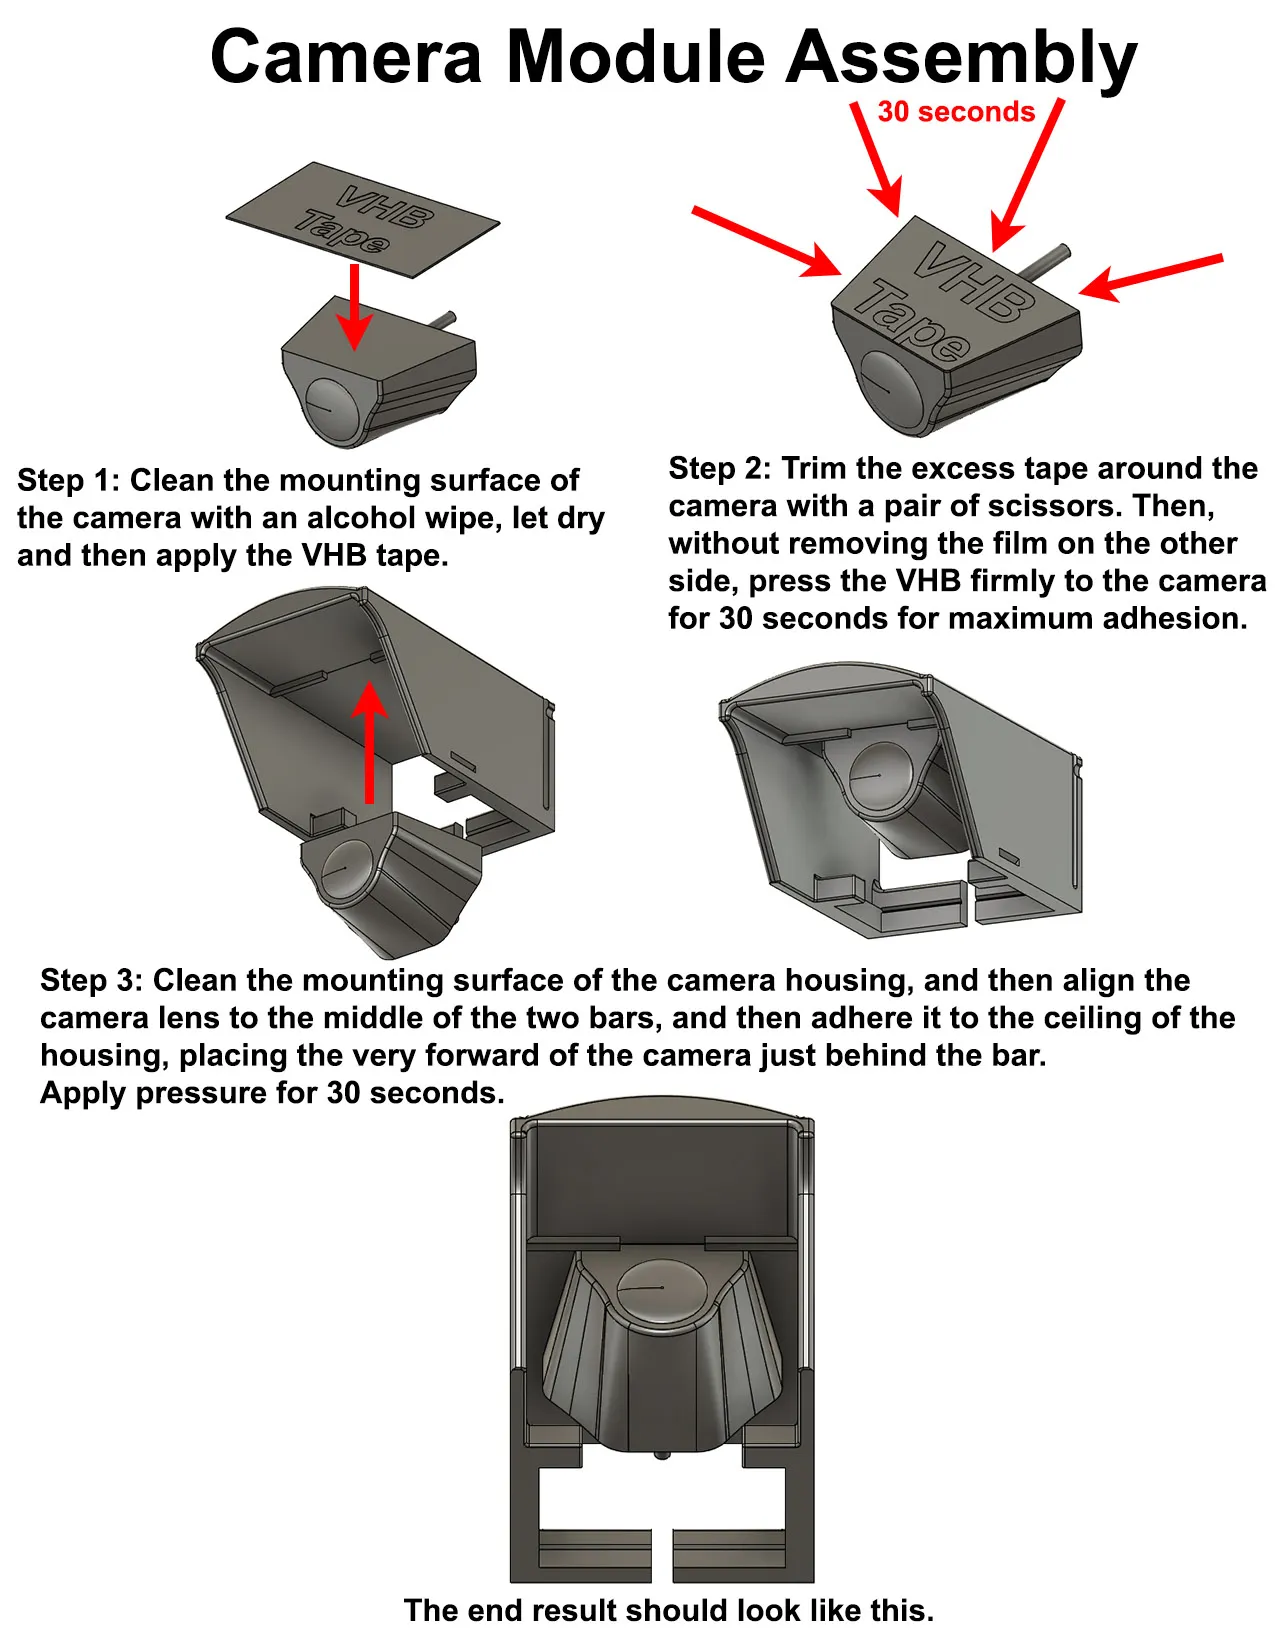
For the reverse camera, I chose to go with the upside-down mounting method to give the lens a little bit of stand-off distance from the surface of the faceplate, to reduce rain from splashing up onto the lens after bouncing off the faceplate, so you'll need VHB tape to put it on. The mounting plate for the camera is slightly angled downward at about 5 degrees, to increase the effectiveness of the bill of the cover.
Not yet available is the 12V ducted fan module which can clear debris and water from the camera lens. It's powered using a brushless drone motor, heavily throttled down using a BLDC speed controller to keep it from overheating, but still moves enough air to clear the lens of any water drops within a second. I'm not sure when I'll get around to releasing that particular module, as that thing requires a little bit of electrical work and I haven't created the instructions on how to replicate it for other people. But the one I've been using is over a year old and still going strong.
Print Settings
CAUTION: Many of the parts in this print are large. Please ensure that you have an enclosure and good bed adhesion, or the print may fail due to the ASA part warping off of the plate.
Printer used: Bambu Labs A1 with enclosure
Nozzles used: Bambu Labs A1 0.4mm hardened
Build plate used: CryoGrip Glacier (Engineering Plate selected in Bambu Studio) with Bambu Labs liquid glue
Filaments used: Inland/PolyMaker PolyLite ASA
Material: ASA
Nozzle: 0.4mm
Layer height: 0.2mm
Initial layer height: 0.4mm
Wall generator: Classic
Walls: 6 with embedding the wall into the infill
Top surface pattern: Rectilinear
Top shell layers: 5
Top shell thickness: 3mm
Bottom surface pattern: Rectilinear
Bottom shell layers: 5
Bottom shell thickness: 3mm
Internal solid infill pattern: Rectilinear
Sparse infill pattern: Gyroid with infill combination enabled
Sparse infill density: 25%
Supports: Tree (Auto)
Additional Materials
- M6-1x55mm flat head hex bolt (x4): Amazon ASIN B0DHKZ9YXV
- You can use a regular hex head flange bolt as long as it's at least 55mm in length.
- M6-1mm lock nuts (x4): Amazon ASIN B07BD1G7KK
3M VHB tape and alcohol wipes (If you are installing the camera)
- The thicker VHB tape is better than the thin ones. If you can source the thick VHB Low Surface Energy tape, that's the best. I don't recommend using adhesion promoter with the VHB since some of them contain acetone and will slowly melt ASA, and makes removal of the camera an absolute PITA if you put it on wrong by accident or want to change the housing.
Tools Required
- 10mm socket and socket wrench (for the lock nut)
4mm hex wrench or Allen key (for the M6 hex bolt I mentioned, but if you get the set I mentioned above it should come with a 4mm Allen key)
- This is obviously not needed if you want to use a different style bolt.
Installation
Pictures and shapes for easy instructions!
(I had originally planned on releasing the files, while concurrently making the printed product available for purchase on Etsy for people who don't have access to 3D printers, hence why the instructions refers to some of the hardware as being supplied. I might still get around to putting it on Etsy, but in the meantime I want people to enjoy this as soon as possible.)
Licensing and Derivative Works
In the interest of allowing others to come up with their own designs for the faceplate, or making their own custom mount to suit their own needs, the license for this design has been set to allow for derivative works. Feel free to download the model in STL format and modify it as you see fit. But, please, don't go around selling this, putting it up on other platforms, or doing anything that might attract legal attention.
License

You may create derivative works based on this object, provided that all such derivative works are published exclusively on the MakerWorld platform and include proper attribution to the original creator. You may not share, upload, host, distribute, or publish this object—or any derivative work of this object—on any other digital platform, marketplace, or distribution channel. Commercial use of this object and any derivative works is strictly prohibited. This includes, but is not limited to, selling, renting, sublicensing, or using the object in any context in which you receive monetary compensation or other financial benefits.


Comment & Rating (6)