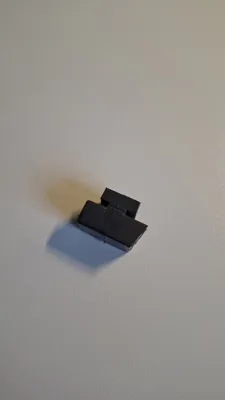
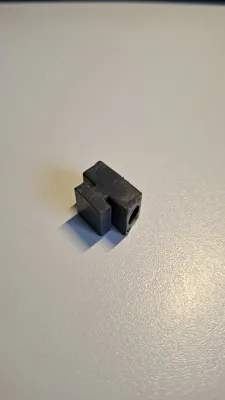
Leifheit Ironing Board Sliding Bearing Sliding Rail


Print Profile(1)
Description
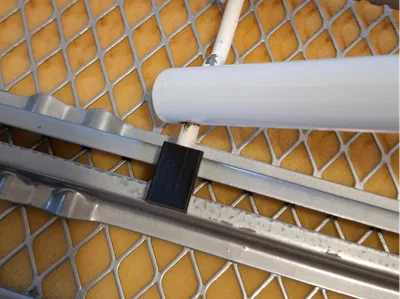
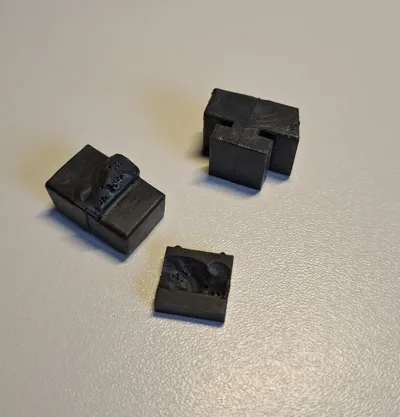
After years of hard use, a plain bearing on our Leifheit ironing board failed

Actually, the ironing board would be ready for the trash, as it can no longer be set up correctly. And all this again just because a part worth a few cents broke
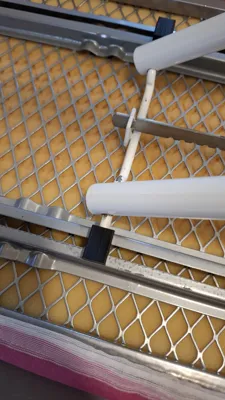
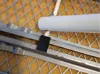
For assembly, the ironing board must be disassembled, otherwise you cannot get both plain bearings into the guide rails. For this, the ironing board must be placed on the floor with its underside facing up. Afterwards, the iron rest must be removed, otherwise you cannot get the linkage far enough forward. Press both bars of the iron rest together (red marking) or carefully pry them inwards. Afterwards, the rest can be pulled out backwards (yellow marking). Now the linkage is free (blue marking)

Now the linkage can be pushed forward far enough to allow both plain bearings to be slid on and then inserted into the guide rail
Reassemble in reverse order
If you like my work, please leave a like, a comment, and a boost. Even if something doesn't fit, just contact me, because there is a solution for everything. Do you have ideas for a printed part, but cannot operate a CAD program yourself, let me know and I will check the feasibility.
Boost Me (for free)
License
You shall not share, sub-license, sell, rent, host, transfer, or distribute in any way the digital or 3D printed versions of this object, nor any other derivative work of this object in its digital or physical format (including - but not limited to - remixes of this object, and hosting on other digital platforms). The objects may not be used without permission in any way whatsoever in which you charge money, or collect fees.
Comment & Rating (0)