Bubble Music Symbols Wall Art


Print Profile(1)

Description
Description
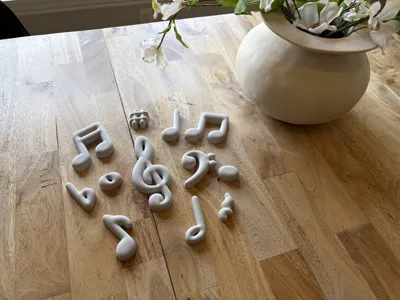
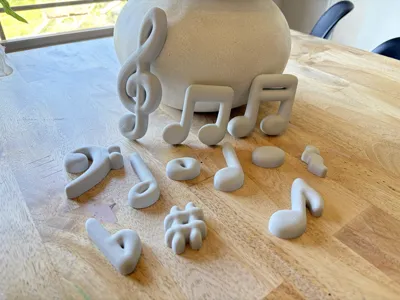
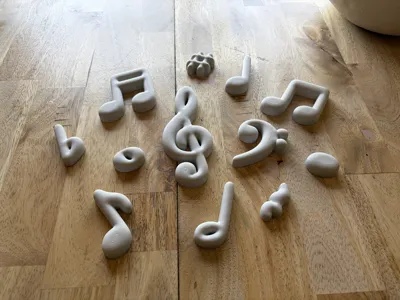
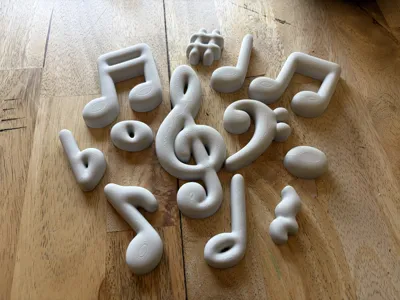
Another addition to my Bubble Wall Art series, this time I have designed a series of music symbols in the bubble style. These models are perfect for a music lovers room, or for a dedicated music space or classroom. They should go well perfectly with my existing Bubble models allowing you to create a matching layout that works perfect for your space. As always, these designs provide a durable, budget-friendly alternative to high-end ceramic decor. You get that same sophisticated look without the high price tag or the risk of breakage. Installation is a breeze—simply use command strips or 3M tape to mount them. If you're looking for a professional, high-gloss finish, I’ve detailed all the printing and painting steps in the description below!
Boost Me (for free)
If you like these models, please consider boosting them to help others see them too!
For questions about commercial use and other exclusive models, check out my Patreon!
(I also offer a commercial license directly through Makerworld)
Membership
Click here to subscribe on Makerworld for commercial licensing
Here are links to my other models as well:
Bubble Letters / Bubble Numbers / Bubble Symbols / More Bubble Decor

Print Instructions
- Open the file in Bambu Studio.
- Delete the Objects you do not need and duplicate ones you need more of.
- Select all of the remaining objects and resize them as needed.
- Use the “Arrange All Objects” function to rearrange the remaining objects for printing.
- Slice and Print!
Paint Instructions
While I was very happy with the finish I was able to achieve with adaptive layer heights in this project, we elected to paint them to get the colors we needed. (My cover photo is rendered, but the gallery includes pictures of the unfinished prints). Several people have demonstrated good results with UV resin coating, or just clear coating over the existing PLA colors.

Here is a picture of the letters I painted, and the process I used in case you'd like to duplicate my results:
- After printing, sand with sandpaper progressing from low grit to high grit. (I used 100-180-220)
- Clean thoroughly.
- Paint with Primer ( I used Rustoleum 2-in-1 Automotive Primer)
- After primer is dry, sand again with 400 grit sandpaper.
- Clean thoroughly again.
- Paint with 3-4 coats of your preferred paint, (I used Rustoleum 2X in a Satin).
- Finish with 3-4 coats of clear coat, (I used Rustoleum 2X in Gloss).
License
You shall not share, sub-license, sell, rent, host, transfer, or distribute in any way the digital or 3D printed versions of this object, nor any other derivative work of this object in its digital or physical format (including - but not limited to - remixes of this object, and hosting on other digital platforms). The objects may not be used without permission in any way whatsoever in which you charge money, or collect fees.
Comment & Rating (0)