
RC Tombstone Battlebot
Print Profile(0)
Description
ESP32 Wi-Fi Combat Robot – Description
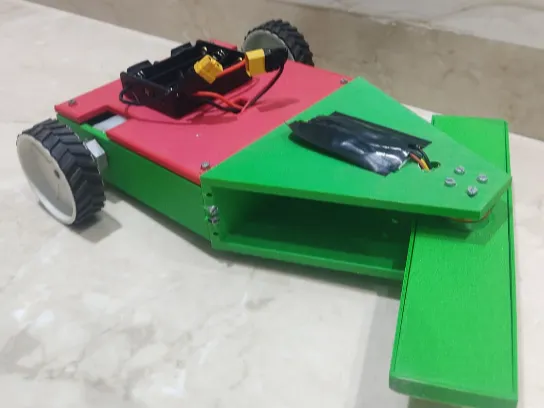
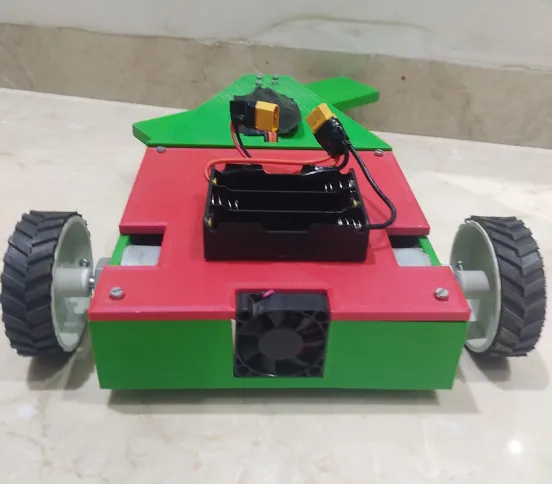
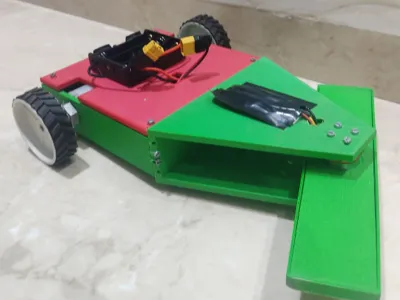
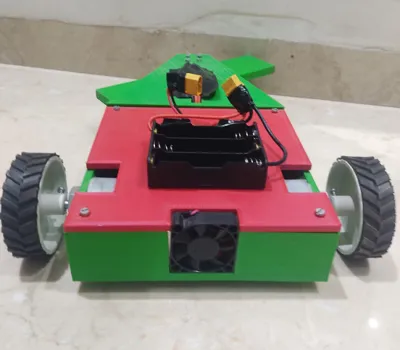
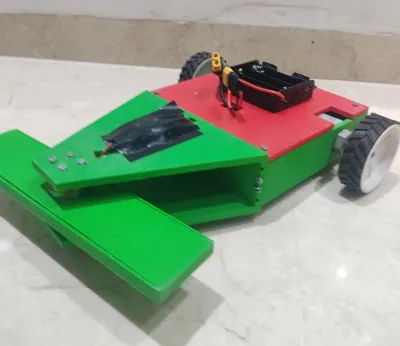
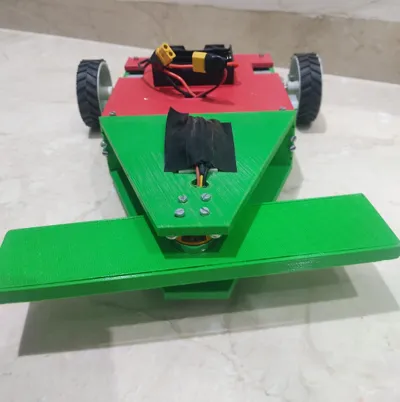
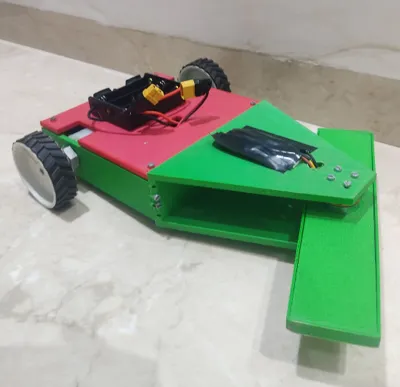
Hi! My name is Ishan Modgi from India, and this is my custom ESP32-based Wi-Fi controlled combat-style robot. This project is designed for makers, beginners, and robotics enthusiasts who want to build a simple yet powerful wireless robot using easily available components and 3D printed parts.
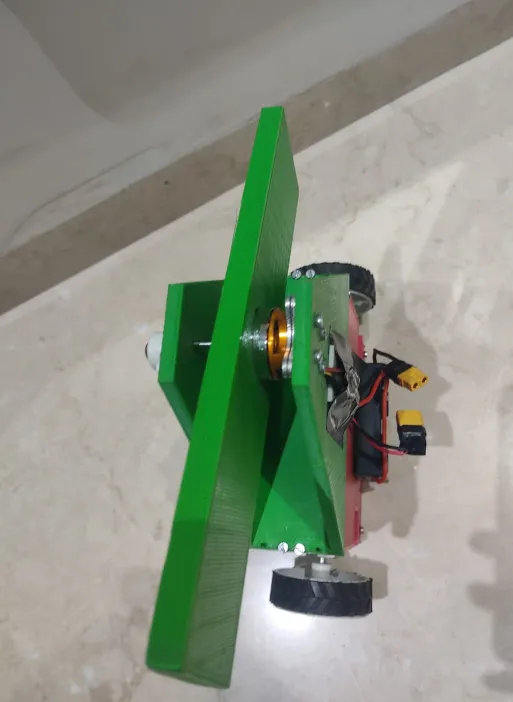
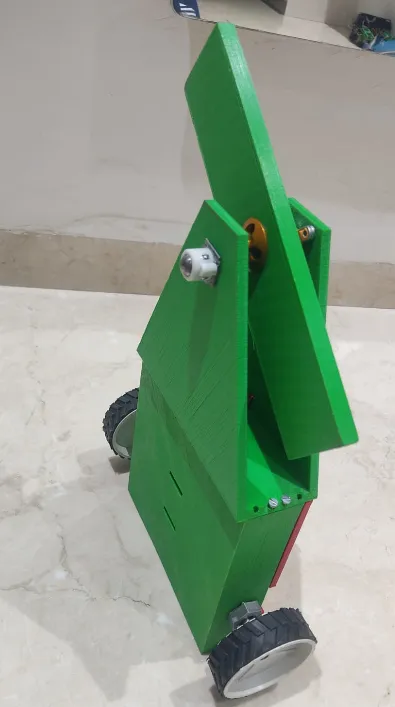
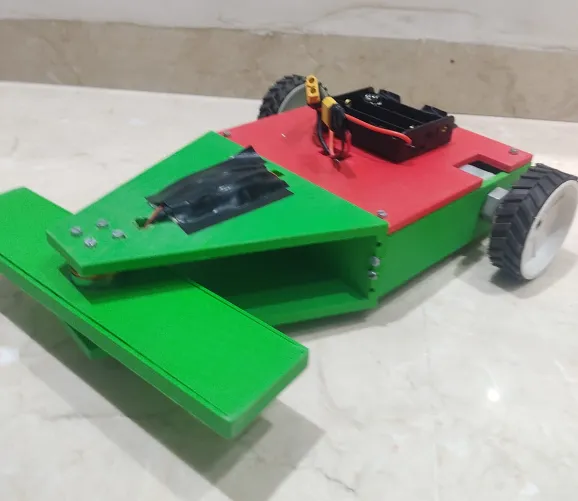
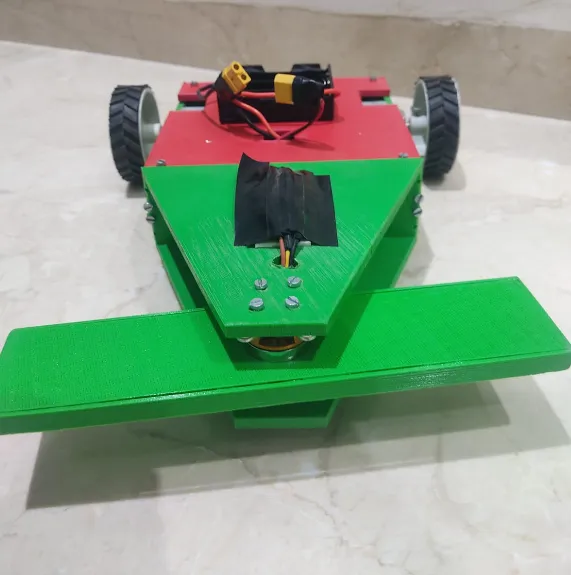
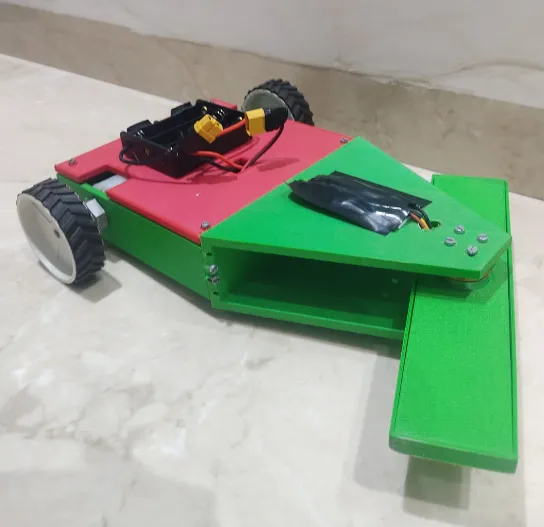
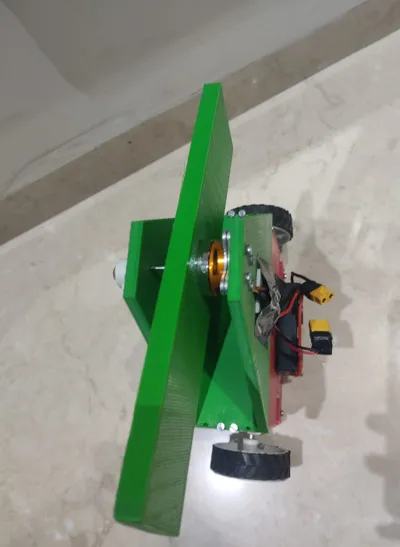
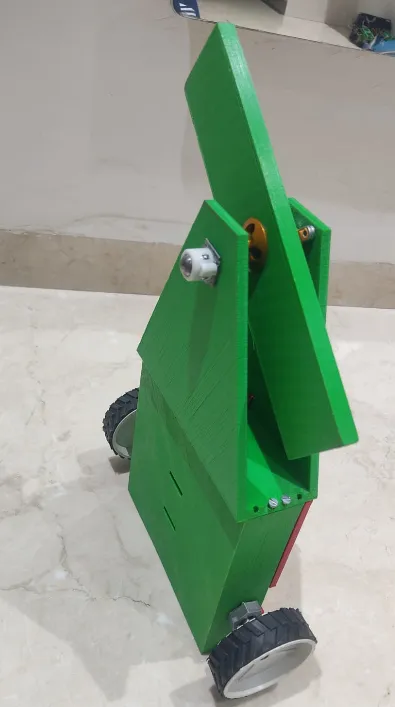
This robot is mainly made for learning, experimenting, and having fun with robotics. The front spinning bar gives it a combat-robot style look and movement, but this project is intended only for safe hobby use and not for damaging objects, animals, or people.
Introduction
This robot works using an ESP32 microcontroller. The ESP32 creates its own Wi-Fi network, and you can connect your phone directly to the robot without needing any external router or internet connection.
Once connected to the ESP32 Wi-Fi network, you simply type the IP address shown in the code into your phone’s browser. This opens a web-based control panel that allows you to control the robot wirelessly.
The control system is very simple and beginner-friendly.
- The webpage contains two main sliders for movement.
- Each slider controls one side of the robot.
- If both sliders are moved forward together, the robot moves forward.
- If both sliders are moved backward together, the robot reverses.
- If one slider moves differently from the other, the robot turns left or right.
This tank-style control system gives smooth and precise movement control.
The robot also has an Attack Mode feature.
- When the attack mode is OFF, the weapon system remains disabled for safety.
- When the attack mode is ON, another slider becomes active.
- Gradually moving this slider increases the speed of the front spinning attack bar.
The spinning bar is powered using a BLDC motor and ESC setup, giving the robot a fun combat-style mechanism.
Components Used
The robot uses simple and commonly available electronics components.
Main Electronics
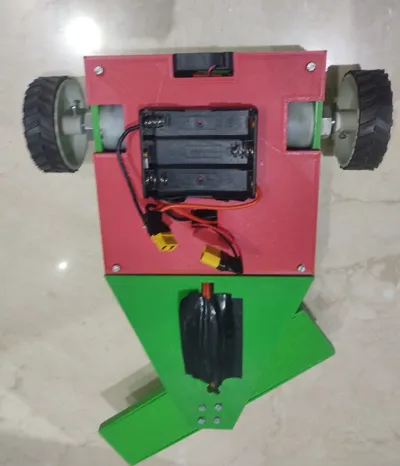
- ESP32 Development Board
- L298N Motor Driver
- BLDC Motor
- 30A ESC (Electronic Speed Controller)
- DC Gear Motors
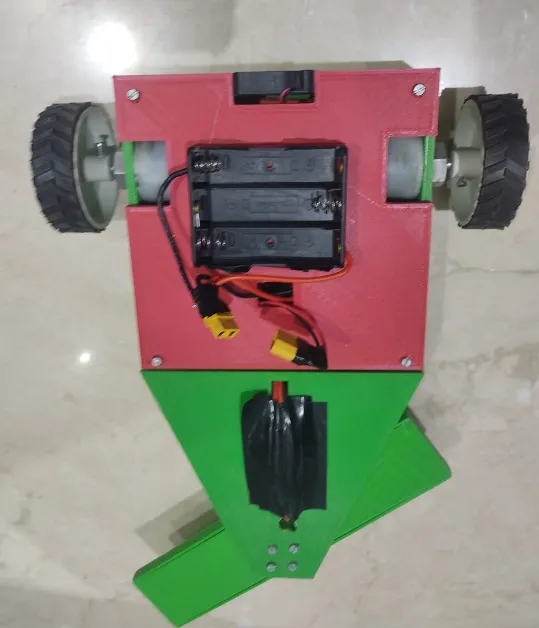
- 3x 18650 Batteries with Battery Holder
- XT60 Connector
- Power Switch
- Wires and Connectors
Recommended Upgrades
Although the robot works with the current setup, I highly recommend some upgrades for better performance.
Battery Recommendation
I used three 18650 cells, but a LiPo battery will provide:
- Better current delivery
- Faster weapon spin-up
- Improved driving performance
- Reduced voltage drop under load
ESC Recommendation
I used a 30A ESC, but for more powerful attacks and better reliability, I recommend:
- 60A ESC
- 80A ESC
Higher current ESCs can handle sudden power spikes much better.
Wire Recommendation
This is extremely important.
When the spinning bar hits something, the robot can generate large current spikes. Thin wires may overheat or fail.
I strongly recommend using:
- 16 AWG thick wires for:
- Battery to ESC
- ESC to BLDC motor
- Main power connections
Also make sure:
- The ESC is connected directly to the battery.
- All solder joints are strong and insulated properly.
Important Note (Please Read)
This robot is not used for hard objects like wood or any other hard objects. I have used a thermocol box for the testing.
Safety Instructions
Please read carefully before using the robot.
Do
- Test the robot in open areas
- Keep safe distance while spinning the weapon
- Use safety glasses during testing
- Secure all screws tightly
- Use thick wires for high-current connections
- Disconnect power while working on wiring
Do NOT
- Do not touch the spinning weapon
- Do not use near people or animals
- Do not use damaged batteries
- Do not short-circuit LiPo batteries
- Do not run the robot unattended
- Do not overload the ESC or motor driver
This robot is intended for educational and hobby purposes only.
Additional Notes
I have also uploaded videos explaining:
- How to assemble the robot
- How the electronics are connected
- How to operate the control system
- Important safety precautions
- Things you should and should not do while using the robot
Please refer to those videos for a more detailed visual guide.
This is the code for Tombstone:
#include <WiFi.h>
#include <WebServer.h>
#include <ESP32Servo.h>
const char* ssid = "Tombstone";
const char* password = "12345678";
WebServer server(80);
// L298N drive
#define ENA 25
#define IN1 33
#define IN2 32
#define ENB 26
#define IN3 14
#define IN4 12
// ESC pin
#define ESC_PIN 27
Servo esc;
bool attackArmed = false;
// Drive control
void driveMotor(int pwmPin, int inA, int inB, int value)
{
int center = 128;
int speed = 0;
if (value > center)
{
digitalWrite(inA, HIGH);
digitalWrite(inB, LOW);
speed = value - center;
}
else if (value < center)
{
digitalWrite(inA, LOW);
digitalWrite(inB, HIGH);
speed = center - value;
}
analogWrite(pwmPin, speed * 2);
}
// ESC throttle
void setESC(int value)
{
int throttle = map(value,0,255,1000,2000);
esc.writeMicroseconds(throttle);
}
// Web UI
const char webpage[] PROGMEM = R"rawliteral(
<!DOCTYPE html>
<html>
<head>
<title>Tombstone Battlebot</title>
<style>
body{font-family:Arial;text-align:center;background:#0b0b0b;color:red;}
h2{color:crimson;}
input[type=range]{width:80%;}
button{padding:16px;font-size:18px;margin:10px;background:darkred;color:white;border:none;border-radius:6px;}
</style>
</head>
<body>
<h2>TOMBSTONE BATTLEBOT</h2>
<p><b>Left Drive</b></p>
<input id="left" type="range" min="0" max="255" value="128"
oninput="send(1,this.value)"
ontouchend="reset(this)"
onmouseup="reset(this)">
<p><b>Right Drive</b></p>
<input id="right" type="range" min="0" max="255" value="128"
oninput="send(2,this.value)"
ontouchend="reset(this)"
onmouseup="reset(this)">
<br>
<button onclick="toggleAttack()">ATTACK OFF</button>
<p><b>Weapon Speed</b></p>
<input id="weaponSlider" type="range" min="0" max="255"
value="0" disabled
oninput="send(3,this.value)">
<script>
let armed=false;
function send(m,v){
fetch(`/set?motor=${m}&value=${v}`);
}
function reset(slider){
slider.value=128;
send(slider.id==="left"?1:2,128);
}
function toggleAttack(){
armed=!armed;
fetch(`/attack?state=${armed}`);
document.querySelector("button").innerText=armed?"ATTACK ON":"ATTACK OFF";
document.getElementById("weaponSlider").disabled=!armed;
}
</script>
</body>
</html>
)rawliteral";
void setup()
{
pinMode(IN1,OUTPUT);
pinMode(IN2,OUTPUT);
pinMode(IN3,OUTPUT);
pinMode(IN4,OUTPUT);
pinMode(ENA,OUTPUT);
pinMode(ENB,OUTPUT);
esc.attach(ESC_PIN,1000,2000);
esc.writeMicroseconds(1000); // minimum throttle
WiFi.softAP(ssid,password);
server.on("/",[](){
server.send(200,"text/html",webpage);
});
server.on("/set",[](){
int motor=server.arg("motor").toInt();
int value=server.arg("value").toInt();
if(motor==1) driveMotor(ENA,IN1,IN2,value);
if(motor==2) driveMotor(ENB,IN3,IN4,value);
if(motor==3 && attackArmed)
setESC(value);
server.send(200,"text/plain","OK");
});
server.on("/attack",[](){
attackArmed = server.arg("state")=="true";
if(!attackArmed)
esc.writeMicroseconds(1000);
server.send(200,"text/plain","OK");
});
server.begin();
}
void loop()
{
server.handleClient();
}
Note:-
WI-FI Name: Tombstone
Password: 12345678
Wiring for L298N drive
ENA 25
IN1 33
IN2 32
ENB 26
IN3 14
IN4 12
Wiring for ESC
ESC_PIN 27
License

You shall not share, sub-license, sell, rent, host, transfer, or distribute in any way the digital or 3D printed versions of this object, nor any other derivative work of this object in its digital or physical format (including - but not limited to - remixes of this object, and hosting on other digital platforms). The objects may not be used without permission in any way whatsoever in which you charge money, or collect fees.


Comment & Rating (3)