P2S X2D baffle chamber temperature assistance 4.3 grams anti-warping optimized quality vase mode flexible and robust all-new original


Print Profile(3)
Description
Boost Me (for free)
Keep it up! Keep it up! Keep it up!
Original model! No combining parts! No derivative works! No copying!
Thanks to Kagiyama Hina and Zhangjiagang Film and Television Industry Research Institute for their great help in design and debugging!!!

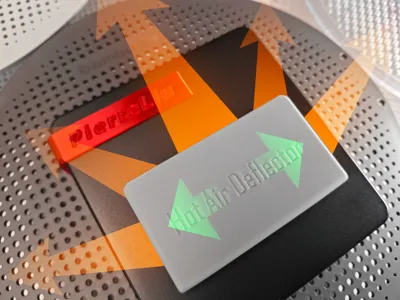
Design Concept:
Direct hot air blowing on the model can lead to uneven heating on the left and right sides, causing warping.
Blowing downwards, uneven heating on the left and right sides may still occur once the heated bed descends to a certain height.
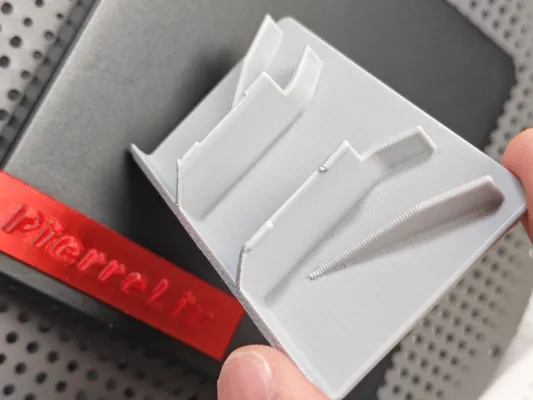
Therefore, hot air should not only blow upwards but also forcibly distribute a certain proportion of airflow to the left and right (the original grille caused stronger airflow intensity vertically). Furthermore, the distribution ratio can be adjusted (by moving the installed diffuser left and right, the strength of the left and right airflow can be controlled), leading to more even heating.


build plate:
Be sure to carefully clean off grease from the **build plate** using dish soap, this is crucial!
If an older build plate is not sticky, it is recommended to apply glue to increase model adhesion.
If the build plate is too sticky, you can try lowering the heated bed temperature.
Calibration:
Before printing, please perform the official hardware and software calibration (dynamic flow calibration, flow rate calibration).
To allow for easy model removal, it is strongly recommended to perform **filament shrinkage calibration** before printing.
filament:
Due to the hot air outlet, please try to choose **materials with higher heat resistance**.
Model Removal:
After printing, be sure to wait for **natural cooling** before removing the model (removing it prematurely can easily lead to model deformation).
License
You shall not share, sub-license, sell, rent, host, transfer, or distribute in any way the digital or 3D printed versions of this object, nor any other derivative work of this object in its digital or physical format (including - but not limited to - remixes of this object, and hosting on other digital platforms). The objects may not be used without permission in any way whatsoever in which you charge money, or collect fees.
Comment & Rating (0)