Wind-Powered LED Generator: Maker’s Kit Edition


Print Profile(1)
Bill of Materials

Description
Functional Overview
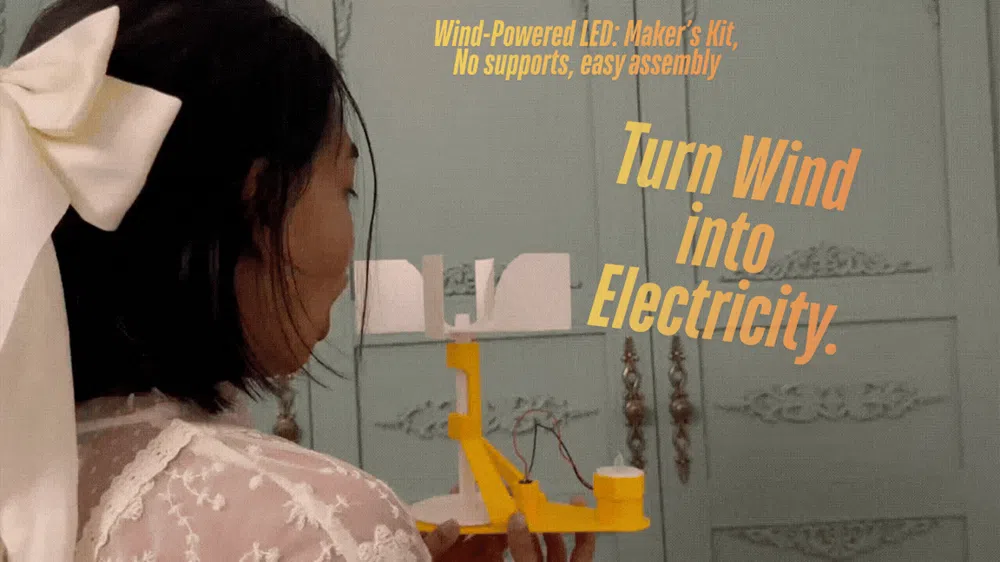
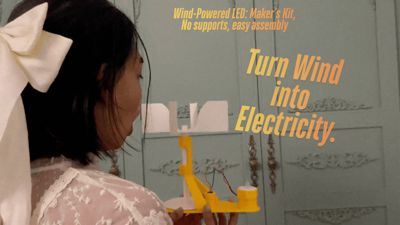
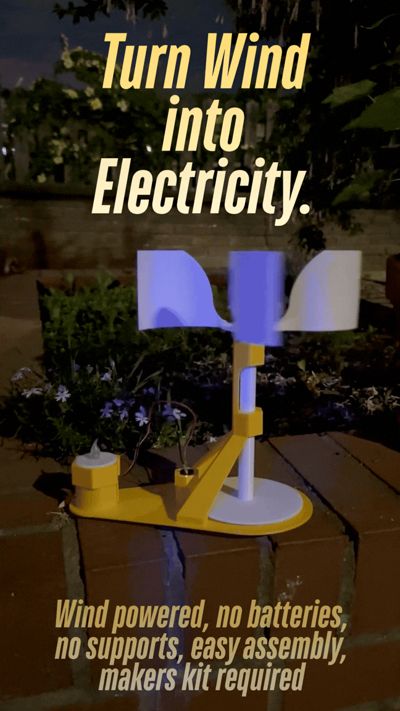
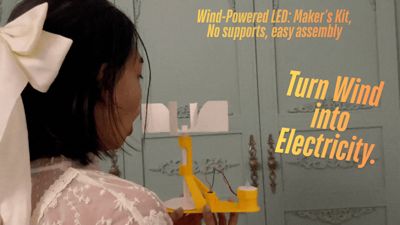
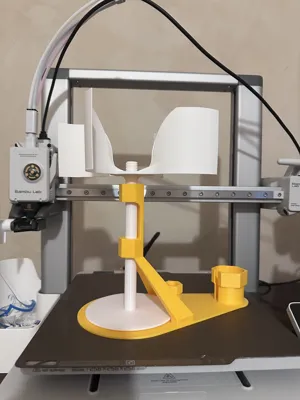
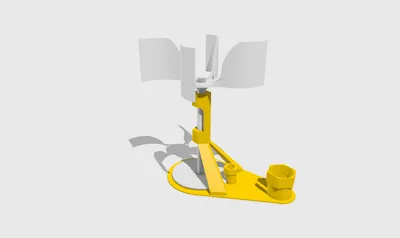
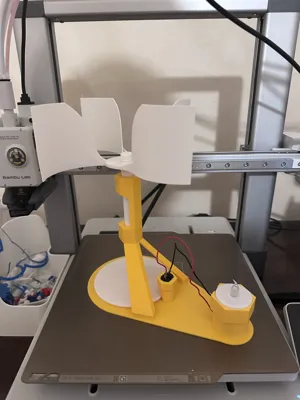
This project is a high-efficiency wind turbine designed to work directly with the DC motor and LED unit included in the Bambu Lab Maker’s Starter Kit. Instead of using a battery to make the motor spin, we are using the wind to spin the motor, turning it into a generator that powers your light for free.
Hardware Modification
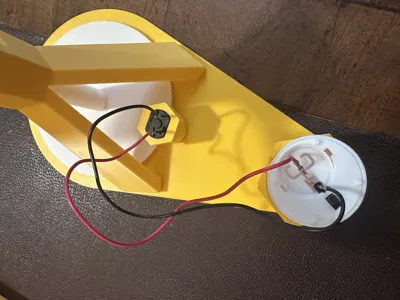
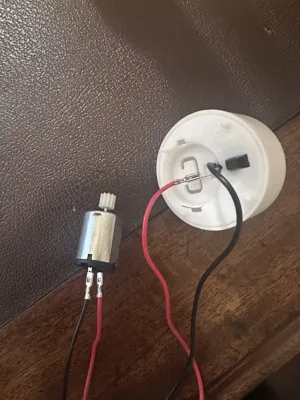
The LED unit in the starter kit usually runs on a small button cell. To make this work, open the LED housing and throw away the battery—you aren't going to need it anymore. By connecting the LED wires directly to the motor terminals, the motor becomes the power source.
How It Works: Turning Wind into Light
You don't need a degree in physics to understand this—it’s a simple chain reaction:
- Catching the Wind: The large turbine blades catch the breeze, which provides the initial "push."
- The Gear Secret: If you connected the turbine directly to the motor, it wouldn't spin fast enough to create light. I’ve added a large gear that turns a small gear on the motor. This "gear up" ratio means for every one turn of the turbine, the motor spins dozens of times.
- Generator Mode: Inside that little motor are magnets and coils of wire. When you spin the motor shaft fast enough, the magnets pass the wires and push electricity through them.
- Instant Light: That electricity travels down the wires and lights up your LED. It’s so efficient that you can even test it by blowing on the blades; if the LED flickers, you've successfully built a miniature power plant!
Technical Features
- 🛠️ Optimized for Maker’s Kit: Tailored specifically for the hardware provided in the Bambu training kit.
- 🛑 100% Support-Free: The geometry is engineered with 45° overhangs to ensure a clean print without any wasted material.
- ⚙️ Precision Gearing: The gear ratio is tuned to provide enough voltage to the LED.
- ⏱️ 60-Second Assembly: A complete snap-fit architecture means no screws, glue, or specialized tools are required.
The "Behind the Scenes" (Design Evolution)
I’ve been working on this design for weeks! While I saw a similar more complex design pop up recently, this was built independently with a focus on simplicity and assembly speed. I have a lot of proof that I came up with this independently before that one was published, and I’ve included pictures of the evolution of this design in the gallery so you can see the prototypes!
Print Settings
- Material: PETG is recommended for outdoor durability, though PLA is great for testing or indoor use.
- Supports: NONE.
- Brim: A 5mm outer brim is suggested for the turbine blades to keep them stable on the build plate.
- Walls: 3 Wall Loops for strong gear teeth.
Assembly Instructions
- Circuit Integration: Remove the battery from the LED module and secure the wires to the DC motor terminals.
- Motor Housing: Press-fit the motor into the designated slot in the main housing.
- Gear Alignment: Screw the turbine assembly onto the shaft, ensuring the gear teeth mesh together.
- Functionality Test: Give it a puff of air! The LED should illuminate immediately.
Community & Support
If you have one of these motors sitting in a drawer, this is the perfect way to use it. If you like the design, please consider leaving a Boost and sharing a photo of your print!
Check my profile for more hardware-integrated engineering models.
Comment & Rating (20)