Soldering Fume Extractor - The D.U.C.K.


Print Profile(1)

Description
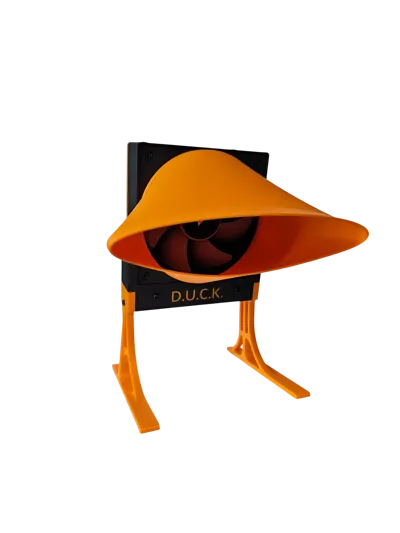
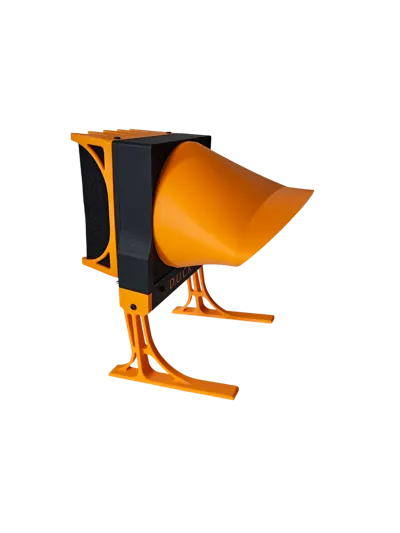
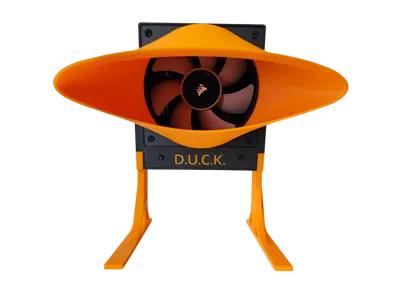
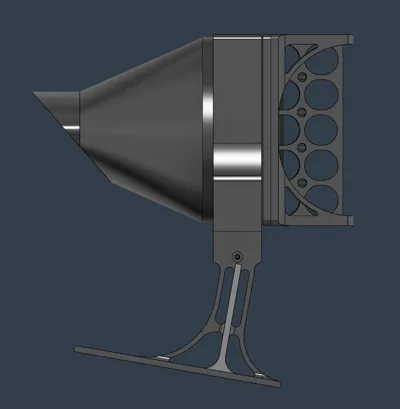
D.U.C.K. – Dangerous Undesirable Contaminants Killer
High-Performance DIY 120mm Fume Extractor
The D.U.C.K. is a modular, high-efficiency soldering fume extractor designed to keep your workspace safe and your lungs clear. Built around a standard 120mm fan and powered by USB-C PD, it combines modern power delivery with a high-surface-area "zigzag" filter design for maximum air purification.
🛠️ Key Features
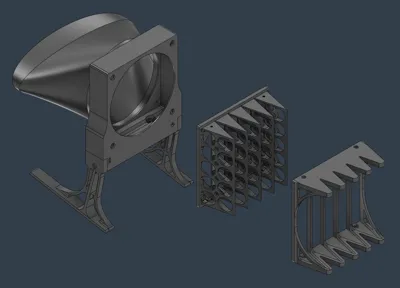
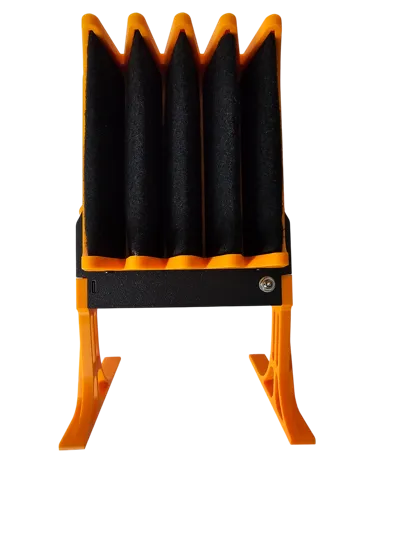
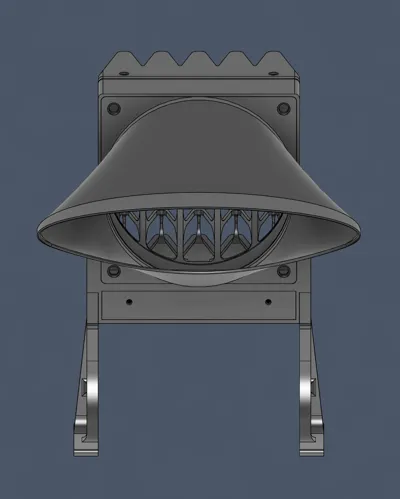
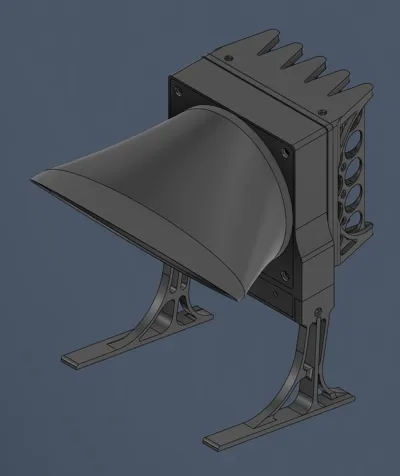
- High-Surface Filter: The unique 5-peak internal structure accommodates a 510mm long filter strip, maximizing the contact area for capturing flux fumes. Optional but recommended; alternatively, you can use a finger guard instead.
- USB-C Powered: Integrated slot for a 12V PD trigger module – use a standard USB-C power supply or a power bank.
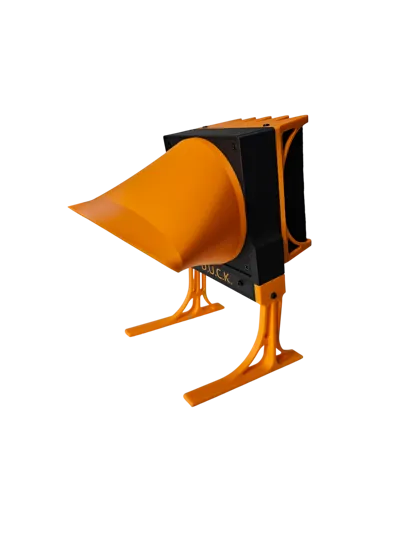
- Modular Intake: Comes with multiple nozzle designs and alternative high-angle legs to customize the airflow to your specific bench setup.
- Robust & Stable: Designed for PLA, providing a solid and reliable housing for any 25mm thick PC fan.
📦 Bill of Materials (BOM)
To complete this build, you will need:
- Fan: 1x Standard 120x120x25mm PC Fan (12V).
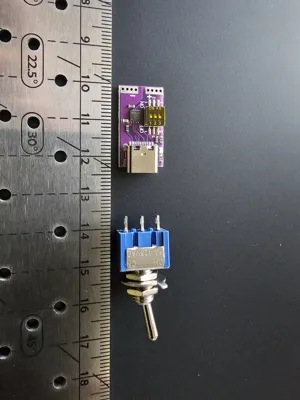
- Power: 1x USB-C PD 12V Trigger Module (Size: 23x13x5mm). You can find these on a major Chinese e-commerce site. It's a purple circuit board with DIP switches for different voltage ranges. aliexpress.com
- Switch: 1x Miniature Toggle Switch (Body: ~13x8mm, 6mm mounting hole). aliexpress.com
- Filter Media: Activated Carbon Filter sheet (Approx. 510 x 117mm, ~1.5mm thick). aliexpress.com
- Hardware:
- 6x M3 Bolts (8mm minimum length), 4x filtering unit, 2x front lid.
- 2x M3 Bolts (10mm minimum length), 2x legs.
- 8x Standard PC Fan Screws.
🖨️ Printing Instructions
- Material: PLA works perfectly and results in a very sturdy unit.
- Supports: While the main body requires minimal supports, they are highly recommended for the filter frame. The frame is designed for minimum airflow resistance, making the structure delicate and prone to breaking during printing if the nozzle happens to catch on it.
- Module Slot: The PD module slot is precision-fit. The front cover secures the module and aligns the Type-C port perfectly without the need for glue.
🔧 Assembly Tips & "Pro-Tips"
1. The Filter Challenge
The filter assembly is the most technical part of the build.
- Weave the 510mm filter strip through the five internal peaks.
- The pleat pitch is about 50 mm.
- Crucial: Leave a little slack (loose fit) at the "peaks" to avoid over-tensioning.
- If the cloth is placed correctly, the lid will seat perfectly. If it floats, check the alignment of the cloth.
2. Prepare the Screws
While the fan holes are aligned, the screwdriver access path is obstructed by the inner filterframe. This requires using a screwdriver at an angle rather than a straight vertical approach.
- Pro-Tip: Pre-thread or "sensitize" the fan holes with your fan screws before final assembly. This makes it much easier to drive the screws in once the frame is in place.
3. Fan Compatibility
Designed specifically for 25mm thick fans. While thicker or slimmer fans can be mounted (since the intake and body are screwed from opposite sides), 25mm provides the most aesthetic and seamless look.
Comment & Rating (0)