Search models, users, collections, and posts

Side Spool Holder - Quick Mount - Left/Right Side

GIF
GIF

Print Profile(3)

All
P1S
H2S
P2S
X1E
P1P
X2D
H2D
X1 Carbon
X1
A1
H2C
H2D Pro
A2L

P1S / X1C - 0.2mm layer, 3 walls, 20% infill
Designer
3.9 h
2 plates
5.0(3)

X2D - 0.2mm layer, 3 walls, 20% infill
Designer
4 h
2 plates
5.0(1)

P2S - 0.2mm layer, 3 walls, 20% infill
Designer
4 h
2 plates

Open in Bambu Studio
Boost
107
411
23
8
128
103
Released 

Description

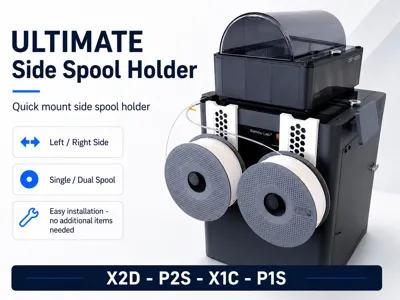
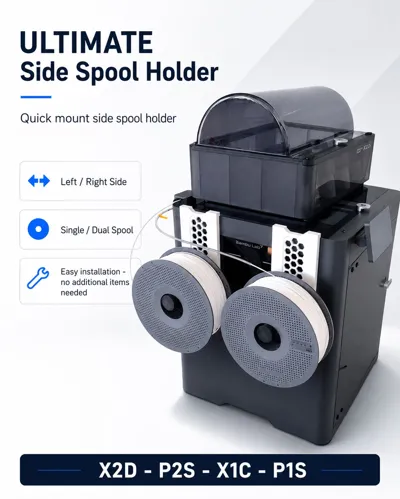
Quick Mount Side Spool Holder for X2D, P2S, X1C, P1S

This side spool holder is designed for a fast, simple and flexible external spool setup.

Main Features

  • Quick and simple mounting
  • Left or right side installation
  • One or two spool setup
  • Easy to position according to your setup
  • Reliable and robust construction
  • No extra hardware needed


Boost Me (for free)

Like the model? Consider a boost so I can continue to improve and release new high quality models.
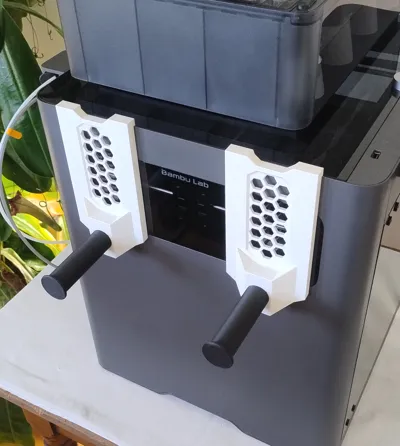
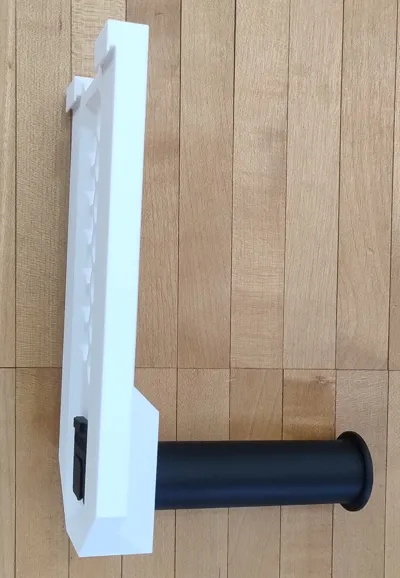
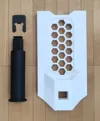
 

Assembly

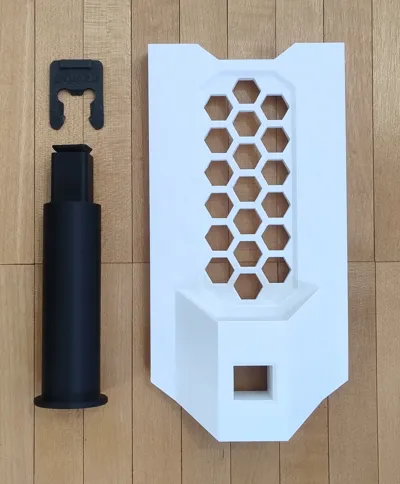
The holder consists of 3 printed parts:

  1. Main holder / base
  2. Spool rod
  3. Locking clip

Insert the spool rod into the main holder until it reaches the end stop. This is intentionally a tight fit, so some force may be required.

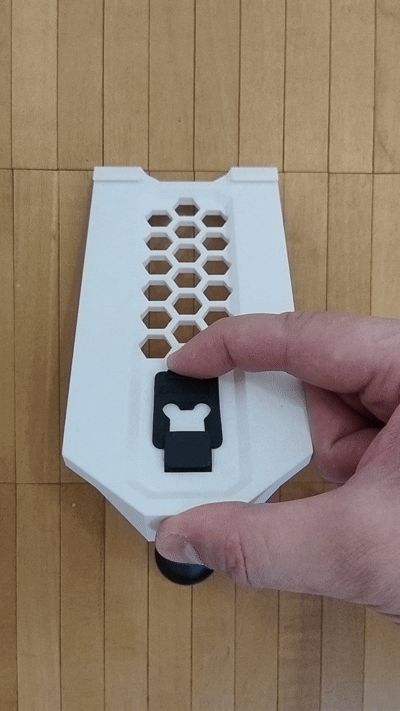
Then turn the holder around and press the locking clip into the slot from above. Push it down firmly with your thumb until it snaps onto the rod and locks into the groove.

Make sure the rod and clip are fully seated before loading a spool.
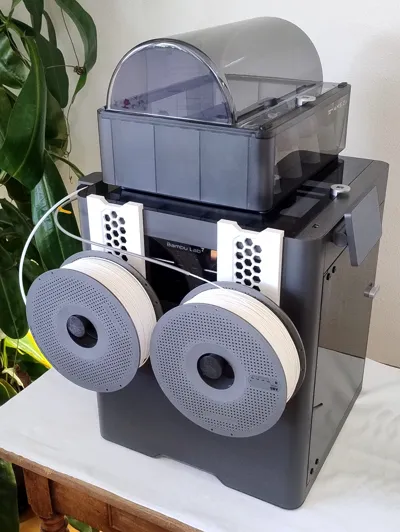
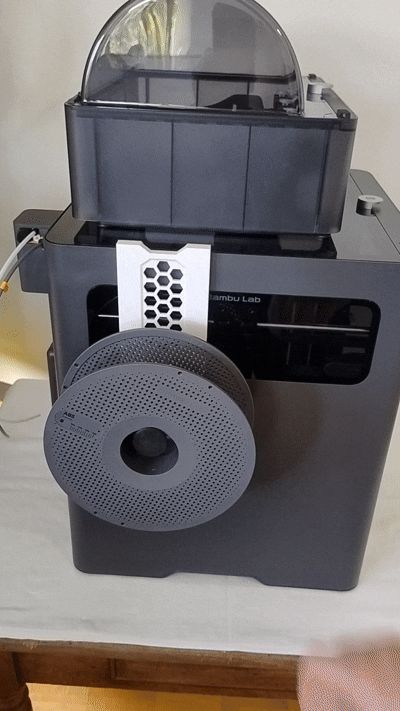
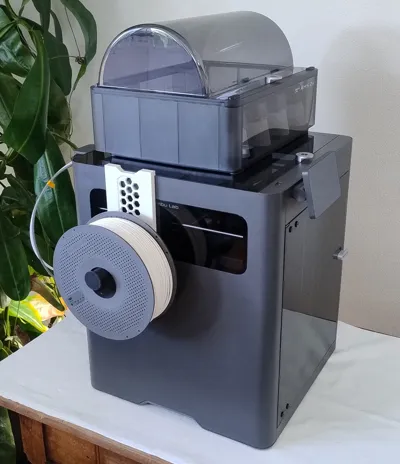
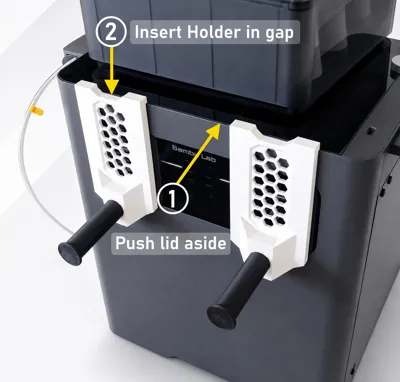
Installation

Slightly slide the glass lid to the opposite side to open the gap between the glass lid and the side panel.

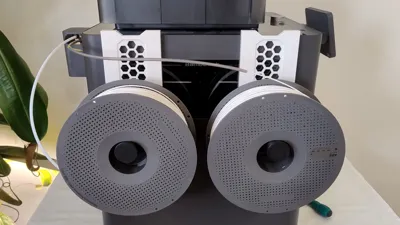
Insert the holder into the side gap from above and push it down until it sits securely in place.

The holder can be mounted on either the left or right side. For an X2D dual-spool setup, simply print the holder twice.

Print Notes

The main holder uses snug supports. These must be removed completely after printing, especially around the insertion area.

I printed my version in PLA Matte for the clean visual appearance. For regular high-temperature printing or elevated chamber temperatures, I recommend PETG, ABS or ASA instead.


There are 3 separate print profiles for X2D, P2S and P1S which I will upload shortly.

Feedback

This is an early version and I may release improved versions in the future. Please give me feedback on the model what needs to improved.

Comment & Rating (23)

(0/1000)

hello, I wanted to boost you before downloading, but the option is not available I had a question: don't you have the missing part for the X2D? I've put a photo for you, or maybe it's not needed. I prefer to ask before I start
The designer has replied
Show original
0
Reply
Hello, no the support for the PTFE tube is not included. You can install the original support, just like user @user_1113347382 did and use it instead. However, you don't really need the PTFE tube support at all
Show original
0
Reply
Replying to @Biceps_Prints :
thank you for your response I printed it well I just have a little trouble with the connections with the buffer at the back
Show original
0
Reply
Replying to @user_806967317 :
Hello, if you want to use the AUX input, it's best to route the PTFE tube under the spool, not over the top (as seen in the second photo of the model). The bend will be better towards the rear. For the main nozzle, I would place the mount a little further forward, roughly in the middle of the printer, and then route the filament and PTFE tube over the top. This way, the curves remain cleaner and less tight
(Edited)
Show original
0
Reply
there’s no boost option but I would if I could lol!
The designer has replied
designer
1
Reply
Thanks for the pictures, looking good! I also like the idea that you installed the og holder as a PTFE guide. That could be quite useful when the holder is placed further toward the front.
0
Reply
ok! thanks for the suggestion and thanks for the profile 🤗
0
Reply
First attempt with ABS and started to hear some "bump" noises and saw the nozzle hitting some of the printed parts. Not sure what caused it, maybe something changed to worse when I decided to use engineering plate with glue (had some issues with bed adhesion on ABS earlier) and added 8mm brim around it. Stopped the printing and now trying with stock setup, textured plate and plate set to 100 celsius degrees
The designer has replied
0
Reply
Well, the second attempt wasn't so successful either, but amazingly the main structure printed well enough (for me), so i can use it for my troubleshooting the feed issues on the auxiliary extruder. :) Someone who knows better and wants to fine tune the abs profile, i'd suggest to look into z-hop and probably some slow-down on bridges. I'm really new into ABS printing, so cannot say for sure.
designer
1
Reply
Replying to @user_1193223096 :
Thanks for your input and pictures, I really appreciate the feedback. I will print the ABS one on my X2D and report back, then make the necessary changes to accommodate ABS quirks better.
0
Reply
super solution thanks !
The designer has replied
Show original
designer
1
Reply
Thank you for the picture and the boost!
Show original
1
Reply
Hi I was wandering if you could modify the hanger to suit the IKEA Skadis mounts as I have a AMS2 Pro riser which has Skadis Mounts on sides
(Edited)
The designer has replied
0
Reply
Thanks for the boost! Unfortunately I don't have the time at the moment to model this niche mount.
0
Reply
I really like the design! Do you think it is possible to have one extra roll place underneath the current side-loaded role? ...an extra long version?
The designer has replied
0
Reply
It would be entirely possible with a large enough bed to print it with, but not with the P or X-series.
0
Reply
Print Profile
P1S / X1C - 0.2mm layer, 3 walls, 20% infill
Very easy to put together and use, holds heavy spools well even with PLA.
profile
1
Reply
Boosted
Installed on P1S but haven't used it yet. The print was perfect. Just using BL PLA Basic and removed supports and assembled without problems. Boosted
The designer has replied
0
Reply
Thanks, really appreciate it!
0
Reply
let’s go bro that was worth the wait I am printing rn
designer
1
Reply
Print Profile
X2D - 0.2mm layer, 3 walls, 20% infill
0
Reply

License

This user content is licensed under a Standard Digital File License.

You shall not share, sub-license, sell, rent, host, transfer, or distribute in any way the digital or 3D printed versions of this object, nor any other derivative work of this object in its digital or physical format (including - but not limited to - remixes of this object, and hosting on other digital platforms). The objects may not be used without permission in any way whatsoever in which you charge money, or collect fees.