PATH Water Bottle Cap


Print Profile(1)

Description
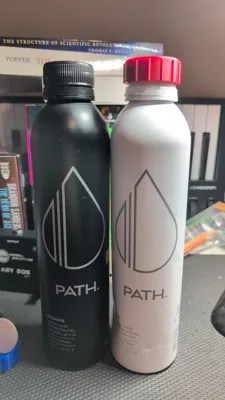
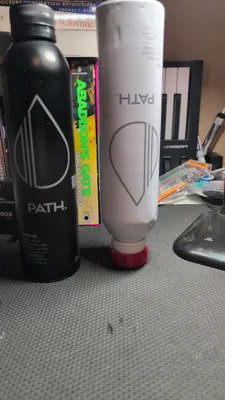
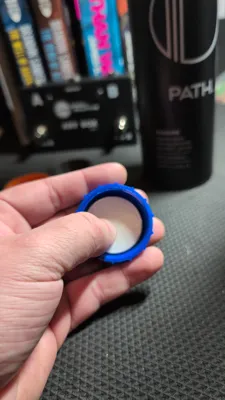
Replacement Cap for PATH 25oz Aluminum Water Bottle
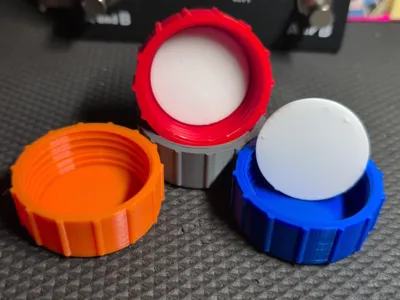
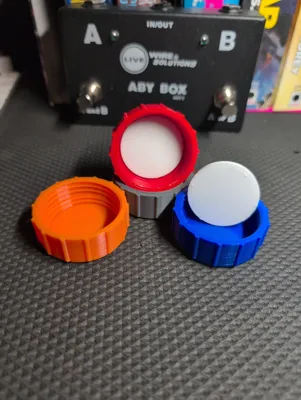
A two-part replacement cap for the PATH 25 oz aluminum water bottle. The PLA outer cap handles the threading and structure; a TPU 95A solid disk gasket drops into the inside to seal it watertight. Tested on inverted bottle, full of water — no leaks. I am a huge fan of the PATH water bottles and couldn't find a replacement lid out there, so decided to make one and post it here.
Bottle compatibility
Designed specifically for PATH 25 oz aluminum bottles, but should fit any bottle with these external thread specs:
- Major diameter: 37 mm
- Minor diameter: 36 mm
- Pitch: 3 mm
- Single start, right-handed
- 10 mm threaded length
- 28 mm mouth ID
- 34 mm OD smooth rim above threads
- 41.5 mm OD shoulder flange
If your bottle measures the same, this will fit. Worth checking with calipers before printing.
Files
- path_bottle_cap_v6.stl — the cap, prints in PLA
- path_gasket_v7_solid_2p5mm.stl — primary gasket, prints in TPU 95A
- path_gasket_v7_solid_2p8mm.stl — backup gasket if the 2.5mm doesn't seal tight enough on your printer
Print settings
Cap (PLA)
Orientation: Closed top down — flat top against the build plate gives excellent first-layer adhesion and a glossy top finish.
- Layer height: 0.16-0.20 mm (thicker bonds better than thin for this load case)
- Walls: 6+
- Infill: 100% (cap is mostly perimeters anyway given wall thickness)
- Supports: none
PLA+ or PETG will give noticeably better thread strength than basic PLA if you have it. PETG is also a step up for cold-water food contact. The model files work unchanged.
Gasket (TPU 95A)
Print flat on the build plate.
- Print temp 230-240°C (toward the high end of your filament's range — better layer fusion = less porosity)
- Bed 50-60°C
- Layer height 0.15-0.20 mm
- Walls: 4
- Infill: 100%
- Print speed 20-25 mm/s
- Retraction: disable or reduce to 1 mm at slow retract speed
- No supports
Each gasket is ~2 g of filament and prints in 5-10 minutes. Print 2-3 of each thickness — they're cheap and you'll want spares.
Assembly
- Invert the cap (open end up).
- Press the gasket disk into the pocket at the top of the cap interior. Should take noticeable but easy thumb pressure — that's the friction fit. If it falls in with no resistance, you'll need a slightly larger gasket OD; if it won't go in at all, it's slightly oversized.
- Thread onto bottle by hand. Snug it firmly hand-tight; don't gorilla-tight it.
Try the 2.5 mm gasket first. If it leaks under inversion, switch to the 2.8 mm — that gives more compression at the cost of slightly more threading force. If neither works, your printer's dimensional accuracy may be off; sanding the gasket OD down a hair, or re-printing the cap at 100.5-101% scale, will usually resolve it.
Food safety note
Everyone's favorite topic, gotta say it. PLA isn't certified food-safe, even when the resin is — additives and brass nozzle wear can contaminate prints. For cold water in a hand-washed bottle that you replace every few months, plenty of people do this and are fine. Hand-wash only (no dishwasher, PLA softens around 50-60°C). If you want better food contact properties, PETG with a stainless steel nozzle is a meaningful upgrade and uses the same files.
Comment & Rating (0)