Meta Oakley Vanguard DIY Charging Clip


Print Profile(1)
Description
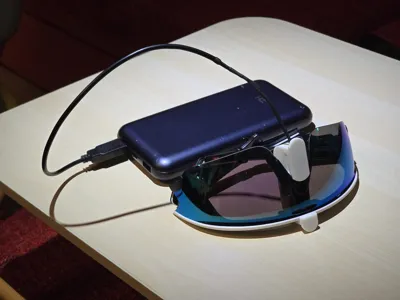
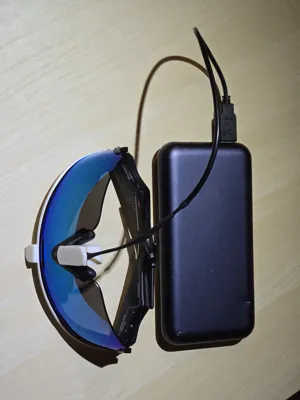
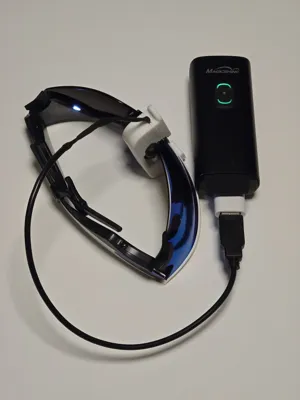
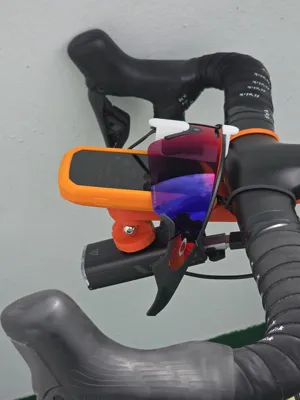
DIY Charging Clip for Meta Oakley Vanguard Smart Glasses
Charge your Vanguards directly from a USB adapter or power bank when you’re not carrying the bulky case.

Why I Built It
These glasses are perfect for cycling – hands-free photos, videos, music, making and answering calls, all while you keep pedaling with your hands on the handlebar. But battery life maxes out at 2–6 hours (usage-dependent), which isn’t enough for my longer 150km+ rides. With my Meta RayBans, I’d stash the lightweight (130g) case in my jersey pocket for quick top-ups on ice-cream stops. The Vanguard case, however, weighs 260g – twice as much compared to the RayBan case – and is too bulky to carry while riding. Since no charging clips exist for the Vanguards yet, I built one using simple, off-the-shelf parts and 3D printing. As for the power bank… I do not need to carry an additional one: I use either reverse charging from my mobile phone or my front light that also supports this feature. But if you need to carry a power bank, you will definitely find much smaller and lighter power banks than the Vanguard case!

What You’ll Need
• 3D-printed clip (this model – use the attached print profile).
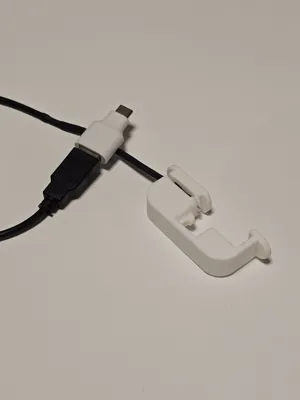
• USB-A cable with 2 exposed wires - AliExpress link
• 2x DuPont male-to-male jumper wires (preferably 1 red, 1 black, to distinguish polarity) - AliExpress link
• Soldering iron, wire strippers/cutters
• Heat shrink tubing or electrical tape for insulating the soldered wires. If you choose heat shrink tubing, you'll need 2x thin (2mm / 1/8" for the jumper wires) + 1x thick (7–8mm) - AliExpress link
Note on links: All product links (above and below) are provided for reference only. I only purchased the USB cables from these listings; I already had the jumper wires, heat shrink, and other components on hand.
Assembly Instructions
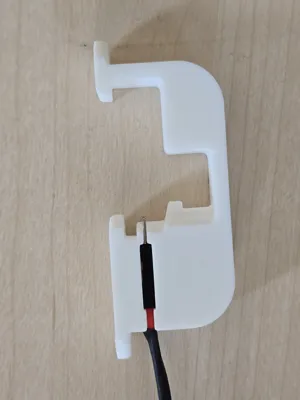
- Cut the Jumper Wires: Cut each DuPont jumper wire in half. Keep one red half (male pin on one end) and one black half (male pin on one end).
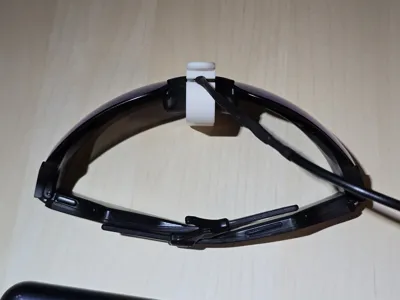
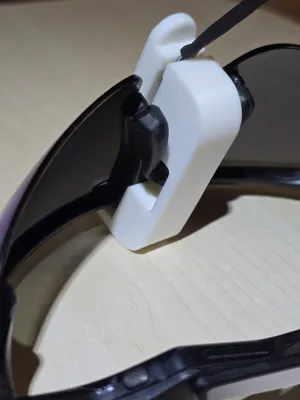
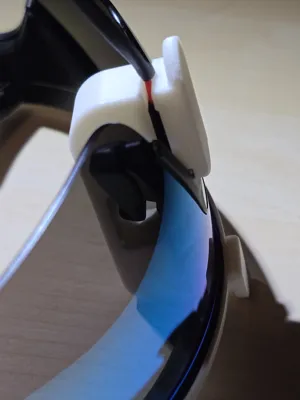
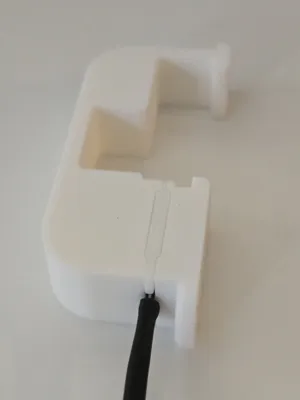
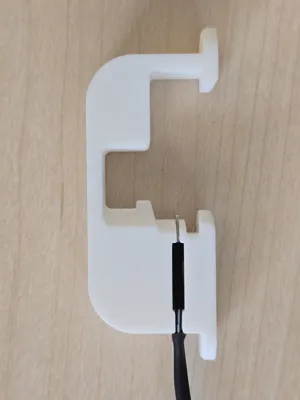
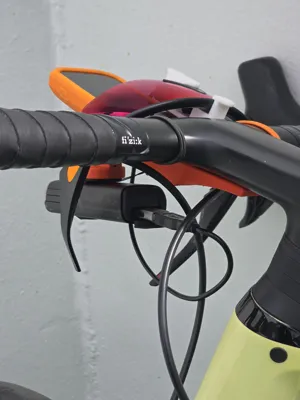
- Insert Pins into Clip: Before soldering, slide the male pin end of each half-wire into the side channels of the 3D-printed clip. The channels grip the plastic pin holders snugly and position the metal pins at the exact height needed to contact the charging pads on the glasses. See photos below for clip orientation and wire color channel placement.
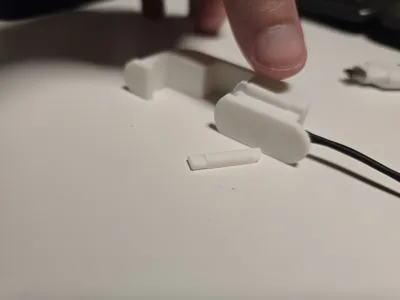
- Prep Heat Shrink (Do This First!): Slide the heat shrink tubing onto the wires before soldering. You’ll need three pieces:
- Two 2mm (1/8") tubes for the individual solder joints
- One 6–8mm tube to cover the full jumper cables and junction + USB cable sheath
- Strip & Solder: Strip ~5mm of insulation from the bare ends of the jumper wire halves and from the corresponding USB cable wires. Solder red to red (positive) and black to black (negative).
- Shrink & Secure: Once soldered, slide the two 2mm tubes over the individual joints and shrink them. Then slide the 6–8mm tube over the entire bundle (covering both solder points and the USB cable’s outer tubing) and shrink it. This creates a solid, insulated, strain-relieved connection.
- Channel covers: The 3D model also includes two small channel covers (see photo). Glue these covers over the channels to lock the pin holders in place.
 |  | 
|
USB-C Compatibility Note
The Vanguards only accept 5V. Standard USB-C chargers that negotiate higher voltages will simply not charge the glasses. If you prefer USB-C, you’ll need to force a 5V output using one of these options:
• Option 1 (What I use): USB-A cable + USB-C to USB-A adapter (see picture below): AliExpress link
• Option 2: USB-C cable/adapter with built-in 5.1K pull-down resistors (forces 5V): AliExpress link

Clipping / Unclipping demo
Please see the following recordings for clipping/unclipping - it is much easier to visualize than try to describe this :)
 | 
|
License
You may create derivative works based on this object, provided that all such derivative works are published exclusively on the MakerWorld platform and include proper attribution to the original creator. You may not share, upload, host, distribute, or publish this object—or any derivative work of this object—on any other digital platform, marketplace, or distribution channel. Commercial use of this object and any derivative works is strictly prohibited. This includes, but is not limited to, selling, renting, sublicensing, or using the object in any context in which you receive monetary compensation or other financial benefits.
Comment & Rating (0)