Search models, users, collections, and posts
Toy Poodle
IP Report


Print Profile(1)
0.2mm layer, 2 walls, 15% infill
Designer
2.4 h
1 plate
Open in Bambu Studio
Boost
74
205
5
1
139
74
Released
Description
Content has been automatically translated.
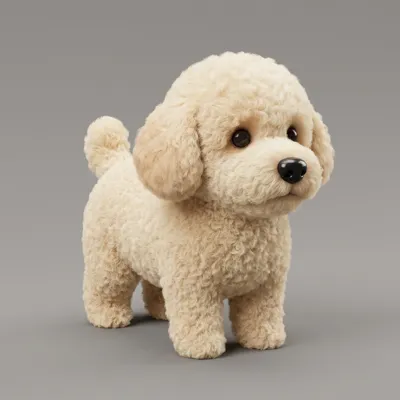
Here is an ultra-cute toy poodle model, designed to have the look and visual softness of a fluffy plush toy The design (shown in the cream reference image) is crafted to maximize cuteness, with large expressive eyes and curly, textured fur all over the body It's the perfect static pose for a desk or shelf
Important: To achieve the glossy black eyes and nose as shown in the final print, a simple post-processing step was performed The body was printed in a single color, and after printing, the eyes and nose were hand-painted with a touch of glossy black acrylic paint (or an acrylic marker) This creates the perfect contrast with the matte texture of the filament
Model Features:
- Style: Cute/Chibi, Amigurumi-look
- Texture: Curly and textured fur, designed for FDM printing
- One-Piece Print: The model is printed standing, in a single session
- Orientation: Printed vertically
Recommended Print Settings (PLA):
- Material: PLA or PETG
- Layer Height: To capture the curly texture, a layer height of 0.16mm or 0.20mm is recommended
- Infill: 10-15% (gyroid or grid)
- 2 or 3 walls
- Supports:
- REQUIRED: Supports are necessary under the chin/snout and under the belly between the front and back legs for a clean result
- Support Tip: Use standard supports with an appropriate Z gap (e.g., 0.2mm) for easy removal, especially under the chin
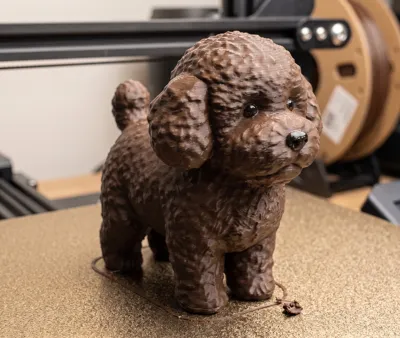
Post-Processing Instructions (as in image 1):
- Print the model in your desired main color (e.g., brown or cream)
- Carefully remove supports under the snout and body
- Grab a glossy black acrylic paint or a medium-tip acrylic marker
- Carefully paint the eye pupils and the entire nose. Let dry
- (Optional) If you want an even glossier effect on the eyes, apply a small layer of glossy UV resin or clear glossy varnish
Generated and designed using Meshy AI.
License
This user content is licensed under a
Creative Commons Attribution-Noncommercial
Comment & Rating (5)