Search models, users, collections, and posts
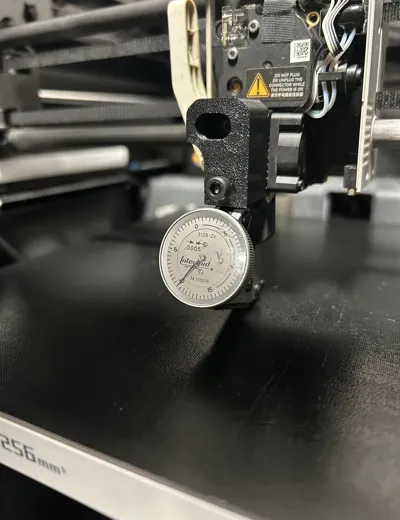
X and P series Tramming Jig
IP Report


Print Profile(0)
Add the first print profile to earn points
Boost
0
0
0
0
0
0
Released
Description
I designed this jig to help with tramming the bed manually. No spacers, feeler gauges or leveling pads. You only need to remove one screw from the hot end which means no unplugging any of the small connectors except for the tool head cover.
Hardware:
M3 x 20mm screw for the hot end.
M4 x 6mm for a set screw on the indicator.
Print with 4 contours so you can tap the hole if you want, I just used the screw to cut the threads.
Here are the steps I recommend:
- Install the jig with the indicator on the hot end.
- Set bed temp to desired temp.
- Move the bed up until the indicator reads the surface without the build plate.
- You can either jog the head using the controls or shut the printer off and move it by hand.
- Place the indicator over the three bed adjustment screws and adjust accordingly.
- Remove the jig and install the tool head cover
- Turn the printer on and run a calibration.
We all know these printers have an automatic leveling sequence but this helps ensure you have a good starting point.
Make sure you have a good working knowledge on how to operate your printer, read an indicator and install hardware before attempting this.
License
This user content is licensed under a
Creative Commons Attribution-Noncommercial-Share Alike
Comment & Rating (0)