


Print Profile(1)

Description
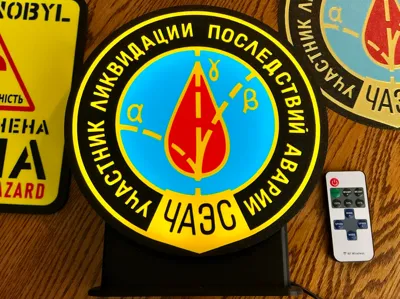
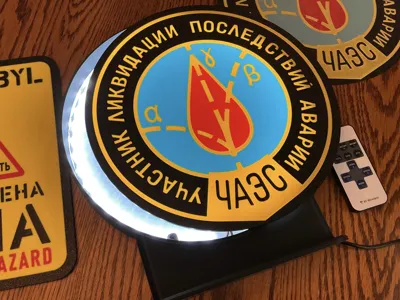
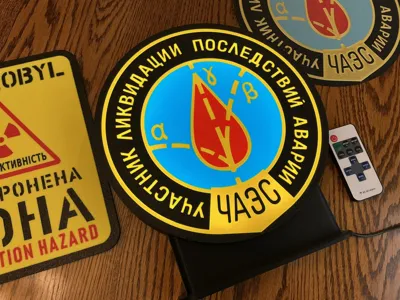
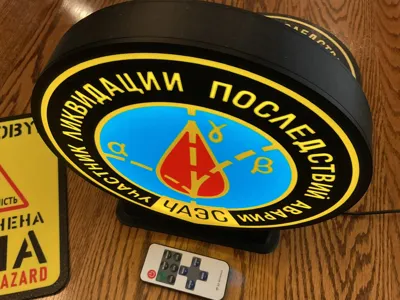
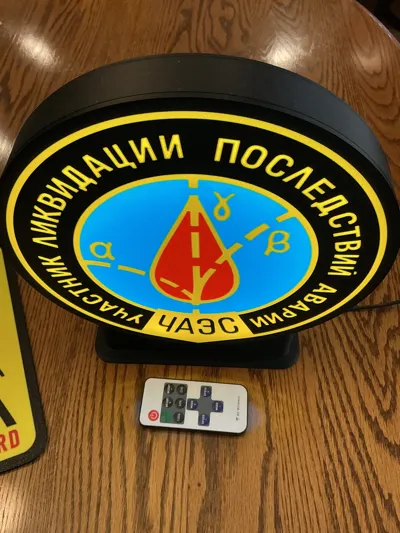
This model is a Chernobyl Liquidators badge/medal 240mm diameter art deco LED lightbox and lens with options for wall hanging or a desk/shelf base/stand if you prefer.
When Chernobyl Reactor #4 exploded in 1986, it threw highly radioactive fuel and reactor components out onto the roof and around the reactor building that had to be cleaned up before any kind of containment could be built to keep further contamination to a minimum. Radiation levels were so high that the Russian lunar rover brought in to push debris back into the reactor malfunctioned nearly immediately and so did a small German industrial remote controlled bulldozer. That left it up to humans to enter highly radioactive areas to clean up the debris - “biorobots”. Workers were given certificates to show their status for benefits and a medal recognizing their heroic and selfless efforts in the cleanup. This lightbox lens replicates the inner region of Chernobyl Liquidators medal.
The text around the outer part reads “участник ликвидации последствий аварии” which translates to “Participant in the cleanup of the accident aftermath”. The larger text is an abbreviation for atomic energy service (I believe but am not certain). The real medals are enameled badges with a red and gold surrounding motif and ribbon. The colors are as seen in the included photograph of a real medal and are red, sky blue or cyan, black, and gold.
For more information on Chernobyl and the Liquidators, see https://en.wikipedia.org/wiki/Chernobyl_liquidators.
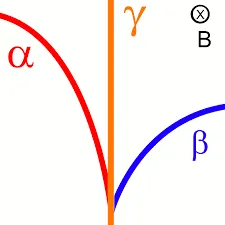
For those who spot the discrepancy in the actual/original design, yep, the alpha particle should take the path marked as beta and vice versa. The much lighter beta paths should curve more sharply in a magnetic or electric field than the much, much heavier alpha particles. Don't know if the discrepancy carried a greater meaning in the face of the disaster or if it is just an error in the design that got past any approvals. Or, maybe it's just not the classic depiction of particle effects in an electric or magnetic field. At any rate, it's not your imagination and the medal is duplicated in this lens as created. See the diagram in the photos section for how the paths are depicted in textbooks. Not nit-picking in any way. Just mentioning since it’s interesting if you’re into such things.
This version of lightbox lens fits my 240mm lightbox back and stand files. You need the lens and the back for a complete lightbox. Standard back and base available here: https://makerworld.com/en/models/2168648-lightbox-back-and-stand-for-mzip-240mm-lightboxes A fancy base with customizable faceplate and rear power jack is available here: https://makerworld.com/en/models/2147170-240mm-base-w-power-jack-and-separate-front-plate
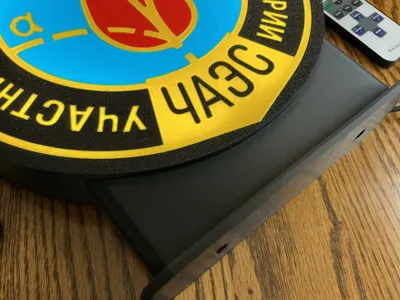
These lightboxes feature a printed-in reflector in the back to maximize brightness of the lens design, a printed-in diffuser for the lens that mostly makes sure different color regions can't separate from each other leaving cracks or holes, a hooded hanging hole to prevent light leaks, a strain relief that has a slot to secure the power supply wire with a zip tie, and an optional base. I used all Bambu Basic PLA (red, white, black, and cyan) for my prints except for the medal “metal” - that's gold Bambu Silk+ PLA.
NOTE: There is a prime tower configured in the print profile but just turned off since the MakerWorld uploader uses more conservative values to determine if G-code is over an edge. If you want a prime tower you will need to enable it in Studio and make sure it still fits properly and adjust it if not. It prints great as is on my X1C.
It's configured as a 5-color print and looks nice printed on textured PEI. If you have lifting, be sure your build plate is clean, your filament is dry, you can add a few degrees to build plate temperature, and you might try liquid glue (worked great for me and recommended with the text and detail elements). The priming tower (if you enable it) is way in a corner and needs either a pretty fresh plate or glue to make sure it stays stuck down. These lenses do print well but you need good adhesion. I use the Bambu liquid glue on textured PEI and it has let me keep using plates that won't hold squat without it.
Parts I used:
2 each M4x16 machine screws (if using the base)
RF LED Strip Light Dimmer, Amazon.com ASIN B0C58VYTFD
LED strip: USB LED Strip Light Cool White 6000K 5V USB Powered 13.12ft/4M 240LEDs Flexible SMD2835 High Brightness No-Waterproof IP20 LED Tape Lights(2pcs x 6.6ft) ASIN B08M65DKZ7
You can also use Bambu striplight sets if you prefer. Some of this new series of art designs can be printed in just black and white and use an RGB strip to set whatever color illumination you want.
5-24V DC power supply (if you use the LED Strip Light Dimmer above)
Clear or black silicone seal to attach the lens to the lightbox back.
License
You shall not share, sub-license, sell, rent, host, transfer, or distribute in any way the digital or 3D printed versions of this object, nor any other derivative work of this object in its digital or physical format (including - but not limited to - remixes of this object, and hosting on other digital platforms). The objects may not be used without permission in any way whatsoever in which you charge money, or collect fees.
Comment & Rating (0)