

Print Profile(1)
Description
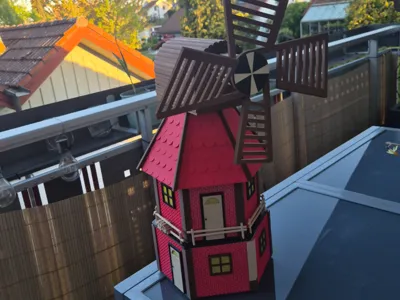
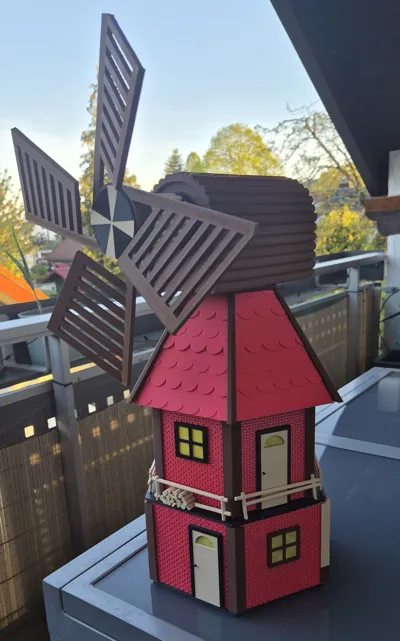
Craft Project: Old Windmill
I designed the windmill as a craft project for children; it needs to be printed and then assembled (glued together).
I printed some parts in different colors to make it a bit more colorful. Therefore, it's best to use multiple filaments or color the parts in the print file as desired.
For gluing, I recommend using a hot glue gun, but craft glue/super glue, etc., also works.
Information about the individual parts (According to print plate from the file)
Plate 1: The actual windmill rotor, this will later be placed on the axle (Plate 2) and then screwed from the front with the spinner.


Plate 3: The upper mill house, where the assembled windmill rotor with axle is inserted, and the window (also Plate 2) is glued on at the back.

Plate 4 + 5: The roof, these two parts are glued together and then the small axle (from Plate 3) is inserted from below to fix the mill house and the roof. Do not use glue here so that it remains rotatable!
Plate 6: The walls for the upper floor, a total of 6 walls are needed, which you can choose yourself.
Plate 7: The connectors for the walls of the upper floor. The walls are inserted into these and then glued. It's best to also glue the roof to the walls.

Plate 8: The base for the upper floor, glue the assembled walls of the upper floor here.
Plate 9: The fences for the upper floor, simply insert these into the base; if they are a bit tight, sharpen them slightly with a knife or file them down a bit.
Plate 10: The walls for the lower floor, again 6 pieces are needed, the rest is as above.
Plate 11: The windows and doors, the number depends on the selection of different walls. Both doors and windows are glued onto the walls.
Plate 12: The base for the lower walls, also glue this as above.
Plate 13: The wall connectors for the lower floor, to be assembled the same way as above; additionally, there are 3 base connectors included, which I glued to the top of the walls (from below) to connect floors 1 and 2.

Plate 14: A ground stake, this is optional and only needed if the windmill is to be placed in the ground (for stabilization). If the windmill is placed on a flat surface, it is not needed. Simply screw it into the bottom base from below.
I hope you have a lot of fun with my model. It is also advisable to print all parts first and assemble them loosely before applying glue ;-). You can, of course, assemble them in any order you like!
Boost Me (for free)
If you like my model, I would appreciate a like, a comment, and of course, a boost
Feel free to follow me for more.
License
You shall not share, sub-license, sell, rent, host, transfer, or distribute in any way the digital or 3D printed versions of this object, nor any other derivative work of this object in its digital or physical format (including - but not limited to - remixes of this object, and hosting on other digital platforms). The objects may not be used without permission in any way whatsoever in which you charge money, or collect fees.
Comment & Rating (1)