Out of the Frame - Phoenix Eruption


Print Profile(2)
![[MEDIUM] 0.2mm layer, 2 walls, 10% infill](https://makerworld.bblmw.com/makerworld/model/USd88aff8093c232/740973040/instance/ada6a24af32ff4cf.jpg?x-oss-process=image%2Fresize%2Cw_100%2Fformat%2Cwebp)
![[LARGE] 0.2mm layer, 2 walls, 10% infill](https://makerworld.bblmw.com/makerworld/model/USd88aff8093c232/740979373/instance/de57d188d5a40684.jpg?x-oss-process=image%2Fresize%2Cw_100%2Fformat%2Cwebp)
Bill of Materials

Description
Boost Me (for free)
Boost = fuel for the next design! If you’ve enjoyed my work, hit Boost and be part of the creative streak. Also, tap Follow to catch the next drop.
Membership
You can sell physical prints of this model as long as you subscribe to my Commercial License Membership.
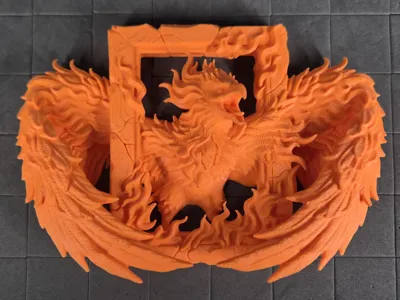
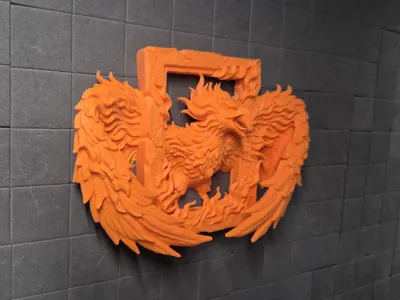
Out of the Frame – Phoenix Eruption 🐦🔥
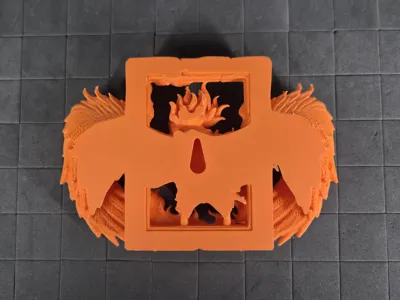
Fiery phoenix erupting dramatically from its ornate frame in the Out of the Frame collection. Massive flaming wings spread wide, tearing through the broken edges while the beak opens in a piercing cry → pure explosive power bursting through reality. Integrated keyhole hanger on the back for easy wall mounting.
Print profiles
This model has plenty of support, so to boost print reliability, I suggest using the filament setting overrides I’ve applied to the print profile. It slightly increases print time with all the Z-hopping but should help prevent the nozzle knocking over the supports.

MEDIUM
100% scale:

- Layer height: 0.2 mm
- Walls: 2
- Infill: 10% Gyroid (infill combination enabled)
- Supports: Tree(auto), on build plate only
Plates
- 100mm 0.2 layer
- 100mm 0.2 layer fuzzy skin (point distance 0.2, thickness 0.1)

LARGE
150% scale:

- Layer height: 0.2 mm
- Walls: 2
- Infill: 10% Gyroid (infill combination enabled)
- Supports: Tree(auto)
Plates
- 150mm 0.2 layer
- 150mm 0.2 layer fuzzy skin (point distance 0.2, thickness 0.1)


Key Printing Tips:
- Disable “Strength → Detect Thin Wall” → gives smoother, cleaner surfaces on detailed parts.
- Always check the slicing preview in Bambu Studio before starting the print.
- Support removal trick: Cut supports into small chunks first, then gently loosen → they usually pop off cleanly without damage.
- Some plates use lots of supports, if so → for reliable prints use these filament settings:
- Filament Overrides
- Z Hop When Retract: 0.6 mm
- Z Hop Type: Spiral
- Travel Distance Threshold: 1 mm
- ✅ Enable Retract When Changing Layer
- Also, disable these settings in Bambu Studio if Variable Layer height is used:
- Supports
- ❌ Disable Independent Support Layer Height
- Others
- ❌ Disable Reduce Infill Retraction
- I’ve found that a 0.15 mm top Z distance works best when printing with variable layer height.
- Supports
- Filament Overrides
Happy printing! Can't wait to see photos of your prints! If you're scaling, experimenting or encounter any issues, let me know → your input helps the next iteration. Please share your feedback for any rating below ⭐⭐⭐⭐⭐ so we can work on improving, thank you!
Boost Me (for free)
Boost / like / collect / follow if it made your day! 🚀
Membership
Now that you’ve printed this model, are you happy with the results? If so, why not sell it? With a subscription to my Commercial License Membership, you’re free to do so.
License
You shall not share, sub-license, sell, rent, host, transfer, or distribute in any way the digital or 3D printed versions of this object, nor any other derivative work of this object in its digital or physical format (including - but not limited to - remixes of this object, and hosting on other digital platforms). The objects may not be used without permission in any way whatsoever in which you charge money, or collect fees.
Comment & Rating (0)