Search models, users, collections, and posts

Fridge Recipe Magnets – Customisable

IP Report

Print Profile(4)

All
P2S
H2D
H2S
H2C
X2D
H2D Pro
A1
A2L
P1S
X1E
P1P
A1 mini
X1 Carbon
X1

0.08mm layer, 2 walls, 15% infill, Ironing
Designer
34.9 h
3 plates
4.3(3)

0.08mm layer, 2 walls, 15% infill, Ironing - No Lines
Designer
19.8 h
2 plates

2x Sourdough Recipe Card - Optimized & Scaled for 0.4 nozzle
1.2 h
1 plate

0.2mm nozzle, 5 Recipes
15.7 h
1 plate

Open in Bambu Studio
Boost
429
1712
22
13
135
38
Released 

Description

Description

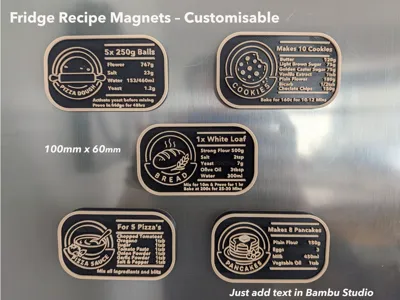
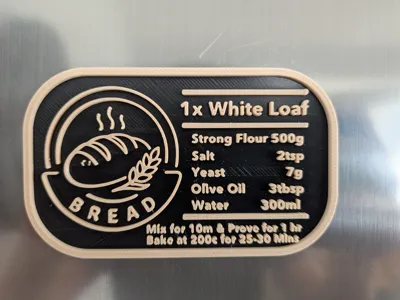
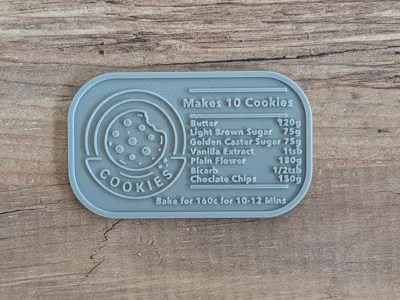
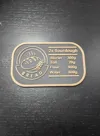
I created these for the recipes I regularly make at home — a quick reference for the numbers I always forget and end up looking up each time. They sit on the fridge and give me instant access to the recipes I make most often. There's also a small space at the bottom for key instructions like temperature or cooking time.
 

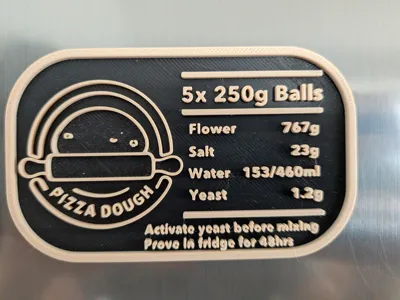
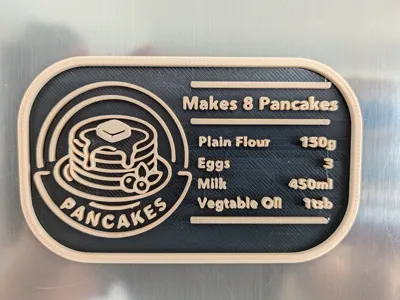
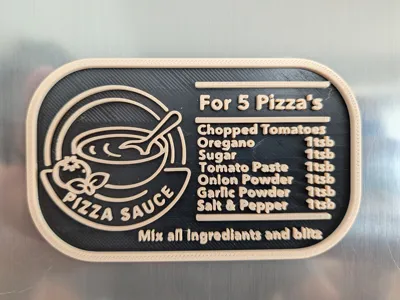
The base is designed in Fusion 360, but all text is added in Bambu Studio and is fully customisable, so you can add your own recipes. My recipes are included on the first plate for reference, but they're tailored to my family's needs (e.g. 8 pancakes or 5 dough balls).

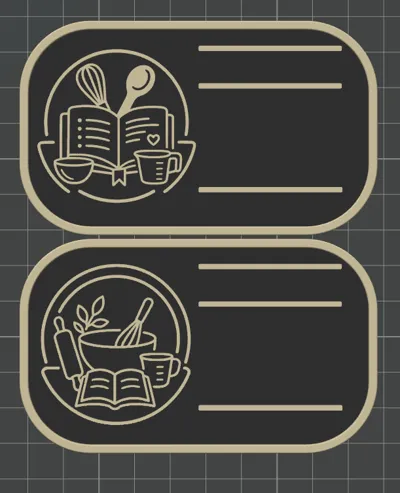
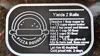
I've also included 2 blank generic cards so you can add your own titles and ingredients from scratch.


Requests Happy to take requests for other recipes or designs — just drop a comment below!

Single Colour & Two Colour Printing These print great in a single colour too. For a two-colour result without an AMS, simply add a filament pause at the layer change. No AMS required!


Text & Font For the font I used Avenir Next. Titles at 6mm and ingredients at 4mm — these print great with a 0.4mm nozzle. For cards with more ingredients I dropped to 3.7mm, and also tested 3.5mm successfully. Note: if you change the font, I'd recommend testing first as sizing and therfore quality can vary between fonts. For the Magnet can leave height as standard 2mm, for the slim version you want to change it to 0.98mm.
 

Painting / Colour Fix When you change the text, you'll lose the colour painting. To restore it, set the colour via layer height using the following values:

  • Magnet version — Height Range: 2mm / Input: 4.23
  • Slim version — Height Range: 1mm / Input: 2.08

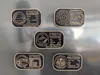
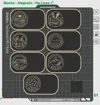
Versions There are two versions:

  • Magnet — designed for an 8x3mm magnet (0.1mm tolerance). A 6x3mm magnet also works well glued in.
  • Slim — no magnet needed, can be slipped into a proving box or drawer.

Dimensions 100mm x 60mm x 6mm (3mm for the slim version)
 

Print Settings

  • 0.08mm layer height
  • 15% infill
  • 2 walls
  • Ironing on top surfaces


A quick note — I've spotted a few spelling mistakes in my pictures, so I've updated the recipes with the correct spelling in the print profile. This only affects you if you're using one of my examples. Tip: always double-check your spellings! I'll be reprinting a few of mine shortly :)

Comment & Rating (22)

(0/1000)

Print Profile
0.08mm layer, 2 walls, 15% infill, Ironing
Very nice design. I’ve already printed three in standard quality with a 0.2 mm layer height, as I don’t think it matters much for this shape. It would be nice to have a variant that prints upside down so the writing and graphics aren’t extruded and can get that nice texture from the build plate.
The profile uploader has replied
0
Reply
Thanks for the rating, I think you are pretty safe to print in 0.2m layer height. Some of my gaps in a's/o's did fill but that most likley down to layer speed, some more investigation needed here. I did play with a flat version but adding text in Bambu on that bottom side is fairly frustrating.
0
Reply
haha, yeah indeed it can be a pain!
0
Reply
Very cool. Any chance you could make the icons separate objects, or upload blanks without icons? I have my own that I want to use for sourdough. Also, Avenir Next is not a standard font in Bambu and is only available commercially from what I can see. Could you use a more standardized font in future iterations? I have found that Arial Black is similar but editing text in Bambu is always a struggle.
The designer has replied
designer
2
Reply
I didn't manually install the font but am working from a Mac, so possibly different. The STL has two blank's in it you can use. Just import into same project and it should keep print settings.
(Edited)
0
Reply
Not sure if you opened this on your PC, but on my Windows 11 Pro desktop, Bambu Studio automatically converted the font to Arial. My suspicion is that if the font used in the model is unavailable, Bambu Studio converts it to the closest similar font on your system. Maybe? Anyway, mine went straight to Arial and I didn't have to do anything to make that change in font.
designer
1
Reply
Boosted
These are great. Any chance you can tell me how you get both the right and left justification alignment for the ingredients? It's driving me crazy. I'm sure it's something easy I'm overlooking, but I can't seem to figure it out. Either way, thanks for the design.
The designer has replied
0
Reply
Its all done by eye as there is no justification alignment. It can be a little tricky. I usually start with Tab key and then will use space bar to line up as best i can.
1
Reply
Boosted
Replying to @jim_3d :
Wow, you've done a great job considering it's all by eye. I printed one that way and turned out great, so I'll do that with others. Thanks for your response!
designer
1
Reply
Nice model. I set my A1 to use a 0.2mm nozzle and I'm really pleased with the end result... granted once you do that the print times increase exponentially, but the quality if worth it. I do have a small request though... any chance you could make the blank templates without the three horizontal lines? I can then add as many lines as I need, where I need them, using the horizontally constrained option in the paint tool. Possible? Please.
The designer has replied
0
Reply
Thank you for the boost, i have just added a second profile and taken off the lines for you. Would be interested to see a picture of the 0.2mm nozzle print. I do not have one currently but would like to see the difference in quality.
(Edited)
1
Reply
Replying to @jim_3d :
Here's a copy of my test print with the 0.2mm nozzle. Kind of a blurry photo, but if you look at the text in the middle of the photo (the text closest to the pizza dough icon), you can get a feel for how it turned out. All text is Arial font at 2mm thickness. Title is 5.0mm, all other text is 3.7mm. Sunlu PLA Meta black and white filament used for the text print.
designer
1
Reply
so many spelling errors
2
Reply
Hello! Is there a reason why the P1S is not listed in the print profile
The designer has replied
Show original
1
Reply
Possibly due to how many fitted on plate. But if you open in studio and move them around, should still work
0
Reply
Thanks for these!
The designer has replied
1
Reply
thanks for the boost 😁
0
Reply
Boosted
Great idea and good design!
The designer has replied
1
Reply
thank you for the boost 😊
0
Reply
Thank you so much for adding the "no line" variant! Thank you, thank you, thank you!
designer
1
Reply
Print Profile
0.08mm layer, 2 walls, 15% infill, Ironing
profile
1
Reply

License

This user content is licensed under a Standard Digital File License.

You shall not share, sub-license, sell, rent, host, transfer, or distribute in any way the digital or 3D printed versions of this object, nor any other derivative work of this object in its digital or physical format (including - but not limited to - remixes of this object, and hosting on other digital platforms). The objects may not be used without permission in any way whatsoever in which you charge money, or collect fees.