V1 X2D AMS HT side-mount for AMS Flipper


Print Profile(3)
Bill of Materials


Description
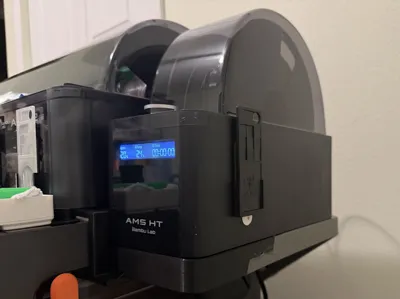
Check out my latest new model - the AMS HT mount for X2D/P2S Standalone or AMS Flipper compatible with my X2D Filament Track Switch Holder and Cable Organizer for AMS HT side-mount.
Boost Me (for free)
If my model was helpful, I always appreciate a thanks, a note, or even a boost :)
*** NEW revamped model now available - AMS HT mount for X2D/P2S Standalone or AMS Flipper V2! ***
Now supports standalone mounting directly to the printer or using Flipper!
--------------------------------------------------------------------------------
If you are looking for my V1 version:
V1 AMS HT side-mount for X2D/P2S printer frame using AMS Flipper for AMS 2 Pro!
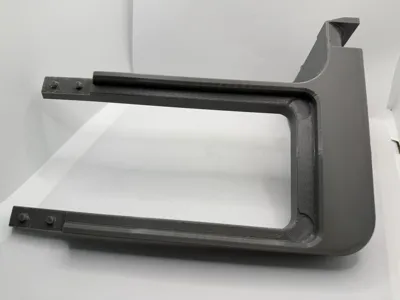
This is a side-mount for the AMS HT for X2D/P2S printer frames and their specific frame geometry built around the idea of making
the mount be highly extensible with add-ons that allow users to pick and mix based on their unique use case.
The model was inspired by the AMS HT Sideholder for AMS Flipper, P1S optimized by @Will.I.Am.G and the concept of harnessing the AMS Flipper by @Jakob_K_Design attached to the back of the printer for mounting it alongside an AMS, or in the X2D's case the AMS 2 Pro that comes with the X2D combo.
The model is carefully crafted around the linear rail belt tension access ports, allowing access for maintenance, and the flipper handle size and groove for a nice flush strong fit.
Core features of the mount
In addition to serving its primary objective of mounting the AMS HT conveniently to the side of the printer, I have built out a library of add-ons, which are optional, but allow significant extension of the basic functionality of being a mount for the AMS HT, as needed, without the need to reprint the core frame.
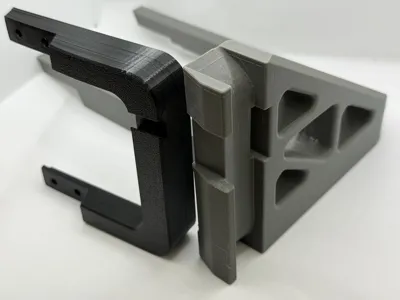
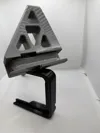
- The model features strong diagonal triangle bracket for strength, with triangular cutouts to limit filament use and doubling as mounting points for snap-fit add-ons to be mounted to.
- The model print profile has been fine tuned for strength, optimizing extrusion settings to maximize strength in the directions needed and limit support interface swaps and harnessing the power of the X2D dual nozzle system. The print profile is optimized to be printed using the X2D using PETG for the frame, with PLA as support interface support layer for crisp results and easy support removal.
Note: As the printer frame is shared between the X2D and the P2S, if printing using the P2S, you will have a few nozzle swaps for the interface layers, but they are minimized to just a few, so it shouldn't affect print time dramatically.
NOTE: Please be careful with resetting settings, they have been carefully set to have repeatable successful prints and hold to the print bed. Optional Add-on: Designed to be compatible with my X2D Filament Track Switch mount for AMS Flipper by having a cutout reserved for the mount and utilizing triangles for chord organization.

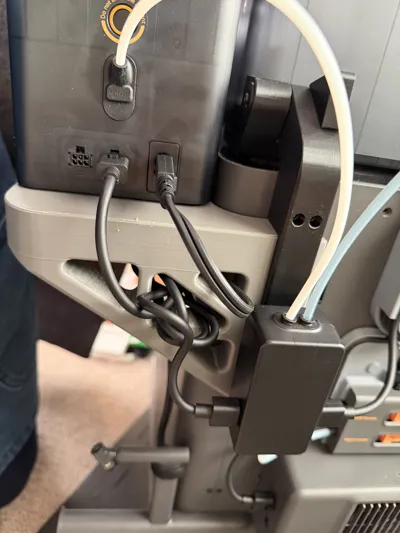
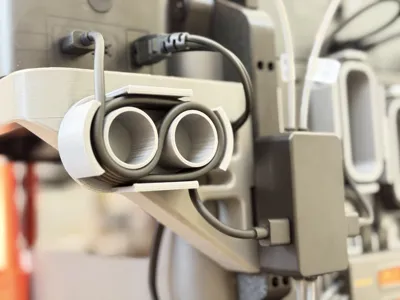
Optional Add-on: Cable organizer with snap-fit mounting using the triangle brackets. Upon request by another user, I designed another add-on to make the cable organization of the 6-pin cable even neater using a figure-8 cable organizer loop that snap-fits into one of the triangle brackets and can be mounted either vertically or horizontally depending on your preference.

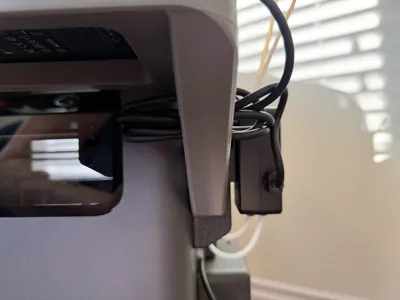
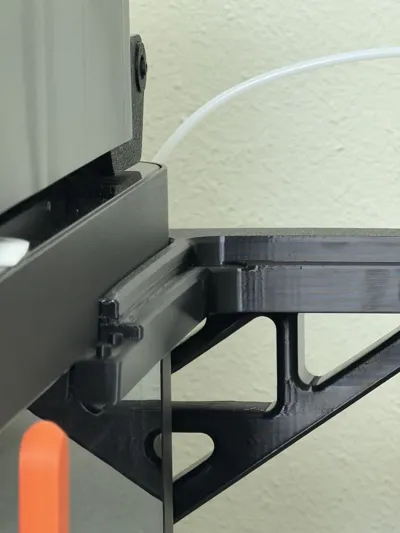
Optional Add-on: Design of a compatible (optional) front support bracket which helps with additional dampening of vibrations when the printer is running. It seamlessly hooks under the front of the side-mount and holds in place atop the printer glass and locked into the front of the side mount bracket using a specially designed interface. The support bracket is entirely removable without tools to access the top glass plate without having to remove the side mount, simply slide out the bracket, do what you need to do and then place it back.

Bonus Recommendation: Strengthen the dampening of vibrations from the printer to the AMS-HT mount via the support bracket using a re-closeable (like 3M Dual Lock, or Velcro) tape pad to the top glass and the underside of the top part (the long narrower side) of the support bracket for shock absorption and still allowing removing the bracket easily if you need access to the top glass without having to take things apart.

Assembly
The assembly is fairly simple and requires just a bit of waiting for the front and back side of the bracket to bond together.
- Dry your filament well! - The arms of the mount are long and utilize the entire size of the build plate, so you want to avoid stringing, warping or lifting off the bed.
- Print the parts - if you have it available, I recommend using the Super Tack Cool Plate for better bed adhesion to reduce the risk of warping/lifting. You may also want to reduce the Aux Fan speed to avoid spot cooling, which can contribute to lifting of large prints, or consider installing an Aux Fan deflector.
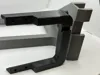
- Print the front side of the side mount
- Print the back side of the side mount
- Print optional add-ons as desired:
- (Optional): Print the front support bracket add-on for extra dampening
- (Optional): Print the Filament Track Switch add-on to mount the Filament Track Switch to the frame over the AMS Flipper Handle and into the AMS HT side mount frame
- (Optional): Print the Cable Organizer add-on for extra neat organization of the 6-pin cable connecting to the AMS HT
- Apply glue on the interface points between the front and back side
I recommend a high strength bonding glue like E6000
NOTE: The curing time of such strong bonding glues is longer than your average glue but provides superior strength. For example, E6000 does become tacky after about 10 minutes, but has an initial curing time of 24 hours to be strong and reaches maximum strength after about 72 hours of curing. You do not have to worry too much about overapplying it as you can cut off or file off excess of cured E6000 afterwards if desired.
Clamp the front side to the back side - this is a tight tolerance fit for maximum hold, so you may need to use tool clamps for leverage to clip things together while the glue settles for maximum strength.

- After the glue has cured, remove the clamps and begin installation of the mount.
Installation
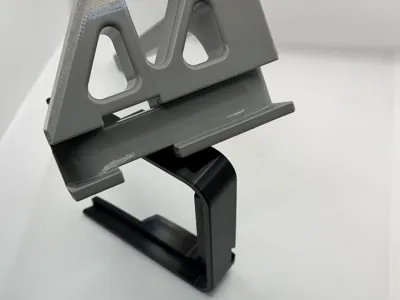
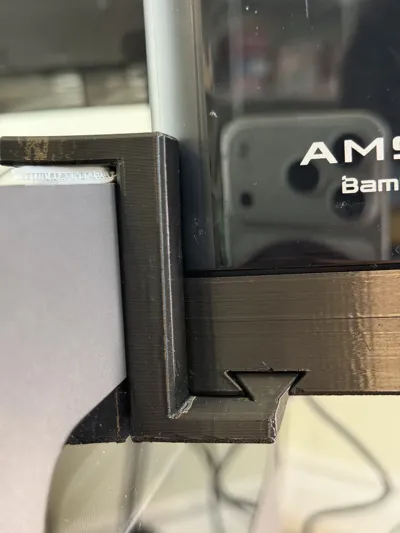
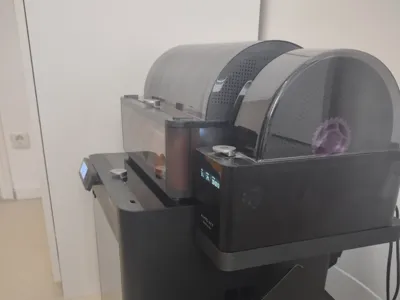
Lift the left side (from the back) AMS Flipper Handle up and clip the mount into the handle - this should sit evenly almost flush on both sides - both sides of the mount have an intentional (visible) partial ridge of a single layer of 0.2mm along half of the exposed side to create a counter clamping force to the AMS Flipper Handle to ensure a strong tight fit, but it will still allow the Flipper Handle to sit flush against the printer frame once aligned correctly as pictured below.
Top and bottom of the AMS Flipper handle should sit flush with the printer if the AMS HT side mount was clicked into place together correctly.
- Lower the Handle onto the printer and check for flush alignment with the back of the printer.


Also pay attention that the cutout for the Linear rail tightening screws sits in the right location.

If mount was correctly clicked into the handle and the handle sits flush as shown above, screw the 4x M3x10mm Allen socket screws onto the printer frame. I recommend starting with one of the bottom screws, but without fully tightening it, and then moving to the top and then finishing the rest of the screws and tightening things into place. Check that the flush fit hasn't shifted in case you tightened one screw before alignment was locked into place.

- If things don't sit flush correctly, repeat Step 1 and 2, check the fit and try again until the mount is properly set in the center of the handle, resulting in a flush fit.
- If this is your initial installation of the AMS Flipper, follow the rest of the AMS Flipper installation instructions to finish installation of your AMS Flipper.
- Optional: Install the front support bracket for extra dampening - you can find the instructions at the model
- Optional: Install the Filament Track Switch mount for AMS Flipper.
Utilize the triangle cutouts in the frame to store and tuck away the cords of the AMS HT.


If you installed the External Spool holder on the bottom of the printer frame, you could route the power chord of the AMS HT through the triangle frame and down and using a cable tie (ideally a good quality Velcro one) attach the chord to the external spool holder for a clean installation.
Optional: Install the Cable Organizer for AMS HT side-mount to organize the 6-pin cable using a neat figure-8 loop

- Done, enjoy easy access to your AMS HT on your X2D/P2S printer.
Print Settings
- Supports: yes, with top interface layer enabled for smooth finish on supported portions
- Note that the triangle cutouts in the brackets do not require supports with the print profile which has optimized bridge/overhang flow/speed settings (as long as you didn't delete them) as you can see from the gif at the print profiles showing a near-perfect bridge. If you don't trust your filament drying, you can re-enable the supports for those areas by deleting the painted support masks, but it will add about one extra hour of print time.
- Brim: yes, for layer adherence of the arms to the bed
- Layer Height: 0.20mm
- Infill: 15% gyroid for strength
- Walls: 6
- Print orientation:
- Upside down, flat on the bed - carefully oriented for maximum strength
- Material:
- Parts: Dry PETG for strength and temperature resistance due to the close proximity to the printer. Loaded into Primary (left) nozzle - I decided to alternate between Black and Grey between parts for a fun mix matching the printer finish which mixes black/charcoal and silver chrome elements. But you can also print everything in a single color of course.
- Support Interface: PLA or specific support material to make removal easy (PLA won't bond strongly with PETG, so removal is easy, but the bond is strong enough for print support and using just interface layer reduces nozzle swaps). Loaded into Aux (right) nozzle if printed on X2D
- Print Plate recommendation: Cool Plate SuperTack
Boost Me (for free)
If you like my model and would like to share your thanks, a boost is always graciously appreciated. Thanks :)
I enjoy crafting and making things, from practical tools to make life easier, to crafty bits and silly or pretty artsy things.
Check out my other models and see if something takes your fancy.
I love seeing people's prints and applications of my models, so if you print one of my models, please don't forget to leave a review or comment with a picture :)
This remix is based on
License
You shall not share, sub-license, sell, rent, host, transfer, or distribute in any way the digital or 3D printed versions of this object, nor any other derivative work of this object in its digital or physical format (including - but not limited to - remixes of this object, and hosting on other digital platforms). The objects may not be used without permission in any way whatsoever in which you charge money, or collect fees.
Comment & Rating (69)