AMS 2 Pro "Bambu" Bracket


Print Profile(1)
Description
Boost Me (for free)
Boost my self esteem if you like my work to help design more useful prints!!!
UPDATE!!! I have a brand new Skadis & Wall Mount Version available here: All in One Bambu Bracket
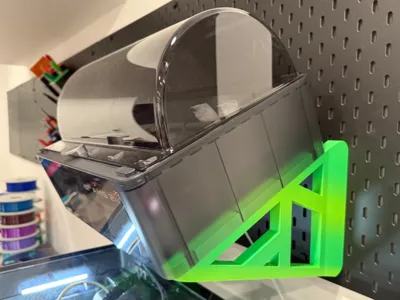
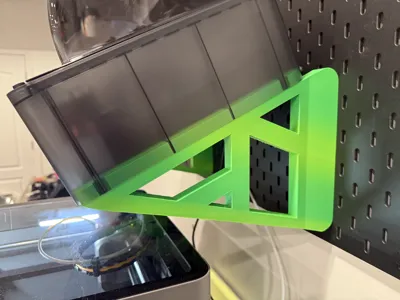
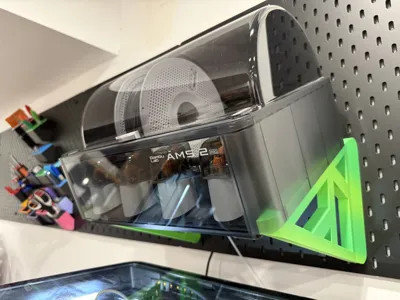
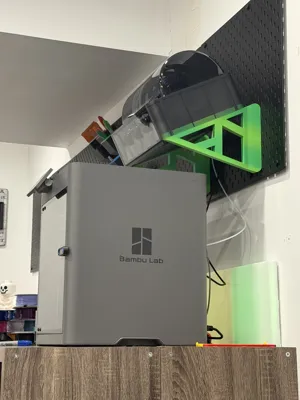
This is the Ikea Skadis AMS 2 Pro “Bambu” Mount.
Unsatisfied with the other mounts currently available I took it upon myself to design something completely new. Featuring a comfortable 30 Degree angle, this allows the AMS to be viewed and spools changed without having to use a stool or lift yourself up to get to the top of the machine. The lid of the AMS can be opened, and stays in place without having to use an extra hand to hold it or clips to keep it in place while changing spools.
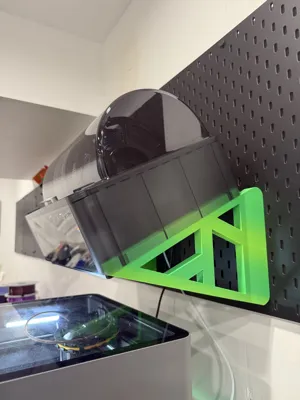
The design allows you to save valuable counter space while keeping your AMS close by.
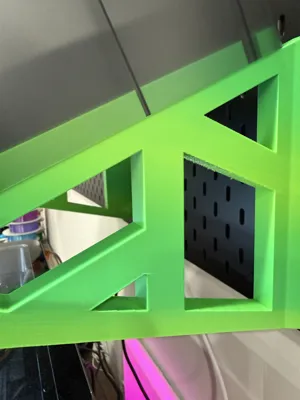
Carefully and artfully designed, the support cut outs in the side of the brackets form the Bambu Labs Logo, hence the name “Bambu Bracket”.
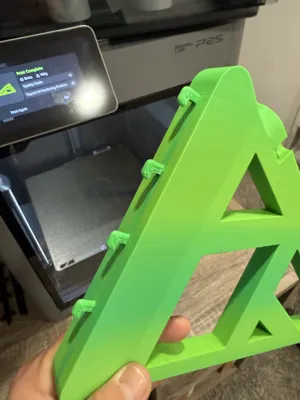
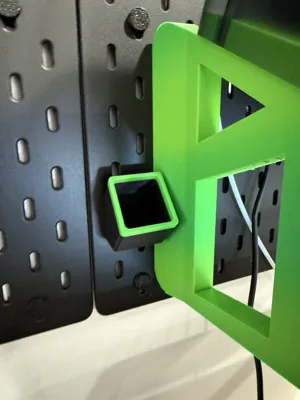
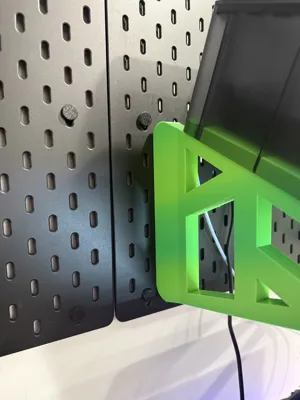
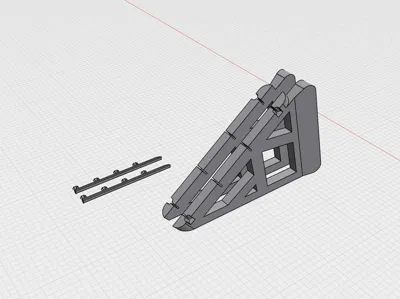
For safety and size requirements, each side of the bracket will need to be printed on its own build plate and with supports, but assembly of the pins into the bracket is simple. Please insert the 5mm Skadis pin stick into the AMS bracket before placing on the wall. Once on the wall, gently tap on the top of the bracket to lock the pins into the Skadis board, creating a secure fit.
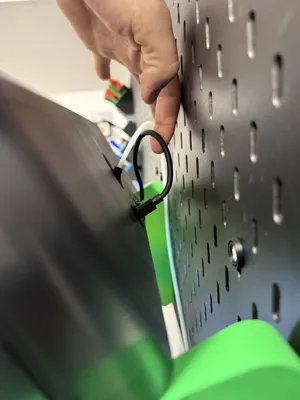
There is a generous amount of room behind the AMS to the wall, so you can connect the power and data cables as well as the PTFE tube once it is already mounted to the wall.
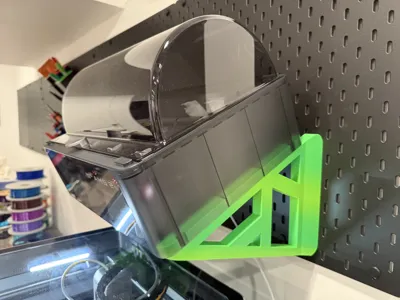
This bracket is a “to the mm” perfect fit to the AMS 2 pro and is not compatible with any other version.
Due to the size of the bracket, this will only work on build plates of 256x256 or larger.
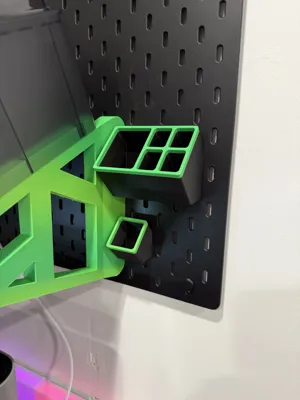
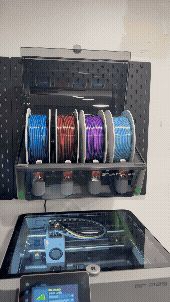
Additionally the brackets are a perfect fit on the outside sides for more skadis accessories to be used up to the mm next to them, not wasting unnecessary wall space. Underneath the AMS is a great place for cable management and Skadis power brick storage (NEW PART COMING SOON!) to keep out of sight and out of mind.
I also recommend reinforcing your Skadis panels at the top and bottom height of the bracket to prevent the weight of the AMS from pulling the Skadis panel off of the wall.
FDM printing and design is a new hobby for me, so I would love to hear your feedback from this project!
License
You shall not share, sub-license, sell, rent, host, transfer, or distribute in any way the digital or 3D printed versions of this object, nor any other derivative work of this object in its digital or physical format (including - but not limited to - remixes of this object, and hosting on other digital platforms). The objects may not be used without permission in any way whatsoever in which you charge money, or collect fees.
Comment & Rating (13)