Tilting Base for Makita Trimmer


Print Profile(2)
Description
🚀 Support My Creative Journey🚀
If you find my designs helpful or inspiring, there are two ways you can help me keep creating:
Boost Me (for free)
If you're on MakerWorld, a "Boost" helps me reach more makers and keeps the filament flowing! It's Free!!🚀
Buy me a coffee☕: For those who want to go the extra mile to support my work and my family.
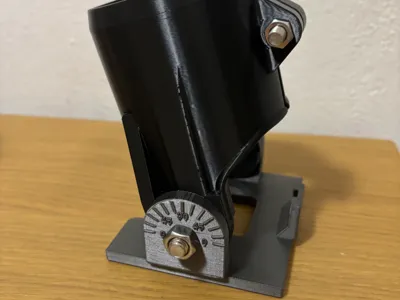
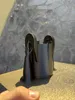
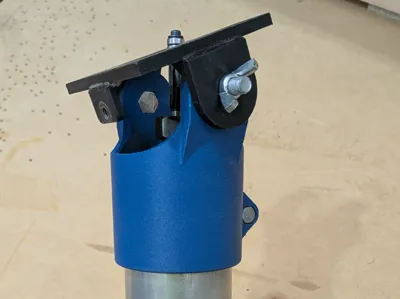
🔧 Tilting Base for Makita/Katsu Trimmer – Bevel Cuts
Tired of being limited to straight 90° cuts with your Makita trimmer? This tilting base gives your router full bevel capability — opening up a whole new range of cuts without buying a new tool.
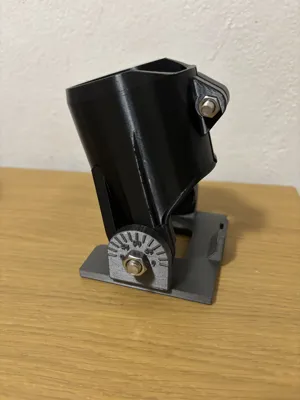
Designed as a direct replacement for the original base, it lets you tilt the trimmer to the angle you need and lock it in place, while the engraved scale on the side tells you exactly where you are at all times.
✨ Features
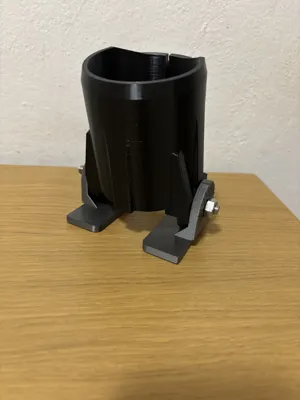
- Tilt Mechanism — Replaces the original flat base and allows the trimmer to be angled for oblique and bevel cuts.
- Angle Scale — Engraved notches on the side panel let you read the current tilt angle at a glance — no guessing, no protractor needed.
- Direct Fit — Designed specifically for the Makita trimmer. No modifications to the tool required.
- Two-Part Design — The base is made of two parts joined by M8 pivot bolts, allowing smooth and repeatable angle adjustment.
- Rigid Construction — Printed in PETG for durability and heat resistance during prolonged use.
🖨️ Printing Tips
- Material: PETG recommended — better heat and mechanical resistance than PLA
- Walls: 4 perimeters minimum for strength at the hinge and mounting points
- Infill: 30% Gyroid
- Layer height: 0.2mm
- Orientation: Print flat to maximize layer adhesion across the base surface
- Supports: Required for the hinge area
🔩 Hardware Required
- 2× M8 hex bolts + 2× M8 nuts — pivot joint between the two parts
- 1× M6 bolt + 1× M6 nut — clamp that locks the base onto the router
Tip: Instead of using a standard hex key to adjust angles on the fly, print a custom knob for both the M6 and M8 bolts. Search "M6 knob" or "M8 knob" on MakerWorld and pick the one you like — it makes angle adjustments fast, comfortable, and completely tool-free! 🎛️
⚙️ Assembly
- Print all parts and clean up any support material from the hinge area.
- Insert the two M8 hex bolts through the pivot holes on both parts and secure each with an M8 nut — leave them slightly loose to allow tilt movement.
- Set the desired bevel angle using the side scale.
- Tighten the two M8 nuts to lock the angle in place.
- Slide the base onto the Makita trimmer and secure it with the M6 bolt and nut through the clamp slot.
- If you printed a knob, install it on the M6 bolt for quick tool-free tightening.
- Run a test cut on scrap material before working on your actual piece.
⚠️ Safety Notes
- Always wear appropriate eye and hearing protection when operating routing tools.
- Verify the angle is fully locked before starting any cut.
- Test fit and fastener positions against your specific trimmer model before printing.
- This part is printed — always inspect for cracks or wear before each use.
📦 Designed for the Makita and Katsu trimmer. Always verify fit before printing the full set.
Comment & Rating (0)