Magnetic Tile Rail


Print Profile(1)

Description
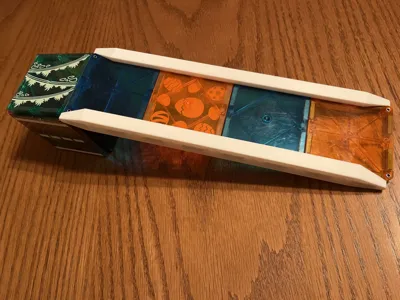
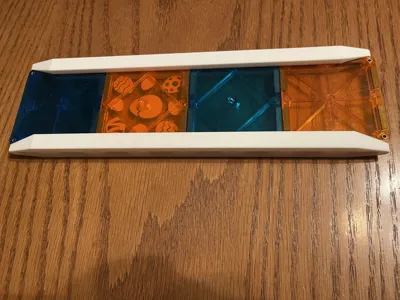
Expand your magnetic tile collection with custom, 3D-printable magnetic tile rails.
Bring new life to your magnetic tile collection with these 3D-printable designs! Use with Magna-Tile or Picasso Tile, or my own magnetic tiles found here.
Boost Me (for free)
Boost me, for free!
Tiles are designed to hold two 20x5x2mm magnets per cavity for a strong, reliable connection. I tried these at first with just a single magnet in each cavity, but found they don't stick well enough. I then increased the cavity size to allow enough room for 2 magnets in each cavity, and that seems to have the right amount of grip compared to other tiles my kids have. At least in the US, it's probably cheaper to just buy the rails as the cost of the magnets is fairly high and you need to use so many in each rail. That said, others have asked for it so here it is.
Magnets: Here is a link to the magnets that I used (should be 20x5x2mm but if the link populates something else, let me know). If anyone knows of any cheaper magnets out there, or if there's a different size that would work better, let me know!
https://www.amazon.com/dp/B0DK72WDY6?ref_=ppx_hzsearch_conn_dt_b_fed_asin_title_5
Please Use the provided print profile for the best results. The layer height and pause for magnets settings are fine-tuned to ensure a perfect fit. If you open in Bambu Studio and adjust the layer height, the pause is likely going to be in the wrong place and the cavity may also be too small to fit the magnets, or too large and the magnets will rattle excessively. When printing using my profiles on a Bambu Lab machine, the pause will stop on the correct layer to allow you to insert the magnets. Just make sure to double check the polarity against another tile to make sure you have it right, install the magnets, and then resume the print.
I would personally recommend using the Cool Plate SuperTack or some other similar high-adhesion plate. If using a PEI sheet ensure the Aux fan is turned off and your build plate is CLEAN, otherwise you may experience warping at the edges. I didn't need to use a glue stick, but feel free to give that a try if you need to.
License
You may create derivative works based on this object, provided that all such derivative works are published exclusively on the MakerWorld platform and include proper attribution to the original creator. You may not share, upload, host, distribute, or publish this object—or any derivative work of this object—on any other digital platform, marketplace, or distribution channel. Commercial use of this object and any derivative works is strictly prohibited. This includes, but is not limited to, selling, renting, sublicensing, or using the object in any context in which you receive monetary compensation or other financial benefits.
Comment & Rating (0)