Footvolley Balls - No AMS Required


Print Profile(2)
Bill of Materials

Description
Boost Me (for free)
If you enjoyed printing this model, consider boosting it. Your support helps me keep designing more models like this. Thank you!
Description
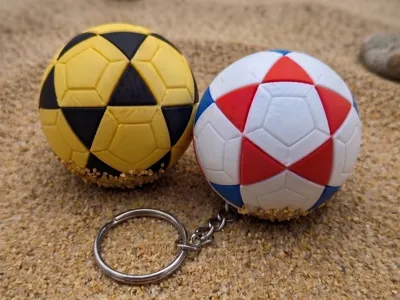
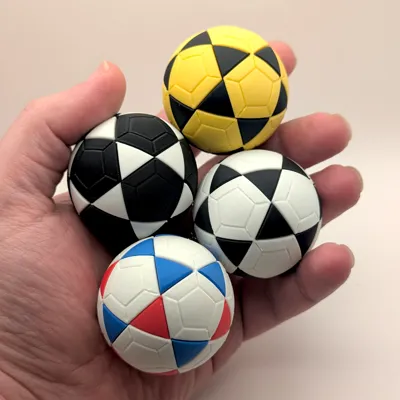
This footvolley ball is part of the Archigami Sports Ball Collection, exploring a more complex approach to spherical assembly through a flowing, triangular pattern.
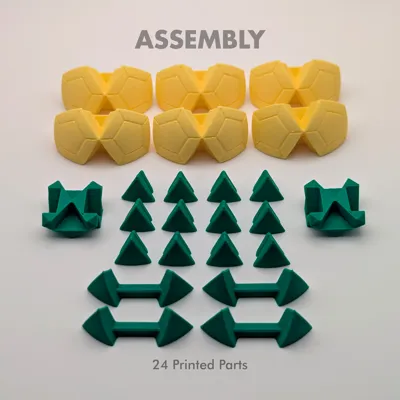
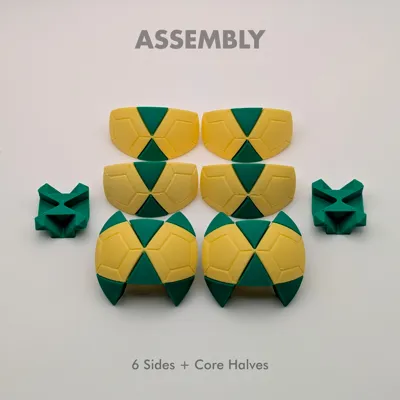
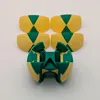
Unlike the soccer ball, this design is built from 30 individual panels, making it the most challenging ball in the collection so far. To make assembly intuitive and manageable, the panels are grouped into larger sub-assemblies (wedges), transforming a complex system into a simple, repeatable process.
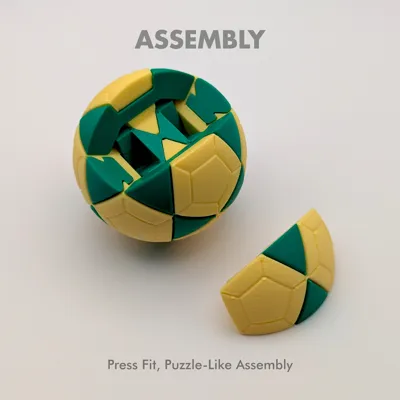
The result is a smooth, dynamic sphere with a distinctive pattern and a satisfying, puzzle-like build experience.
Design Features
- Built from 30 panels, grouped into modular wedges for easier assembly
- No supports, no waste, no glue
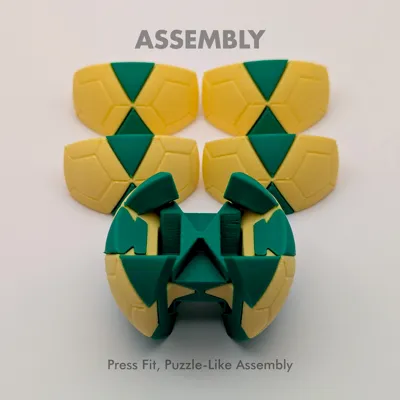
- Press-fit, puzzle-like connections
- Designed for both AMS and non-AMS workflows
- Clean spherical form with flowing triangular geometry
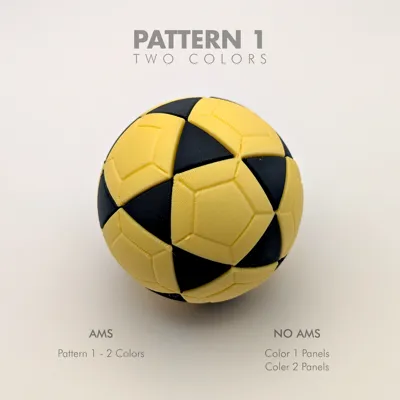
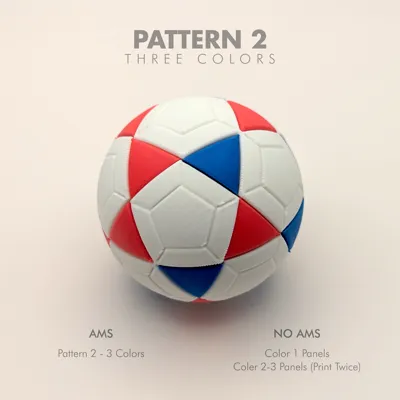
- Multiple color pattern options using the same core parts
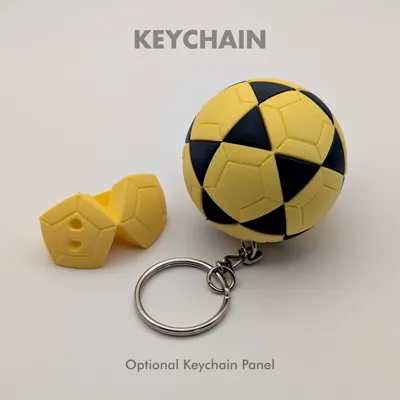
- Optional keychain-compatible panel
- Scaled to match the collection (1:5 scale)
Assembly Instructions

- Start with 4 wedge groups (each made of two pentagon panels).
Attach 2 triangular panels to each wedge to form partial sections. - The remaining 2 wedges also consist of two pentagon panels, but include channels designed to receive double triangle connections.
Attach the corresponding triangle panels to complete these structural wedges. - Arrange the core parts into two mirrored halves.
Use the wedges from Step 2 to clamp and connect both halves together.
These act as structural connectors across the seam. - Slide in the remaining 4 side panels one by one to fully close the sphere.
- Use the optional keychain panel for one side if needed.
- Once all parts are in place, press firmly around the ball to ensure all connections are fully seated.
Printing Notes
- Profiles tested on Bambu Cool Plate (SuperTack) with Bambu Matte filament
- Matte filaments provide the best finish and reduce visible layer lines
- All parts are designed for clean, support-free printing
- AMS Users: Print full ball directly in one build plate depending on the selected pattern
- Non-AMS Users: Parts are grouped in plates per color for efficient printing
Sports Ball Collection
This model is part of the Sports Ball Miniature, a growing series where each ball explores a different geometric approach to building spheres using modular assemblies.
Browse the collection by clicking the image below.

License
You shall not share, sub-license, sell, rent, host, transfer, or distribute in any way the digital or 3D printed versions of this object, nor any other derivative work of this object in its digital or physical format (including - but not limited to - remixes of this object, and hosting on other digital platforms). The objects may not be used without permission in any way whatsoever in which you charge money, or collect fees.
Comment & Rating (33)