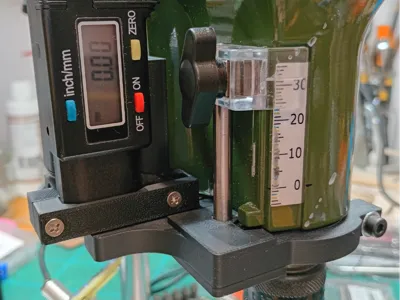
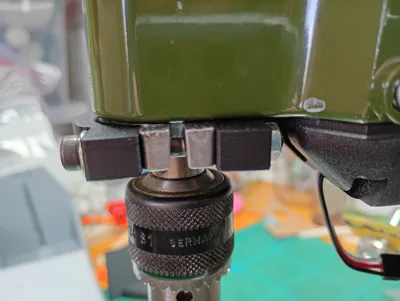
Proxxon TBM 220 Digital depth drilling gauge


Print Profile(1)
Description
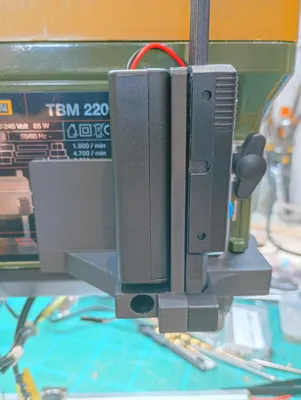
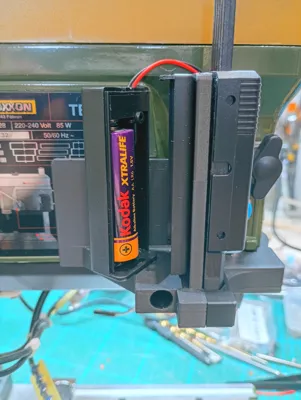
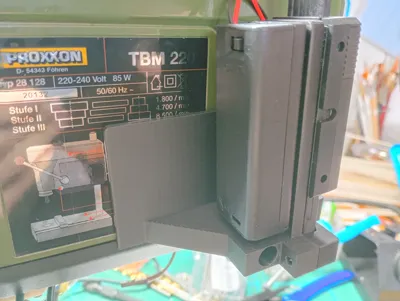
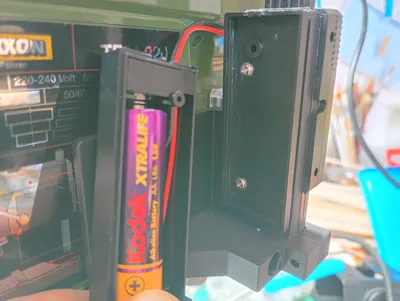
This adapter allows you to use a cheaply available digital tyre tread depth gauge on your Proxxon TBM 220 pillar drill. It has provision on the rear for fixing a ‘AA’ Battery box with a switch and on mine I just soldered the wires from the box into the coin cell battery contacts on the tread depth gauge. One annoying thing with these digital gauges is that they consume the battery power even when switched off, draining the battery prematurely. Fitting the AA cell with a switch bypasses this issue and an AA cell has 10 times the capacity of the coin cell.
You will need a longer M4 screw where it fixes to the body, replacing the M4 x 70 as supplied with the drill with an M4 x 75mm.
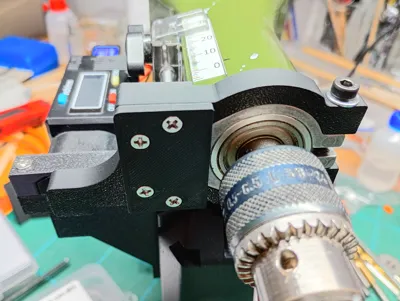
4 x M3 x 10mm countersunk self tapping screws secure the plate to the upper of the drill chuck.
2 x M3 x 20mm countersunk screws secure the tread depth gauge front bracket to the body.
M4 x 40mm machine screw to replace the original that secures the plate to the drill chuck upper, plus an M4 nut to go on the back of that.
2 x M2 x 6mm pan head self tapping screws to fix the battery box to the gauge body.
To drill the battery box hold in against the gauge holder level with the top and drill through from the gauge holder side with a pilot. Then remove the box and redrill with a larger clearance drill for your screws. The battery box cover slides down to remove so this is why the box needs to be higher than the base and thus level with the top to give it the space to slide down to open.
I cut the left hand side of the tread depth gauge's foot off to make it more compact and the mount is shaped to reflect this. I would also recommend using some double sided tape on where the square part of the gauge holder contacts the drill body, just to stop it moving about. The M4 screw holds it but doesn't stop it rotating, I was reluctant to drill any holes in the drill body. One note, don't overtighten the M4 x 75mm screw as it seems to make the quill on the drill bind up. Just a nice nip up seems to do the trick.
One other thing, the digital tread depth gauge naturally has some resistance to movement which would inhibit it from rising and falling freely, so what you need to do is remove the sticker on the back to reveal four small screws, remove these screws and pop the cover off. You will notice a short length of metal which makes contact with the plunger and provides resistance for holding the reading when you use it as a tread depth gauge. But for our purposes it needs to be removed so that the plunger can fall easily under gravity. So simply pop it out and file under B1N. Reassemble the gauge.
All the parts for this can be found on Ali-express, the Tread depth gauge is about £2.50, battery box £0.80 and the screws were in the order of £2 for 10.
Good luck!
Comment & Rating (1)