Search models, users, collections, and posts

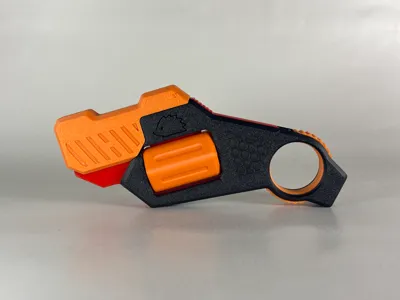
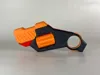
RevoSpin-Slider - tactile slide and ratchet fidget

Print Profile(1)

All
A1
H2S
X2D
P1P
X1
H2D
H2C
P1S
P2S
H2D Pro
X1 Carbon
X1E
A2L

0.2mm layer, 3 walls, 15% infill
Designer
3.3 h
2 plates
5.0(19)

Open in Bambu Studio
Boost
368
929
47
19
440
306
Released 

Description

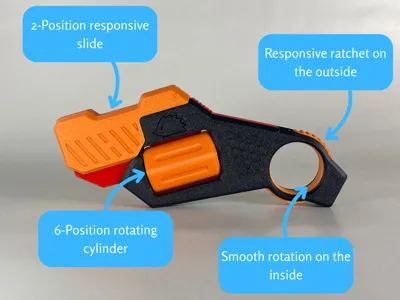
4 fidget features, tactile patterns and no hardware required!

四种解压玩法,触觉纹理设计,无需任何五金配件! 🇨🇳


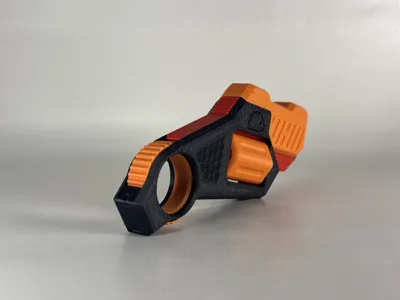
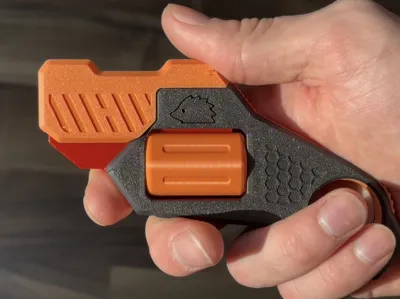
So i decided to try making a fidget toy that i would occasionaly use, and this is how it worked out. It combines satisfying features of pistol replicas with a ratchet ring inspired by a karambit. All packed in a simple package comfortable enough to be held in multiple orientations.


Whats needed?

For this project you will only need its printed parts, and some filament pieces for keeping it firmly together.


Print and assembly notes

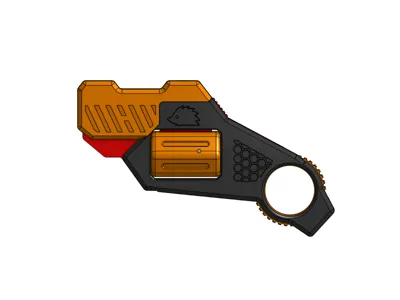
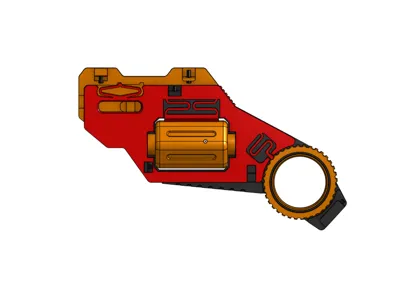
The profile is divied into 2 plates - the mechanism that must be printed in PETG/PCTG, and all the other parts that can be printed in PLA (mixing colours can look really cool :D). As always, keep the orientation as it is in the provided files. For the cylinder, you will have to use some simple supports - feel free to use settings from my preset, or your own. For the rest of the parts, make sure to turn the supports off, or the printer may try to squeeze them under the tactile patterns on the surface. Make sure to have your filaments well calibrated, because for a model this size, the tolerances have to be quite small.


Assembly is quite simple if you follow the gif below. First you need to assemble the mechanism, shell and all the ,,spinny" parts by putting it together and sliding filament into 3 holes (front, top and on the bottom end of the shell near the ring). Afterwards you just add the slide parts from both sides, and insert 2 more pieces of filament from the top. Some holes may be too tight on your printer, if that happens widdle the filament down a little with a knife. Also for your safety make sure to use a thin knife to cut the filament flush with the body (can also be achieved by pulling it out a little, snipping it and using the end of your cutters to push it back in), because exposed cut filament can be quite sharp. 

Make sure to follow the instructions and only add the slide on the body after you have assembled the rest - if you add it before, you will not be able to assemble the rest. 


Check out this video by user @Labax :


Thanks to everyone who decides to give it a try, I hope you have some fun with it. I will appreciate any like, comment or boost. Your feedback is also appreciated so if you have any questions/suggestions, feel free to send me a comment or a private message.


Boost Me (for free)

Help me get one step closer to buying a P2S (or an X2D :D), so i can explore more materials and hopefully keep bringing you new models :-)


Disclaimer: This model is not a gun, does not shoot any projectiles and it is not designed to do so. 

Consider following me to see my newest projects as soon as they get published :-)


Also if you are interested, check out some of my other models:


Utility knife for pocket carry


Practical tie for your extension cables


Comment & Rating (47)

(0/1000)

Print Profile
0.2mm layer, 3 walls, 15% infill
Nice model! I made a short with it https://youtube.com/shorts/gCf4FejA4A4?feature=share
The profile uploader has replied
profile
1
Reply
wow thank you so much! Im glad you like it
(Edited)
1
Reply
Would it please be ok if i put the link to your video into the model description?
(Edited)
1
Reply
Replying to @mino45628 :
Of course! It would be an honor for me
(Edited)
profile
1
Reply
Print Profile
0.2mm layer, 3 walls, 15% infill
Great print. Play features are cool, all work fine. For the base (second plate) you can use pla and don't have to use the one listed. I tried it and all went well. I printed this on my Bambu Lab A1 (the first plate I used grey PLA and the second plate I used green pla). It took a total of 2 hours (around 1hr 10 mins for plate 1) + (50 minutes for plate 2). this is my third ever print and everything was fine. Thanks for the great design! This is fun.
The profile uploader has replied
profile
1
Reply
Hi, thank you! You probably can use PLA, however I can not recommend it because I do not know how long it will last and keep its flexibility. I hope it works well for you and lasts long! :-) I strongly recommend trying some PETG if you never tried tho, not just for this model. It is more durable and flexible, but still easy to print - good for anything functional.
0
Reply
Replying to @mino45628 :
ohh okay, I'll look into it. Thanks again!
(Edited)
profile
1
Reply
Print Profile
0.2mm layer, 3 walls, 15% infill
Overall a really good print, tolerances were just right and assembly went smooth. The end result is satisfying in many ways just as described. However, the brim on the PLA parts was quite annoying and I considered going with four stars just because of how fused it was. I will probably print another without the brim in a different color scheme. Thank you for the model, great design!
(Edited)
The profile uploader has replied
profile
2
Reply
Thank you for your feedback, I am happy it works, and also glad to see some pictures. I will make sure to edit the profile as soon as possible, making the gap bigger/remove the brim entirely.
(Edited)
1
Reply
Print Profile
0.2mm layer, 3 walls, 15% infill
love this printed in all pla and it worked beautifully
profile
1
Reply
Print Profile
0.2mm layer, 3 walls, 15% infill
Awesome model. Great job with details and engineering of this to fit perfectly everywhere.
profile
1
Reply
The printing turned out to be of very high quality and passed without any problems. I printed PETG Basic (white), PLA Mate (black), PLA Basic (orange). Everything is working fine, spinning and moving. Thanks for the model and design!
designer
1
Reply
Print Profile
0.2mm layer, 3 walls, 15% infill
Printed perfectly. Went together easily. Works great 👍
0
Reply
how does this not have any comments!? this thing’s amazing!!! wish I could boost if I had any! :)
The designer has replied
designer
2
Reply
Thank you so much! I am glad it works for you.
0
Reply
does it make noise??
0
Reply
Replying to @user_2567915486 :
it did for me :), but if it didn’t work for u it might be cuz i have some custom print profiles
0
Reply
Print Profile
0.2mm layer, 3 walls, 15% infill
profile
1
Reply
A1 mini version?
The designer has replied
designer
1
Reply
I believe all of the components are small enough to fit a1 mini. I dont know if the filament and user presets transfer as well, but i believe they should. As far as i know, only notable difference between A1 and A1 mini is size - just print the PLA parts in multiple batches.
0
Reply
Replying to @mino45628 :
thank you
1
Reply

License

This user content is licensed under the MakerWorld Exclusive License.

You may create derivative works based on this object, provided that all such derivative works are published exclusively on the MakerWorld platform and include proper attribution to the original creator. You may not share, upload, host, distribute, or publish this object—or any derivative work of this object—on any other digital platform, marketplace, or distribution channel. Commercial use of this object and any derivative works is strictly prohibited. This includes, but is not limited to, selling, renting, sublicensing, or using the object in any context in which you receive monetary compensation or other financial benefits.