WLED Smart Candle Set – Home Assistant, ESP32


Print Profile(1)

Description
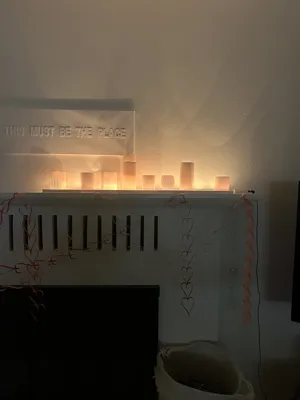
WLED Smart Candle Set — Home Assistant Compatible, No Cloud, Real Flicker
A set of 3D-printed candle shells driven by WLED on an ESP32-WROOM. Designed to look like real decor. Integrates natively with Home Assistant — no cloud, no proprietary hub, no app required.
WHAT IT DOES
Each candle shell sits over an SK6812 RGBW LED. WLED handles the flicker patterns, color, and brightness. Because it's WLED, Home Assistant sees it automatically through the native WLED integration — shows up as a light entity you can tie into scenes, automations, presence detection, whatever you want.
I run mine on a presence sensor + time-of-day trigger: candles fade on at dusk when someone's home, and fade out at bedtime.
PRINT SETTINGS
Material: PLA (white or natural) Matte looks great
Wall thickness: 1 layer — this is critical for light diffusion. Thicker walls block too much light; 1 layer gives a warm, even glow.
Supports: None needed
PARTS LIST (~$35 total)
- SK6812 RGBW LEDs (100pcs) — https://www.amazon.com/dp/B07CBTMSTW — $20.99 (you'll use 20, plenty of spares)
- - JST SM 3-Pin Connectors (20 pairs) — https://www.amazon.com/dp/B01DC0KIT2 — $9.99 (plug-and-play, no soldering between candles)
- - ESP32-WROOM dev board — search Amazon/AliExpress — ~$5-8
- - 5V USB power supply — you probably have one (standard iPhone/USB charger works fine)
- - PLA filament — whatever you have — ~$2-3 worth
WIRING
All 20 SK6812 LEDs are wired in series on a single data line from the ESP32.
ESP32 GPIO 16 → LED 1 → LED 2 → LED 3 → … → LED 20
Connections per LED:
- DIN (Data In) from previous LED's DOUT (or ESP32 GPIO for the first LED)
- - DOUT (Data Out) to next LED's DIN
- - VCC → 5V
- - GND → Ground
The JST connectors make each candle a plug-and-play module — rearrange or replace individual candles without resoldering.
WLED SETUP
- Flash WLED to your ESP32 at https://install.wled.me (works right in Chrome)
- 2. Connect to the WLED AP and configure your WiFi
- 3. In WLED settings: LED output = SK6812 RGBW, LED count = 20, color order = GRBW
- 4. For candle flicker, use the “Candle” or “Candle Multi” preset — set to warm white (~2700K)
HOME ASSISTANT INTEGRATION
Once WLED is on your network, HA auto-discovers it. If not: Settings → Devices & Services → Add Integration → WLED → enter IP address. Done — it shows up as a light entity for scenes, automations, dashboards.
DON'T WANT TO BUILD IT YOURSELF?
I sell pre-built, fully assembled sets on Etsy — flashed, wired, and ready to plug in: https://www.etsy.com/listing/4482055635
Comment & Rating (0)