Atlético de Madrid - w/wo AMS


Print Profile(1)
Description
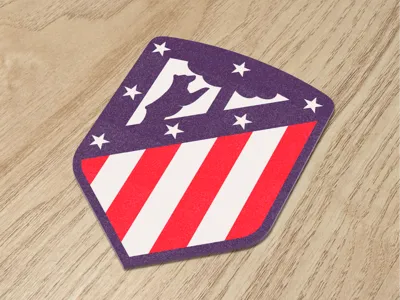
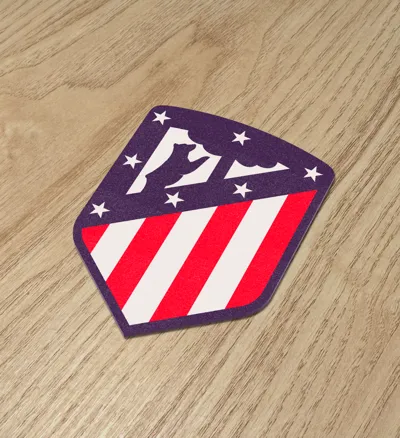
Atletico de Madrid insignia. “Coraje y Corazón”.
---------------------------------------------------------------------------------------------------------
About the process and Print Profile:
There are 3 plates depending on your needs and 3D printer set up:
- AMS facing up: this is the Logo with the text facing up ("looking" at the top of the printer). You need to use this with 3 colors on the AMS.
- AMS facing down: this is the Logo with the text facing down on your build plate if you want to get the plate texture. You need to use 3 colors on the AMS.
- No AMS: if you are just like me, and you don't have an AMS yet, you have to use this plate. The process is simple but a bit manual, you have to:
- chose the position of all objects and never change it again during the process (make sure that you choose a position where the nozzle does not touch the build plateduring the start up process),
- for each of the colors that you want to use, you're going to have to do a “new” print, without removing the previously printed objects:
- enable each of the same color objects to print (eg all the parts that you want to be indigo purple) and disable the rest of the colors (Process > objects > No AMS Plate > check/uncheck given the color). Print that,
- when that print ends, manually set up the build plate temperature to prevent the print from ungluing from the plate,
- remove everything that got printed on the startup process except the actual Logo objects (eg: skirt, nozzle cleaning line, etc),
- enable a new set of objects of the same colors (and disable the one you just printed) and change the external spool in your 3d printer to that new color you're going to print, eg white.
- repeat the process with all the colors, make sure that the last one is the background one, in this printed example the last one would be white background.
- NEVER EVER THINK ABOUT TOUCHING OR REMOVING THE BUILD PLATE UNTIL YOU PRINT ALL COLORS!!!
- Enjoy your multi-color print without AMS!
In this particular case, I recommend the following order for the colors: indigo purple > white > red.
I found out that if I did white first, then the white would unglue the black parts, so this is the order that worked for me.
If any of the small parts get unglued, don't get discouraged! you can choose only that object in a new print and re print just that, without needing to start over!
I know it's a pretty laborious process and seems hard at first, but feel free to reach out if you have any questions! Once you get the hang of it, it becomes easier and makes your prints more versatile!
If you liked this print and process, follow my profile to find out more about my designs. And if you loved it, you can help me out with a boost or a like, that helps me to continue to develop designs like this one :)
Boost Me (for free)
If you like my work, consider a free help boosting my models 😄
License
You may create derivative works based on this object, provided that all such derivative works are published exclusively on the MakerWorld platform and include proper attribution to the original creator. You may not share, upload, host, distribute, or publish this object—or any derivative work of this object—on any other digital platform, marketplace, or distribution channel. Commercial use of this object and any derivative works is strictly prohibited. This includes, but is not limited to, selling, renting, sublicensing, or using the object in any context in which you receive monetary compensation or other financial benefits.
Comment & Rating (0)