


Print Profile(2)
Bill of Materials


Description
Boost Me (for free)
Like my models? Consider boosting and following me to show your support!
You've seen the videos on Instagram, now download and make it yourself!
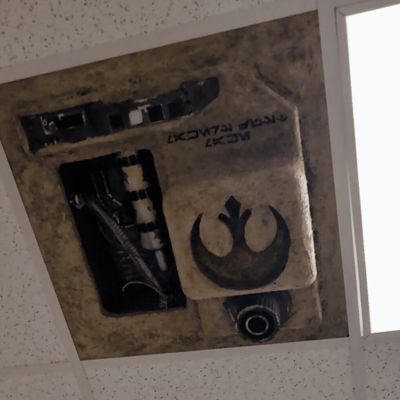
You can either use this as a ceiling tile or wall decorations. It has mounting holes embedded in it, it can be back lit or you can add LEDs.
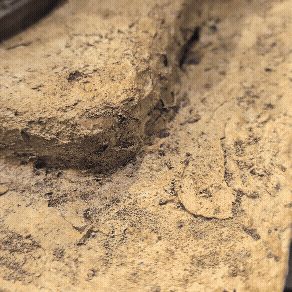
I really wanted to make something out of the ordinary, and some thing dull pop. So I decided to make this. It needed to be light enough that a standard ceiling tile could support it, be secure, and I added some reinforced strips across the back; but when it was all done I think that was unnecessary. This project was a lot of fun, and the beginning of a bunch more I think! To make it realistic it takes time, but the directions of how it was done are more simple than you would expect.
External BOM
These are items that I used but are easily replaced with other products. If you have anything similar you can use that.
- Mod Podge Matte Sealer
- Acrylic Gel
- Sand (Craft sand or regular, doesnt really matter)
- Liquid Latex
- Spray Paint
- Rustoleum Metallics
- Montana
- Shock White Cream
- Sahara Yellow 8010
- Sahara Beige 8020
- Sahara Sand 8030
- Orange Brown 8100 or Rust Coat 8110
- Rust paint
- Water mixable Oil Paint
- Acrylic
- Orange
- Brown
- Random wires that I had laying around
- Zip Ties
StarWars Inspired Ceiling Tile
For a full video walk through please check out my youtube video here. (Coming Soon)
Instructions
Assembly
This assumes that the pieces were all printed and supports were removed. With the recessed pieces there are supports that had to be added to the underside of the hose holes and the bend in the large pipe greeble. They should be easy to remove if you are using the profile settings.
- First prep your ceiling tile by marking your layout.
- Dry fit the pieces together so you can use them for outlines.
- Flip your recessed piece and trace and outline of the edge.
- Next cut inside that mark by at least a quarter inch, so that the recessed portion can sit on top of the tile.
- Trace the larger portion that will hang down from the tile.
- Mark the holes for lighting if you intend to wire it for lighting, and the holes for the fasteners. i used M6 35mm but this will depend on the thickness of your tile. Please measure and use hardware that will work for your tile.
- Now use a medium to seal the ceiling tile. It is important to use something that will not react with the tile. As an example polystyrene based tiles will react with anything that has a solvent in it. I used a modpodge to seal and strengthen the tile. Apply a thick coat, but leave the area that the mounted piece will hang down from, that will be attached later.
- Make sure to seal all of the raw edges including the area that was cut out.
- Let that dry and harden. Depending on how thick it was applied it can take up to 24 hours.
- Glue the printed pieces together and clamp if you are able to.
- Preping the 3d for paint. I use a typical prop finishing process which is laid out in my video. However most use there own processes for removing layer lines, and getting smooth surfaces. The only parts that need to be smooth are the recessed part, the greeble, and the metal face plate. The portion that hangs down can be left raw, as it will be textured to blend in with the tile.
- Glue down the large assembled portion (not the recessed) to the the face of the ceiling tile. I used the same mod podge and added weight. You can also use your fastners but they will be removed to attach the portions that look like metal later.
- Let that dry completely before continuing.
- Mask off the are where the greeble and the metal plate will be added.
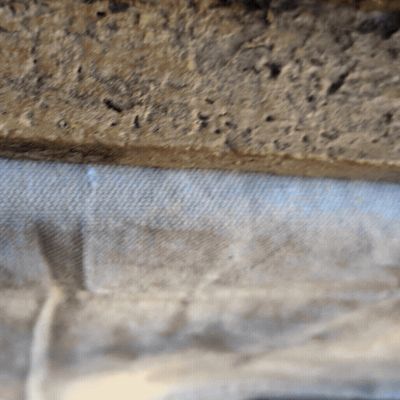
- To add the texture
- I mixed a combination of modpodge and the acrylic gel along with craft sand. You can add portions with the sand and without to give different textures to the piece. I also used brushes in areas, sponges, and putty or art knives. This adds a lot of variation to the textures. Add a lot to the transition areas of the 3d printed piece and the tile.
- Add a healthy amount of your texturing paste to the seam areas to hide them.
- Try to avoid the areas that are masked however removing the masked areas
- Let that dry completely. You can repeat these steps if you want to add more texture.
- Mask the edge of the recessed piece so you avoid painting it as it will be used for mounting.
- Prime the tile and pieces mounted, as well as the greeble, metal piece, and recessed piece.
Painting
Make sure that the tile is sealed, as some types of tiles will react with spray paint.
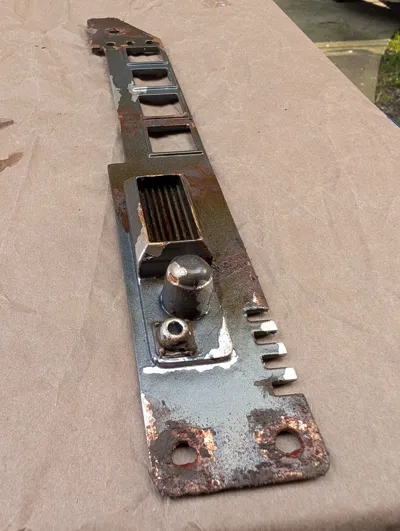
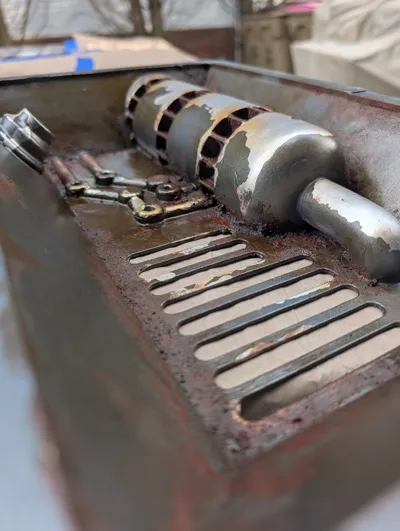
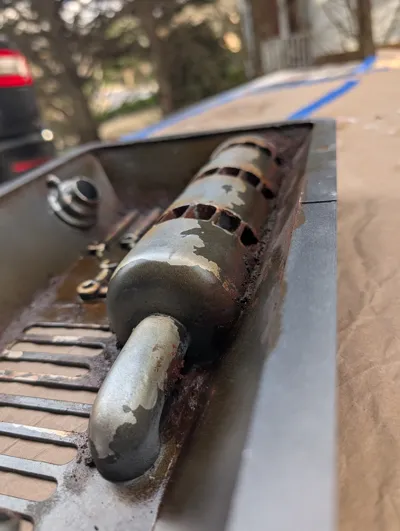
- Metal portions, (Greeble, light plate, and recessed piece)
- Add a light or silver based metallic spray paint. (rustoleum chrome, titanium silver, etc)
- After that is completely dry, apply liquid latex to edges and areas you would like chipping.
- Once that has set a little bit (doesnt have to be completely dry) Add a dark metallic color, with several coats. (Rutoleum Dark Iron, Gunmetal, Dark Steel, etc)
- After that has completely dried, remove the Liquid Latex by rubbing those areas with a paper towel.
- Ceiling tile.
- Spray Painting the base color
- Apply an off white spray paint across the whole piece.
- Apply a heavy dusting coat of a darker white / yellowish / sand color, at different angles to allow the textures to be more obvious. Add heavier amounts in edges and valleys of the piece.
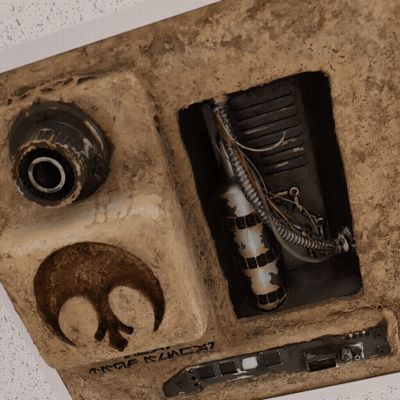
- Apply a light coat of a reddish color to the rebel symbol.
- Apply the darkest off white / yellowish/ heavy sand color as a light dust coat only to the deepes valleys and areas you want to darken.
- If you apply too much of any color you can always apply light dusting coats of the other colors.
- Attach your Metal parts to your tile.
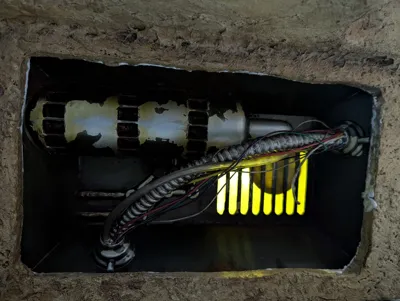
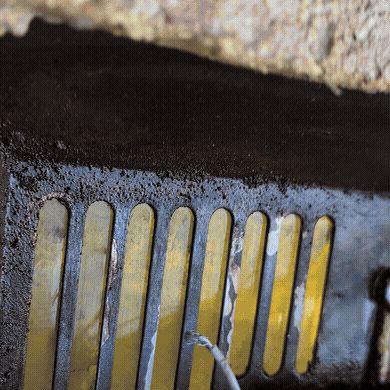
- Glue the light tiles to the face plate with a small amout of CA glue.
- Glue the greeble and face plate for the lights, make sure to line up your bolt holes and fasten them. I used washers to help support the nuts.
- Attach the recessed piece to the back of the tile by using a mix of the mod podge and gel, or just one of them. Since this will be resting on top of the tile, the glue is added primarily to keep it in place.
- After it is dry you can add a strong duct tape around it to add additional fastening.
- From this point forward you will have to work with the tile either resting on that piece (not the best), or propped up.
- Spray Painting the base color
Weathering (Optional)
- Wash weathering of the tile (this is messy, wear gloves)
- Mix water mixable Oil paints lightly paints black and brown at a 50/50 ratio and add water. (You need very little paint for this)
- Add a light amount across areas you want weather to the base of the tile and wipe and blot with a paper towel.
- Repeat the steps with darker or light mixes of the oil based wash.
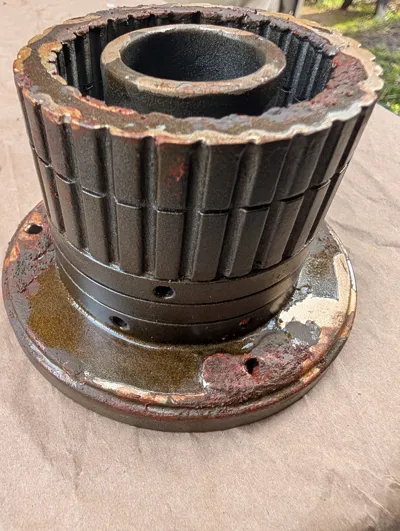
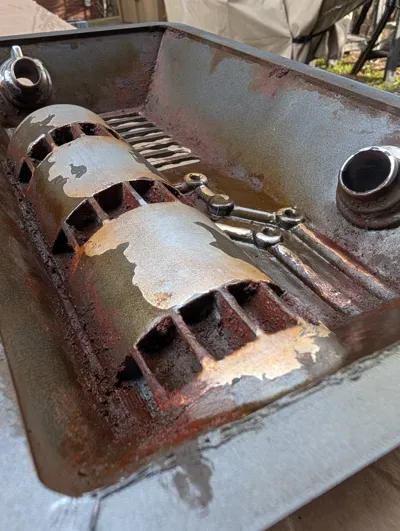
- Rusting the metal
- Make a textured paint with the Acrylic Gel, the paint color you want to use (grey and burnt umber with a little red), and a small amount of sand
- Brush on the chunky mixture on the bolts, on edge of the metal parts and in deep corners.
- Smooth out the edges and paint lines that can spill on to the tile and textured areas.
- Add some areas with a lot of the mixture, and other areas with very little. This adds to the aged look.
- After that had dried it should be fairly hard, dry brush lights amount of a burnt reddish color. There are some paints that can be used to add this specific rusty color. Vallejo makes a wash FX rust which is what I used. Very little goes a long way, use it sparingly.
- Feather the rust color in areas and add staining to the textured areas as well by areas that have the rust on the metal.
- Last dry brush a bright orange color on the rust textured areas. Very light and very little goes a long way.
- You can also add an additional yellowing wash in areas to age the metal as well.
- After everything is dry, seal the entire piece with a spray varnish or laquer to protect the paint.
License
You shall not share, sub-license, sell, rent, host, transfer, or distribute in any way the digital or 3D printed versions of this object, nor any other derivative work of this object in its digital or physical format (including - but not limited to - remixes of this object, and hosting on other digital platforms). The objects may not be used without permission in any way whatsoever in which you charge money, or collect fees.
Comment & Rating (5)