Lobster Buoy Keychain — With Leftover Filament


Print Profile(1)
Description
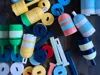
A customizable lobster buoy keychain that finally gives your leftover filament scraps a job. Stack solid colors or swap spools mid-print for stripes.
The Problem
You print a big project with six colors. Now you've got six spools with not-quite-enough filament left on them. Too much to throw away, not enough to do anything with. I've been staring at those spools for months.
The Solution
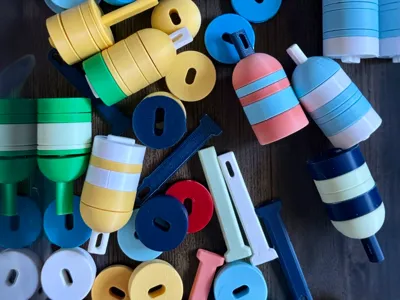
Lobster buoy keychains. Each buoy is a handful of small pieces stacked on a center peg. Small pieces mean small filament runs. Every scrap spool in your graveyard just became inventory.
I run Maine Pottery Co. — three galleries in midcoast Maine. We sell a product called the Maine Stack Game, and it uses a ton of different filament colors. The leftovers pile up fast. These keychains are how I solved that.
How the Colors Work
Two methods, and you can mix them on the same buoy:
Stacking — Use different solid-color pieces on the same peg. Red base, white ring, blue disc, whatever. Color-blocking by just grabbing different pieces off the shelf.
Striping — This is the good one. When your filament runs out mid-print, swap to a new color and hit resume. The piece picks up in the new color right where it left off. Horizontal stripes within a single piece. This is where the leftover filament thing really shines — you're not just using scraps, you're making something that only looks right *because* of the scraps.
What's in the 3MF (9 Plates)
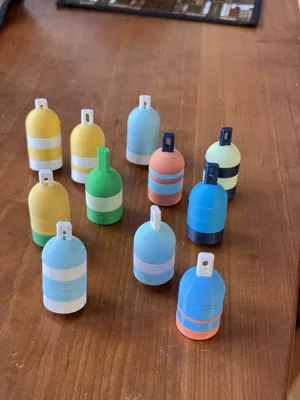
1. **Complete Buoy** — 1 peg + 2x of every piece type. Print this plate and you've got one finished buoy ready to assemble.
2. **Plates 2-7: Individual Piece Batches** — 10 copies of each piece type per plate. For when you're producing stock and want a pile of one shape.
3. **Plates 8-9: Single Piece (1x1)** — One peg or one piece per plate. For when you've got barely anything left on the spool and you want to squeeze out as many complete prints as possible before it runs dry.
Assembly
1. Grab your center peg.
2. Slide on a base piece (thick or medium) — look for the notch on the bottom, that faces down.
3. Stack your rings and discs in whatever color order you want. Build up the buoy shape.
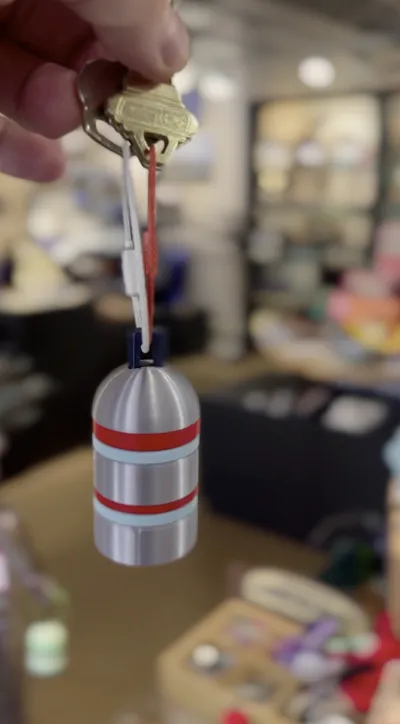
4. Attach a lanyard, key ring, or wire clasp through the top of the peg.
5. Done. That's your buoy.
Formula: 1 peg + 2x of each piece type = 1 complete buoy.
Print Tips
- Any filament works. PLA, PETG, ABS, TPU, whatever you've got lying around.
- I print at 0.24mm layer height, 0.4mm nozzle, 2 walls, 50% gyroid infill, moderate speed. Nothing fancy.
- If you're printing pegs in ABS, account for shrinkage — the pieces need to slide on smoothly.
- The whole point is using scraps, so don't overthink material choice. Use what's there.
Photos & Video

Licensing
Personal use is free.Print them, give them as gifts, make a buoy for every key you own. Licensed under CC BY-NC-SA 4.0 — remix, share, and print for yourself.
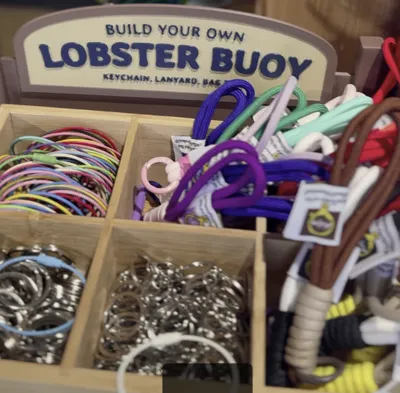
Commercial license: $10/month. This covers selling printed buoy keychains and running build-your-own stations (retail, events, markets, etc.). Must reference Maine Pottery Company in any commercial display or station signage. Commercial license includes a Retail Display Build Station 3MF file.
Credits
Designed by Brad Hilton / This Rad Life (thisradlife.com) (mainepottery.com)
Sold at Maine Pottery Co. galleries — Edgecomb, Portland, and Portsmouth, Maine.
Contact: info@mainepottery.com
Comment & Rating (0)