


Print Profile(7)


Description
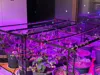
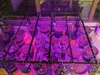
Modular design, a grow light for plants of any size, like building blocks~
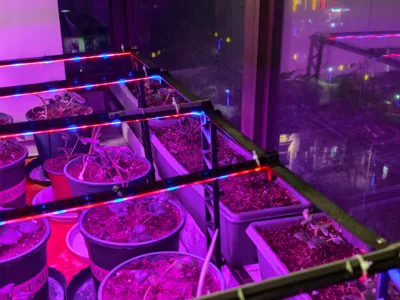
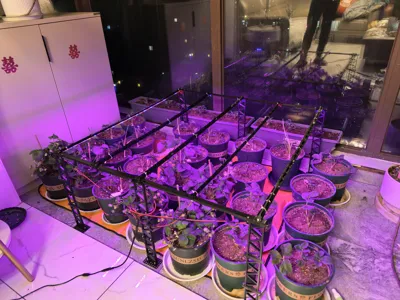
This was originally made in winter when I planted a balcony full of strawberries, and the light was severely insufficient. Because the area was large, similar grow lights on Taobao cost over two hundred yuan, so I designed this set. The size shown in the picture is 1m*1m, with the light strips approximately 50cm from the ground, covering 5 rows of 1-meter plants. It can be combined into any size as needed
Overall cost is as follows:
Lighting circuit part:
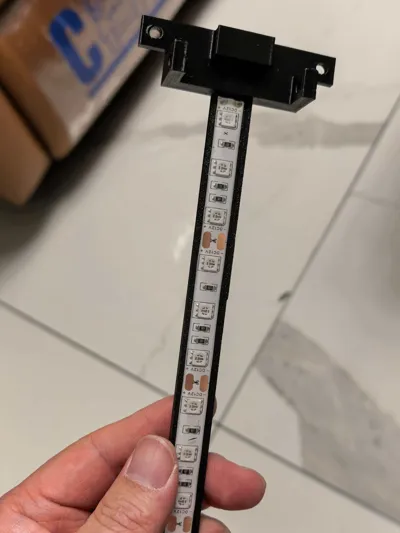
12v 5050 red and blue grow light strip (over 5 yuan per meter);
12v power supply (calculate wattage as needed, 1 meter is 12w, 5 meters is 60w, remember to leave redundancy, about 8 yuan);
6 sets of DC male/female wired connectors (about 2 yuan, one set for the main line needs to be thicker, I used 0.75 square mm wire, others 0.3 square mm is sufficient)
The total cost for five meters of light strips is about 40 yuan
filament part:
It is recommended to use the cheapest, 'ugly' colored PETG, as a large amount of filament is needed, and I have tried my best to hollow it out to reduce weight

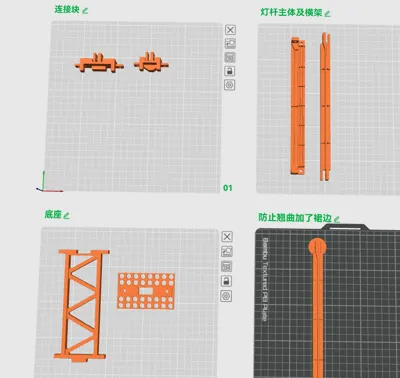
There are only 5 types of parts:
Light pole body, support bracket, crossbeam, base, and connector blocks (with base and without base). They will be distinguished as large and small connector blocks below

I designed a set of modular interfaces, all using M4 screws (any length works). The actual fit is quite snug, so not every screw needs to be tightened, nor do they need to be overtightened, just secure enough not to loosen. The two ends require base connector blocks to connect to the base brackets. Fewer bases are needed in the middle; you can choose the number of bases according to the material strength. The light poles and crossbeams are connected with non-base connector blocks. The schematic diagram is as follows

Each light pole is 18.8cm long, 5 poles including connectors make 1 meter. Each support bracket is 15cm long, 3 brackets including connectors make 46cm. The connecting crossbeam is 20cm. I have a high planting density, with pots close together, so the spacing between each light strip is 20cm. For convenience, several commonly used sizes are pre-plated for easy calculation.
For example, for a 3-meter, 3-row grow light: light frame body * 15 (3 pieces) + support bracket * 12 (4 pieces) + base * 4 + connector block with base * 4 + connector block without base * 2


You can directly download the published print profile. There are no special printing requirements, just make sure it's sturdy enough. Because of its large size, a slight sag after assembly is normal. After all, it's just ordinary PETG, but there's no need to worry about strength; I've been using it for half a year without any issues
Please leave any suggestions, so I can make changes~
Below are detailed installation instructions:
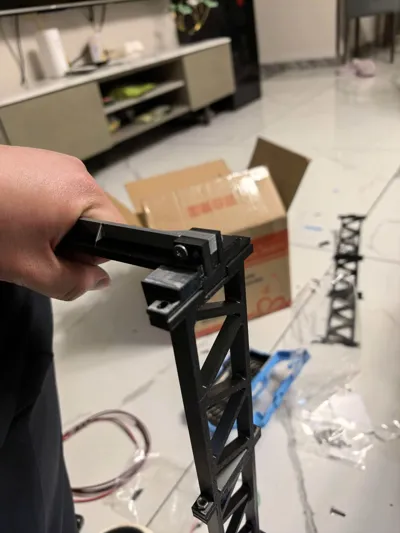
1. Light pole body
5 pieces make 1 meter, which is usually just the right size for home use. To prevent warping, I added extra skirts in the slicing software, which need to be trimmed off. Then align and insert them, using M4 screws (the design is a bit tight, so you might not need to tighten the nuts; if it's fixed securely, even one screw might be enough, emphasizing 'whatever works, haha')


2. Light pole and base
The light pole requires a large connector block with a base to connect to the bracket. First, connect the light pole to the connector. Just snap them together into the slots like building blocks


Then connect the connector to the bracket


3. Base installation
The three base brackets are approximately 0.5m high. Press them into the slots, and tighten with M4 screws on both sides. Then align with the base's slots and press firmly, tightening the screws on both sides (screw from bottom to top, use flat-head screws if possible). Because of the slight interference fit, you can trim the edges a bit to make insertion easier


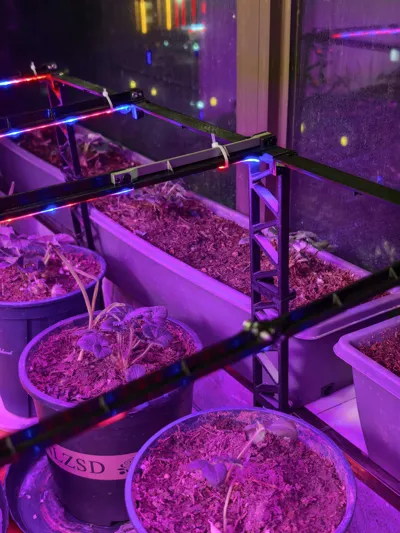
4. Crossbeam installation
The middle light strips do not necessarily need a base, so crossbeams are used for suspended connections. The crossbeam combines with the small connector block without a base, and the connector block combines with the light pole. See the figure below for details


Then connect the crossbeam to the connector block with a base, and then combine it with the base. The final effect is shown in the figure


5. Light strip and wiring installation
The main body is fully assembled; next is the installation of the light strips. There are 1cm wide guide lines on the light pole; align them and stick the adhesive backing of the light strip. If you are concerned about the adhesive's strength, you can secure it further with zip ties.
The wiring uses a parallel connection. Each light strip needs one DC connector soldered, either male or female, but they must be consistent and pay attention to polarity (you can also buy 1-meter long pre-wired strips on Taobao to skip the soldering step). Connect the wires from several light strips to a main wire, and ensure the main wire's connector matches the 12v power supply's connector (male/female)


Comment & Rating (0)