Toolgrid Socket Clips with Pins & Printed Labels


Print Profile(5)
Description
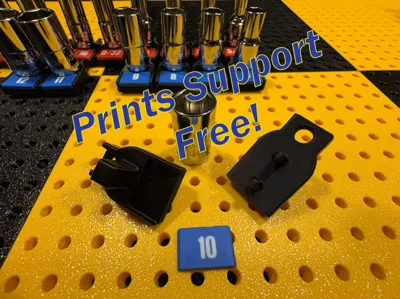
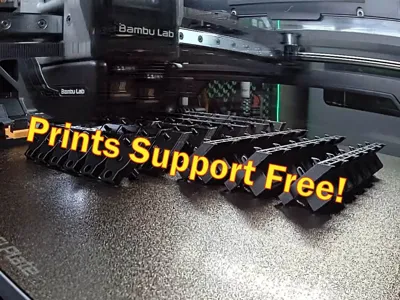
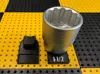
Change Log: 6-17-26 -The original connecting “Sprues” and Brim Ears were kind of tedious to post process. To solve this issue I removed the sprues and the mouse ears. Starting back with the base model, I created directly modeled-in support that sits on a raft interface. Really sticks the holder to the bed and is very easy to remove and leaves a clean print behind. (See the video below)
Important Slicing Note: The slicer will bark about “Floating regions”. Ignore this warning and continue printing. The space between the raft and the model is intentional and necessary so that the two don't fully fuse together.
I worked with several users in this iterative process to test out and verify the changes. (Special thanks to Miden92 who tested and retested. Thanks buddy!) I am happy to report success! Please feel free to offer feedback. I have learned quite a bit about modeled in support in this process, that is for sure. ;-)
_______________
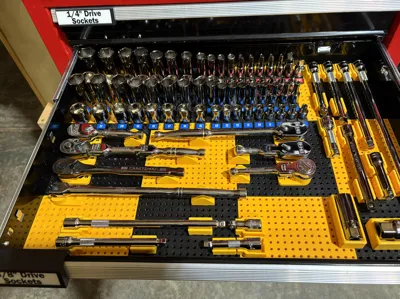
I use a wide mix of 3D printed toolbox organization systems and techniques, but IMHO, nothing beats Toolgrid for socket drawers! It is so flexible and really works well for me.
There are plenty of Toolgrid socket holder models out there, however many had two or three challenges:
A. Cleaning support off that many small parts is not anyone's idea of fun.
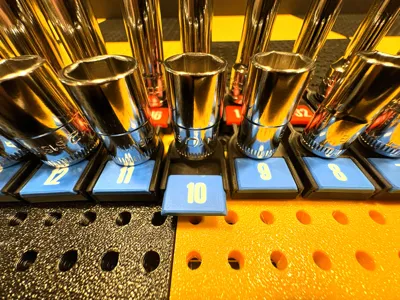
B. No printable labels, which makes finding the socket your looking for harder than it needs to be.
C. No orientation/alignment pins.
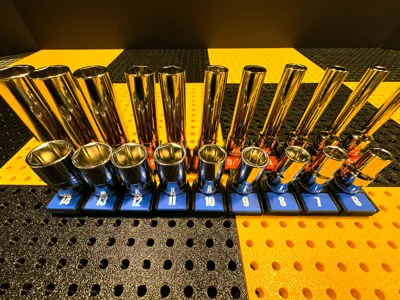
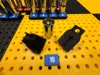
Introducing, “Support free" printed Toolgrid socket clips with positioning pins and editable Printed Swappable Labels!
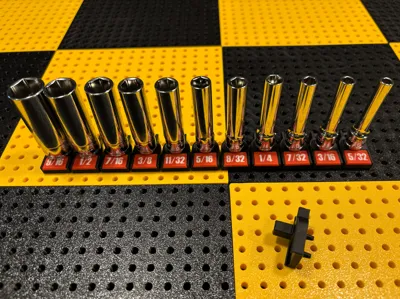
These holders come in four drive square sizes, 1/4", 3/8", 1/2" and 3/4". Each holder has two alignment pins which, IMHO, greatly helps with the layout before you commit and screw them all down. They are all sized so you can stack rows as close as possible while still providing space for the visibility of each label. The orientation pins and screw holes are set for the standard Toolgrid tiles with 3.5 mm holes on 9.5 mm centers.
If you need a set for 1" drive square sockets, let me know. The model is parametric and it's easy enough for me to change the socket dive size if someone has a need. At 1" I am usually reaching for a striker wrench… ;-)
The holders print in linked sets (5 or 6 connected), set upside down on the plate at a 45° angle. The holders have two small “sprues” between them where they contact the print bed to give added surface adhesion during printing. There are also some strategic “Brim Ears” at a few points in the 3MF file to give even more bed adhesion. I have successfully printed many entire plates full at once with zero issues. (Caveat: Squeaky clean print plate a must!)
The sprues are super simple to clip off with your 3D printing flush-cut pliers after printing. Which are conveniently sitting/hanging right by your printer right!? In the supplied 3MF the main plate has enough clips to fit all of either the SAE or Metric label sets. You can clone as many additional copies of each as you require.
There is a separate 3MF file for each size drive square. Each profile contains three print plates.
Plate 1: 3 sets of 6 linked socket clips for a total of 18 (clone or delete as needed)
Plate 2: SAE slide-in labels.
Plate 3: Metric slide in labels.
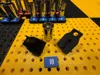
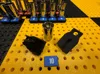
The label text is editable if you need an unusual socket size or custom label). The text is created as a face down, flush, embedded modifier object. Just flip the plate upside down in Studio to edit it. The label colors are pre-set to Red for SAE and Blue for Metric, both have White text.
Feel free to change the colors if want something bespoke. Each holder has a slot that these labels slide into. They hold firmly but can be removed easily with a narrow bladed tool to to start them sliding if you need to change them.
Note about the labels: The ones pictured were printed with a 0.2 nozzle on a smooth PEI plate, which is why they are super crisp. However, the labels print just fine with a 0.4 nozzle if you don't have either the nozzle or the time to use a 0.2. But if you have the nozzle and the time, highly recommend printing them on a smooth PEI plate with a 0.2. You'll love the results.
The screw size I recommend to secure them to the grid are M4 x 8 to 10 mm rolling thread screws. It just depends on how thick your base is. You want them to be as long as possible without protruding out the bottom side of the plate. These are the screws I used (Ordered from Amazon) Standard machine threads will also work as long as you don't over torque the screws.
For those of you who have the need or desire for zero space between each socket, you can check my “Adjustable” version of these holders with labels. They are pin-less since pins limit the adjustability of spacing between sockets. (Link coming soon)
Happy Organizing!
See how I am creating order in my shop with these other models. Might find something that is useful to you also!
Toolchest and Drawer Label Systems
DeWalt 20V Outdoor Tool Wall Mount Holders
Hardware and Small Parts Organizers
Miscellaneous Tools and Holders
Toolchest and Drawer Label Systems
DeWalt 20V Outdoor Tool Wall Mount Holders
Hardware and Small Parts Organizers
License
You may create derivative works based on this object, provided that all such derivative works are published exclusively on the MakerWorld platform and include proper attribution to the original creator. You may not share, upload, host, distribute, or publish this object—or any derivative work of this object—on any other digital platform, marketplace, or distribution channel. Commercial use of this object and any derivative works is strictly prohibited. This includes, but is not limited to, selling, renting, sublicensing, or using the object in any context in which you receive monetary compensation or other financial benefits.
Comment & Rating (107)