P2S External Mainboard Cooling Fan


Print Profile(1)
Description
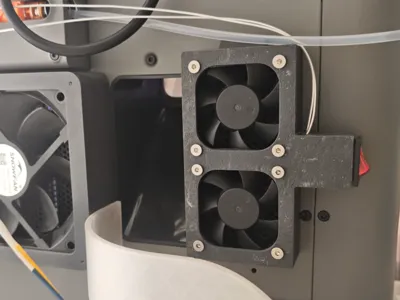
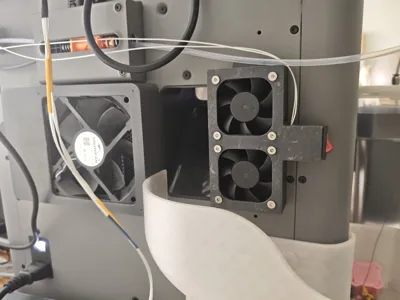
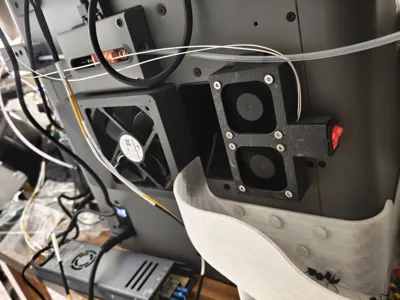
A magnetic fan enclosure for providing additional forced cooling to the P2S MC control board.
After successfully installing my previous modelhttps://makerworld.com.cn/zh/models/2266662-p2szhuan-yong-cang-wen-jia-re-qi-da-gong-lu-heng-w#profileId-2552247, the printer issued an MC board over-temperature alarm when printing at chamber temperatures above 62°C for extended periods. This is due to the P2S design omitting a mainboard cooling fan. The P2S uses copper blocks to connect critical mainboard components to the chassis sheet metal frame, using the frame for passive cooling. However, when printing at high chamber temperatures, the chassis frame can transfer heat from the chamber to the MC board, causing overheating. Compared to the P1 and X1, the P2S is inherently less suitable for printing engineering filaments that require higher chamber temperatures. To ensure normal operation when printing high-chamber-temperature filaments like nylon and PC for extended periods, this device blows fresh air through the back panel cooling holes to cool the mainboard. Actual tests showed no further alarms during PA6-CF prints exceeding 10 hours at a 65°C chamber temperature.

Additional materials required:
- Two 5020 fans, select voltage according to your power supply. Since I plan to power it from an external AMS power supply, I am using 24V fans.
- Eight M3*4*5 heat-set inserts, eight M3*8 bolts, for securing the fans.
- Three 20*5*3mm magnets
- One KCD1 switch
- 502 super glue
- Several wires (recommended not less than 0.2mm²)
1mm thick EPDM self-adhesive foam, this option is optional and can significantly reduce vibration and noise.
The print file has a pause layer set for embedding magnets. During the pause, place the 3 magnets into the corresponding recesses (they can be secured with super glue). The magnet surfaces can be coated with a glue stick to aid adhesion of the subsequent two layers.

The hole for the side-mounted switch may crack along the layer lines when removing supports; simply glue it with super glue. The two fans are connected in parallel and controlled by the switch to connect to an external power supply.
Can be used with my chamber heaterhttps://makerworld.com.cn/zh/models/2266662-p2szhuan-yong-cang-wen-jia-re-qi-da-gong-lu-heng-w#profileId-2552247, drawing out the internal thermostat wiring to power this fan, enabling automatic start and stop.

Comment & Rating (0)