

Print Profile(2)

Description
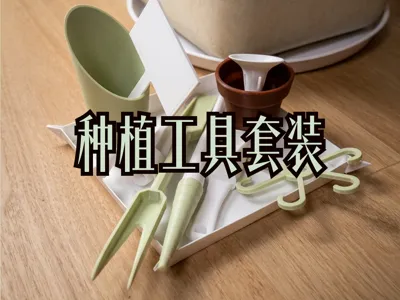
〔Material Universe〕010 Planting Tool Set
> > > Reading the configuration explanation and printing suggestions can help you achieve better print results < < <
Recently, I bought some succulents and potted plants to decorate my room, and I made some planting tools to help me, a gardening novice. I hope you like them.

Boost Me (for free)
🔨 I am creating a daily practical series 〔Material Universe〕
🚀 Free boost = 📦 Design supplies
👆 Follow me so you don't miss my updates!
Configuration Explanation
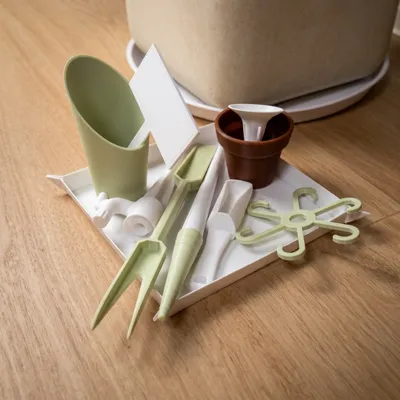
- Plate 1 and Plate 2 are for the 【Mat】 set, making it easy to keep the ground clean during operation. After printing, fold Plate 1's 【Mat】 upwards along the crease (do not apply excessive force, as it may break the pre-printed crease; it is recommended to use materials with good toughness). Then, use the 【Mat Pin】 provided in Plate 2 to install it into the four corner holes;
- Plate 3 is for the 【Label】. After printing, use a marker pen to write the plant name or any text you want on the flat side, then insert it directly into the flowerpot. If other sizes are needed, you can scale it in the slicing software;
- Plate 4 is for the 【Bucket Shovel】, no supports needed;
- Plate 5 and Plate 6 are for the 【Plant Holder】 set, available in 3 to 6 hook versions, which can be printed as needed. If other sizes are needed, you can scale it in the slicing software;
- Plate 7 is for the 【Transplanting Shovel】 with a dual-head design. The Y-shaped end makes it easier to transplant small plants with minimal damage, while the regular shovel end is suitable for turning soil, moving soil, and other operations;
- Plate 8 is for the 【Hole Puncher】. Before planting, use the hole puncher to make holes in the soil. It is designed with 1cm intervals for easy observation of hole depth;
- Plate 9 is for the 【Watering Tool】, a watering device to prevent root rot, which can also be used as a ventilation tube for small plants;
- Plate 10 is for the 【Drip Irrigator】, compatible with bottle necks using the PCO 1881 standard. Tighten a water-filled bottle and punch a hole in the bottom, then insert the conical part into the soil (currently the dripping speed is a bit fast; if concerned, please wait for optimization);
- Plates 11 to 18 are for the 【Plant Pot and Drip Tray】 set, designed similar to classic terracotta pots. Currently, there are four sizes: 50x44mm, 80x68mm, 120x100mm, and 150x130mm, with drainage holes at the bottom.
Printing Suggestions
- It is recommended to print with materials that have good toughness, such as PETG, ABS, and ASA, as PLA may not be strong enough;
- If the first layer does not stick during printing, be sure to clean the build plate. You can try adding a brim yourself;
- If the 【Plant Pot and Drip Tray】 leaks, try reducing the 【layer height】, increasing the 【line width】 to 0.6 or more (if conditions permit, you can try using a 0.6 or 0.8 caliber hotend), setting the 【bottom shell layers】 to 5-10, and the 【wall layers】 to 4-6. You can also try changing the bottom pattern and observing the infill to choose a denser type.
👇Love my model? Click below to see more practical models!


Boost Me (for free)
🚀Free Boost = 📦Design Supply 👆Follow me and you won't miss my updates!
License
You shall not share, sub-license, sell, rent, host, transfer, or distribute in any way the digital or 3D printed versions of this object, nor any other derivative work of this object in its digital or physical format (including - but not limited to - remixes of this object, and hosting on other digital platforms). The objects may not be used without permission in any way whatsoever in which you charge money, or collect fees.
Comment & Rating (0)