Elias – Illuminated 3D Lettering (no soldering!)


Print Profile(1)

Bill of Materials

Description
Boost Me (for free)
If you like my model, I’d be really happy about a like, a photo of your print, or a boost. 🚀📸✨ Your pictures and support help me a lot and motivate me to keep creating and sharing new designs. Thank you for your support, and happy printing! 🧡🖨️
Take a look at my other models too — maybe there’s another little favorite waiting for you. 🧡✨

Boost Me (for free)
Boost me & show your Elias!
If you like this model, I would be thrilled about a boost – it helps me to create more clean designs like this 🙌
And even better:
Feel free to send me pictures of your print! 📸
I love to see it.
Thanks for your support and happy printing! ❤️
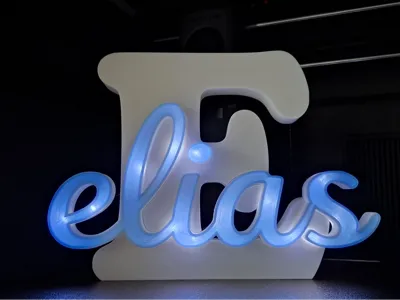
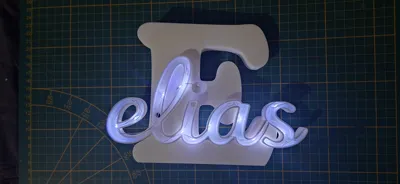
✨ Elias – Illuminated 3D Lettering (no soldering!)
Turn a name into a real highlight:
"Elias" as illuminated 3D lettering brings warm light and a personal touch to any room – perfect as decoration, a gift, or a night light.
The special feature:
👉 You don't need any soldering skills!
The lettering is simply operated with a standard wire fairy light string.
👉 You can find a suitable light string here: https://amzn.eu/d/0apGPBrk
This makes the project easily manageable even for beginners.
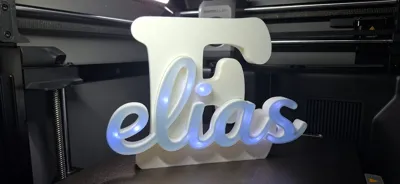
🔧 Assembly & Notes
Assembly is generally straightforward, but:
➡️ You should bring a little patience.
Especially when inserting the fairy light string into the letter "i", it can get a bit fiddly – this cannot be completely avoided due to the design. However, with a little dexterity, it works without problems.
🔋 Variants & Print Options
You have several options for printing:
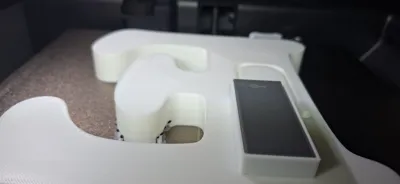
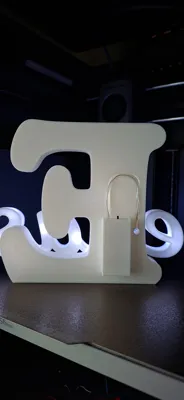
- "E" with battery compartment holder (recommended):
→ Ideal for neatly integrating the wire fairy light string
⚠️ Important: The Battery Support must be printed separately beforehand – with 100% infill to ensure stability. - "E" without holder:
→ For a simpler variant without a battery compartment
⚙️ Print Plates & Settings
The model is divided into several print plates:
🧱 Print Plate 1 – Battery Support
- Material: PETG
- Layer height: 0.24 mm (Standard)
- Infill: 100% (very important for stability)
🔤 Print Plates 2 & 3 – "E" with / without battery compartment
General settings:
- Layer height: 0.2 mm
- Infill: 15%
- Infill pattern: Concentric
- Bottom shell: 1 mm
- Bottom shell layers: 5
Support settings (already prepared):
- Support interface: PETG
- Top Z distance: 0.22 mm
⚠️ Important (only for "E" with battery compartment):
👉 Set a print stop at layer 143 in the slicer to insert the fairy light string.
✨ Print Plate 4 – Elias "Peel"
- Layer height: 0.2 mm (Standard)
🔝 Print Plate 5 – Elias "Top"
- Infill: 100%
- Infill pattern: Concentric
Surface speed: 30 mm/s
💡 Why this model?
✔ No soldering necessary
✔ Beginner-friendly
✔ Individual, personal decoration
✔ Warm, pleasant light
✔ Perfect as a gift
🔧 Conclusion
An easy-to-implement project with strong results.
👉 A little patience during installation, but technically uncomplicated – perfect for anyone who wants to create an illuminated model without electronics knowledge.

Boost Me (for free)
If you like my model, I’d be really happy about a like, a photo of your print, or a boost. 🚀📸✨ Your pictures and support help me a lot and motivate me to keep creating and sharing new designs. Thank you for your support, and happy printing! 🧡🖨️
License
You may create derivative works based on this object, provided that all such derivative works are published exclusively on the MakerWorld platform and include proper attribution to the original creator. You may not share, upload, host, distribute, or publish this object—or any derivative work of this object—on any other digital platform, marketplace, or distribution channel. Commercial use of this object and any derivative works is strictly prohibited. This includes, but is not limited to, selling, renting, sublicensing, or using the object in any context in which you receive monetary compensation or other financial benefits.
Comment & Rating (5)