Laser Exhaust Air Filter and Smoke Purifier


Print Profile(1)

Description
Boost Me (for free)
I would appreciate a boost
Boost Me (for free)
After much deliberation, I decided on the Bambu Lab laser kit, but my biggest concern was the smell generated during laser processing
All the filters on the market were personally too expensive for me, so I decided to build something myself And I must say it turned out very well No smell, no expensive filters, no worries
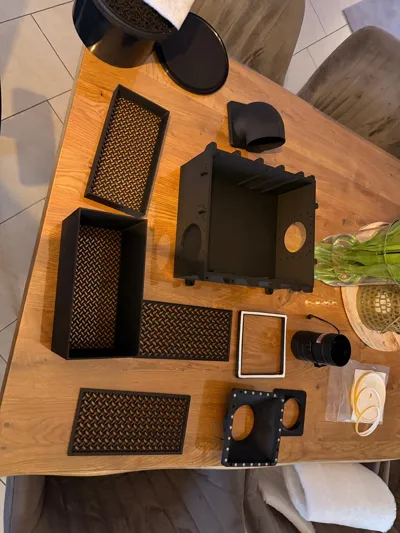
These parts are needed
Fan
https://www.amazon.de/dp/B0F48NLNK2?ref=ppx_yo2ov_dt_b_fed_asin_title&th=1
Sealing tape
https://www.amazon.de/dp/B0951X6D2Y?ref=ppx_yo2ov_dt_b_fed_asin_title&th=1
Activated carbon 3KG CTC30
https://www.amazon.de/dp/B0D6L4L27M?ref=ppx_yo2ov_dt_b_fed_asin_title&th=1
Magnets
https://www.amazon.de/dp/B0C84SYYRC?ref=ppx_yo2ov_dt_b_fed_asin_title&th=1
HEPA filter, 2 pieces are included, so only order once
https://www.ebay.de/itm/187379255648
M4 x12
M3x16
M3 nuts
Threaded inserts
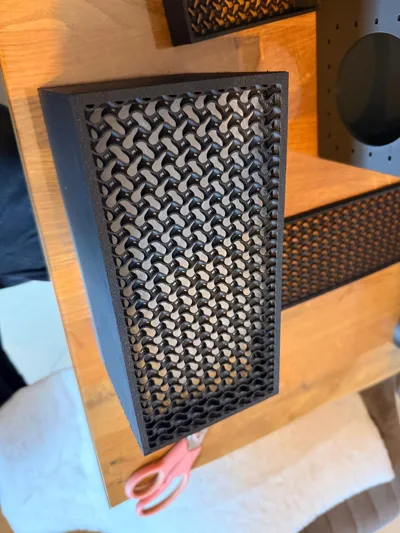
Pre-filter

These are all the necessary parts

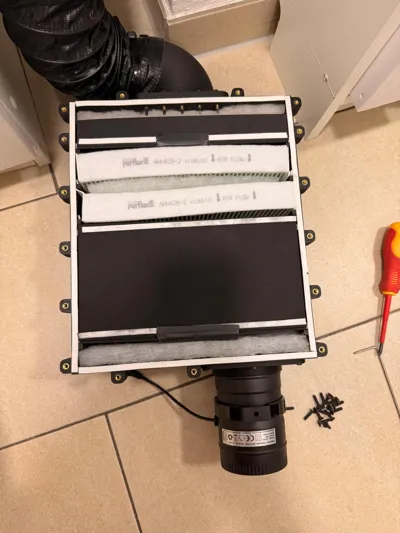
Filtration is done in 3 stages
Coarse pre-filter
1: Pre-filter + Activated carbon + Coffee beans + Pre-filter
2: HEPA Filter
3: HEPA Filter
4: Pre-filter + Activated carbon pellets 4mm + Pre-filter
5: Pre-filter


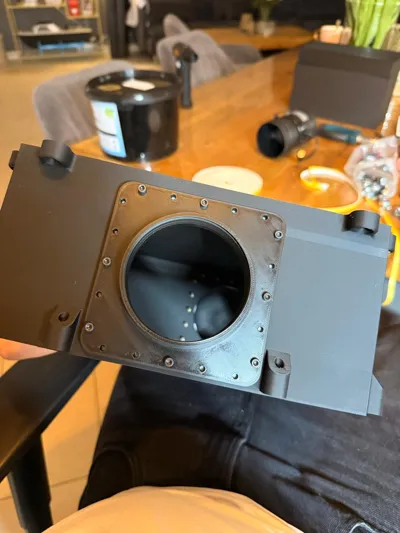
On the top of the housing, where the lid is screwed, M4 melt-in threaded inserts are used everywhere The on/off connectors are screwed on with M4 screws and nuts Three screws on the 90-degree intake pipe are not accessible, so these must be fastened from the inside of the housing

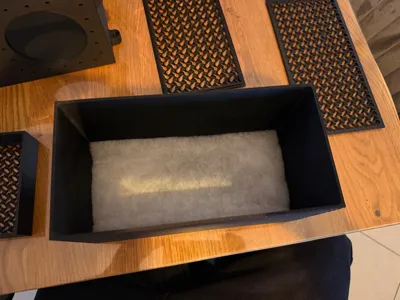
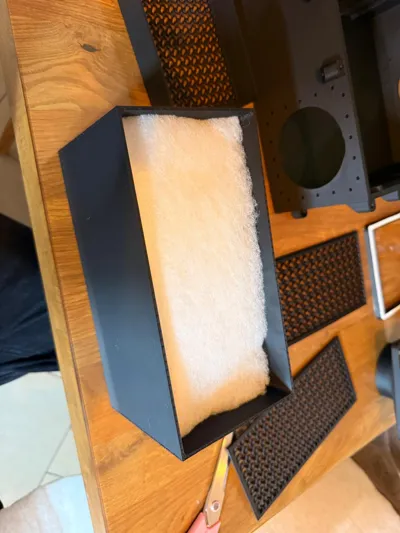
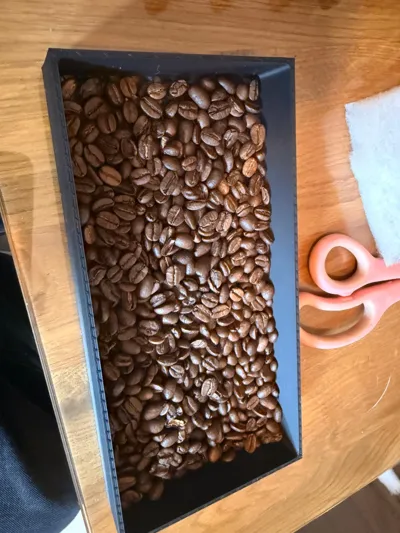
In the first filter box, a pre-filter is added, then activated carbon mixed with coffee beans Please don't use as many beans as in the picture, but mixed with activated carbon pellets Then another pre-filter is added, and finally the lid

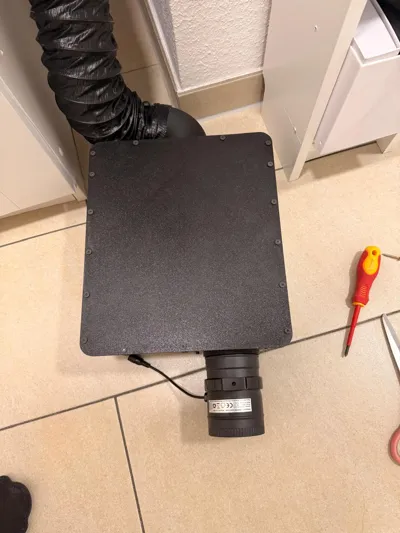
This is what it looks like when finished

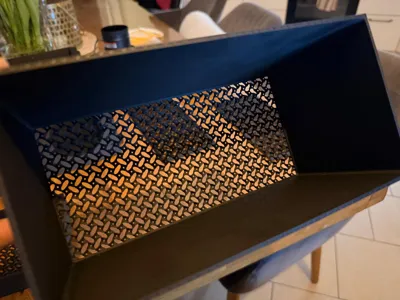
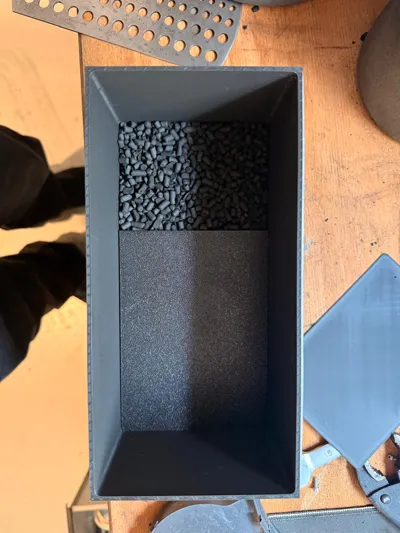
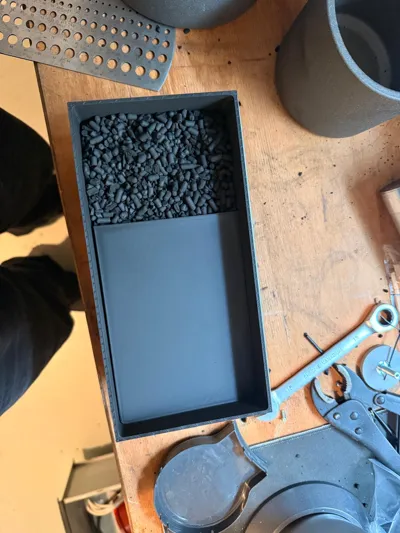
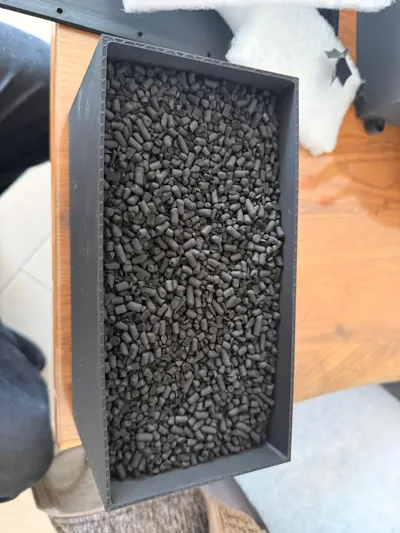
In the large box, another pre-filter is placed, then about 2-3 cm of activated carbon pellets are placed in it, and an intermediate layer Then another 2-3 cm of activated carbon pellets

and again an intermediate layer and again activated carbon, so that all three intermediate layers are inside in total This ensures that the air flowing through always takes a long path and does not take the easiest route

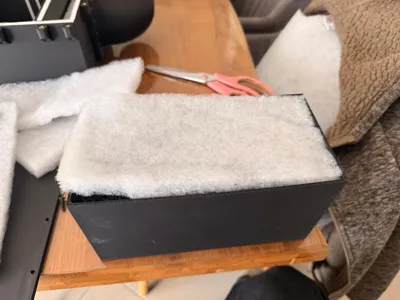
then you insert another pre-filter and put on the lid

Now you can apply the sealing tape to the housing so that the air flows through the filters and does not escape unfiltered to the outside Don't be stingy with it, it's important It should also be applied between the filters Now you can insert the filters as shown in this picture; the installation direction is important

The large filter box 2 must be at the outlet where the fan is mounted So pay attention when assembling the connections I myself also put it together incorrectly at first :-)

The fan is simply plugged on
Boost Me (for free)
Then you screw the lid on tightly, and the filter is finished

These two parts are intended for the connection behind the pusher They are only needed if you want a magnetic solution to quickly access the pusher Otherwise, the original connection can be used without having to buy magnets If needed, simply glue the purchased magnets, apply sealing tape all around, and screw them on
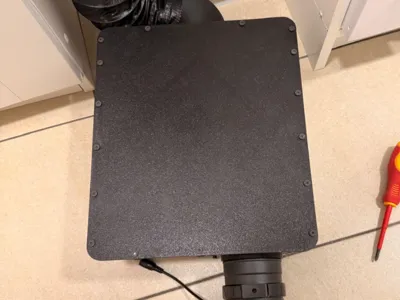
This exhaust housing has been designed so that it should be hung
If you have any questions, just contact me
License
You shall not share, sub-license, sell, rent, host, transfer, or distribute in any way the digital or 3D printed versions of this object, nor any other derivative work of this object in its digital or physical format (including - but not limited to - remixes of this object, and hosting on other digital platforms). The objects may not be used without permission in any way whatsoever in which you charge money, or collect fees.
Comment & Rating (6)