Dice Throne Battleshelf v5 - Push and/or Pull


Print Profile(1)
Description
Overview
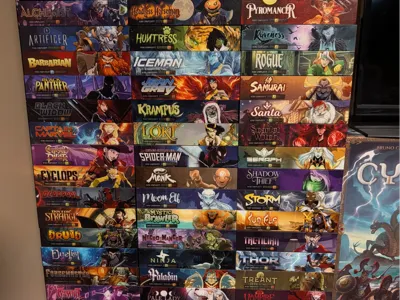
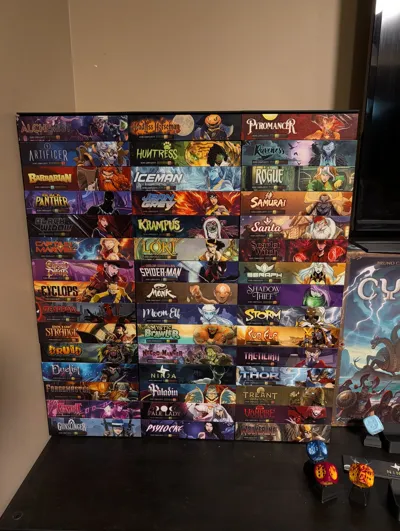
Meet the Battleshelf V5—a highly flexible, interlocking storage and display system designed to adapt to your Dice Throne roster. Whether you are looking for a sleek way to store your characters on a shelf or want to dramatically reduce your setup and tear-down time at the table, the Battleshelf is built to scale with your collection.
The units are completely modular and can be stacked as tall as you need. If you are using standard IKEA Kallax shelving, exactly 9x2 character shelves will fit perfectly stacked inside a single cube.
Two Ways to Build
You can customize your Battleshelf loadout depending on your preferred storage and play style:
Option 1: The Purist (Original Trays)
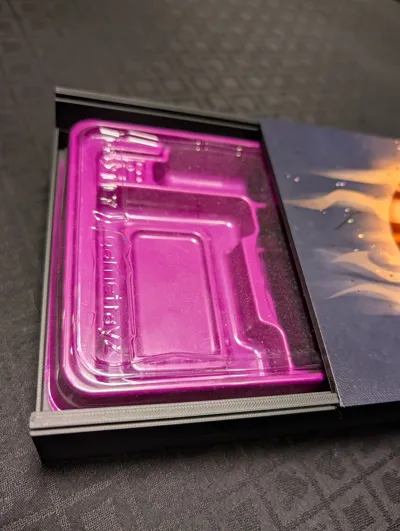
- How it works: This option is designed to slide the game's original manufactured character trays straight into the Battleshelf.
- Faceplates: You can choose to leave the shelves open or utilize the magnetic faceplates for a clean, premium display look.
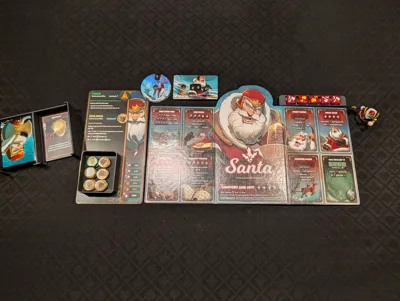
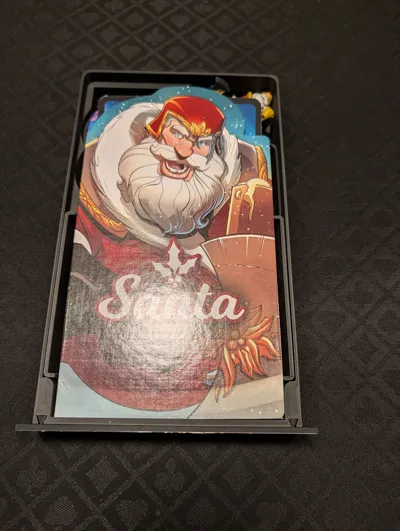
Option 2: The Rapid Deployment (3D Printed Modular Trays)
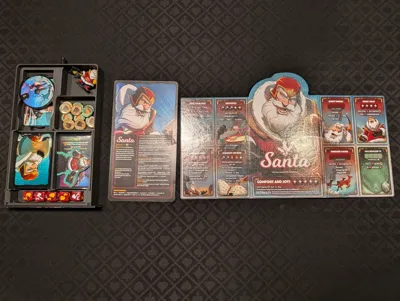
- How it works: Ditch the plastic inserts and print the custom modular character trays. This is optimized for quick setup and tear down at the table.
- Storage Layout: Features dedicated modular slots for cards, tokens, and dice.
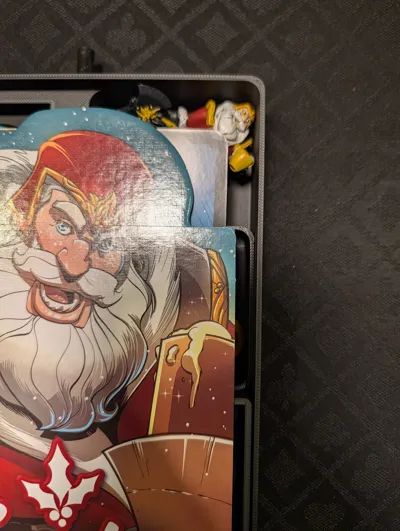
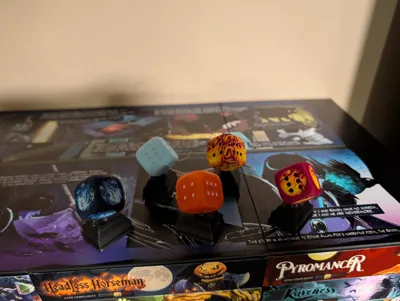
- Miniatures & Standees: The miniatures slot right into the back of the tray. Don't have the miniature? You can drop in a secondary token tray in that space instead. The character standee tucks perfectly underneath the health dials.
- Custom Faceplates: The faceplates for these 3D printed trays are a little different. While they share the same outer dimensions as the standard ones, they feature two pieces that slide securely right into the character tray.
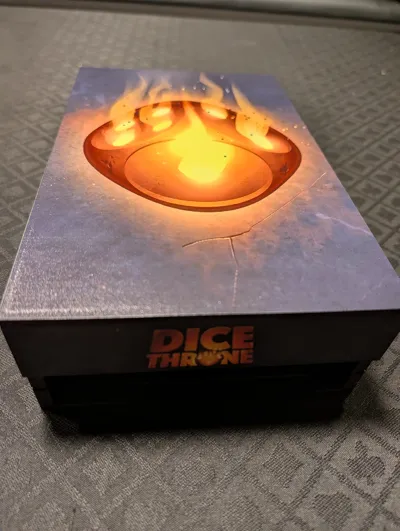
Tray Extraction Options: Push vs. Pull
Getting the trays out of the shelves is just as satisfying as storing them. The system is designed with two different extraction mechanisms. You can build your shelves to use one, the other, or both (I personally prefer the push-to-pop, while my kids love using the magnetic key, so I built ours to support both!).
- The Push-to-Pop Mechanism: Similar to another awesome design (Link), simply press the tray in, and it will pop right out. Note on Kallax use: The push-to-pop mechanism requires some force. If your shelf is freestanding in a Kallax, pushing the tray might just push the whole shelf unit backward. This mechanism works best if the back of your Battleshelf is pushed up against a wall or a solid backing.
- The "Dice Throne Key" (Magnetic Pull): I remixed the awesome Dice Throne Trophy by (Link) by scaling it down and adding magnet holes to the base. You just touch the key to the faceplate and pull! Because it has to overcome the resistance of the push-to-pop mechanism, the key requires a strong pull force, utilizing three 12x3mm magnets. If using the 3D printed trays with this pull method, I highly recommend adding a 12x2mm magnet behind the faceplate. The model has a spot already designed for this—just secure it with a drop of CA glue.
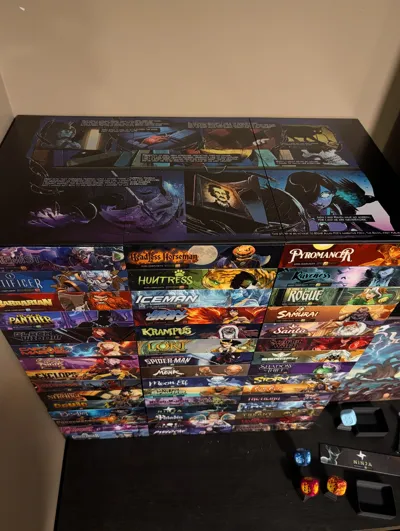
Topping It Off: Lids & Locking Bars
To finish the top of your Battleshelf setup, you have two options depending on how wide your display is:
- Multi-Shelf Locking Bar & Cover: If you have multiple shelf stacks side-by-side, you can link the tops together using a locking bar, and then snap a printed cover on top. This uses magnets in the channels and the cover to keep everything tightly aligned and secure.
- Single Shelf Slide-On Lid: If you are just building a single, standalone shelf stack, you can download the one-piece lid that simply slides into place on top—no magnets required!
The Travel Case
If you want to pack up a character or two for a game night or go to a tournament, there is now a Travel Case option
To use this, you must print the "Travel Edition" character trays mentioned above. The travel case features a sliding lock mechanism that slots right into the back corner notch of the tray, keeping all your components locked in place while in transit.
Note: The Character trays from the travel case can be used as the normal character trays. So I recommend just printing the travel edition of the character trays
The shelf requires two 12x2 magnets on the back and 1 12x3 magnet for hte sliding lock. While you dont need the magnet to function properly they help with aligning the lock in a locked or unlocked state.
Faceplates & Customization
The cover images for the characters are included in this post! There are two great ways to finish your faceplates:
- Standard: Print the provided cover images on high-quality sticker paper and apply them to the faceplates.
- Premium: For a high-end, commercial feel, the flat faceplates are perfectly dimensioned to run directly through a UV printer.
Hardware Requirements
For the Push-to-Pop Mechanism:
- 1x Push-to-Pop Mechanism per tray ([Insert Link Here])
For each shelf unit (If using Option 1 Original Trays with Faceplates):
For each 3D Printed Tray (If using the Magnetic Pull Method):
- 1x Magnet (12x2mm) to be glued behind the faceplate
For the Multi-Shelf Top Cover & Locking Bar (Per Shelf/Cover):
- 6x Magnets (6x1mm) for the channel locks Link
- 6x Magnets (6x2mm) for the cover
For the Magnetic Extraction Key:
- 3x Magnets (12x3mm) Link
Printing & Assembly Instructions
- Pre-Sliced Pauses: The included .3mf file already has the pause commands baked in at the exact layers needed to insert the hidden magnets inside the print.
- Pro-Tip for Hidden Magnets: When the printer pauses to insert the magnets, place them in the cavities and add a tiny drop of CA glue (super glue) on top of the magnet. Rub the glue in slightly so it coats the surface of the magnet. This helps the PLA properly adhere to the magnet when the printer bridges over it, resulting in a significantly cleaner and smoother top finish!
Comment & Rating (6)