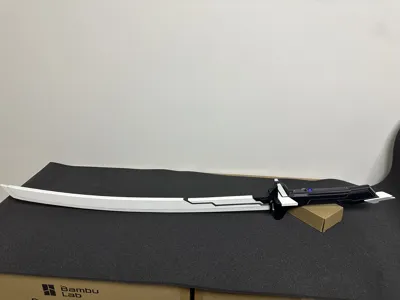
Genesis Ray Cut Katana 1.2m (Motion-Sensing Sound and Light Version) Dual Version v2


Print Profile(2)
Description
Boost Me (for free)
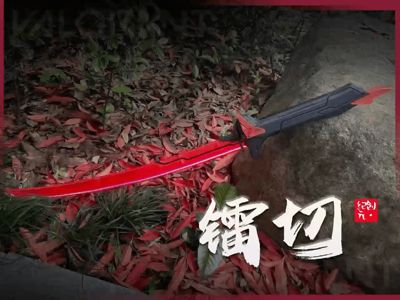
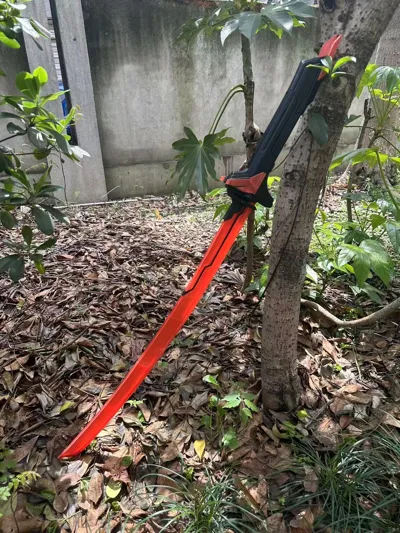
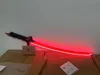
This sword is named 'Ray Cut'. Foremost of the five, one strike opens a new era!
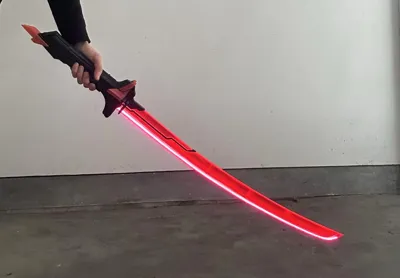
“Originating from the Valorant Genesis series skin, with a translucent cyber-mech textured sci-fi blade, it transforms the game's smooth drawing and light effects into a tangible physical form”
- March 30 COB monochrome version accessories list: [ XH2.54 2-pin connector (female) / 3mm * 1-meter COB LED strip / 5v charge/discharge module / Type-C male to female extension cable / 2-position 3-pin switch / M2*3 hex socket screws / M2*6 hex socket screws / M3*6 hex socket screws ] Specific links are at the end of the article, for your reference.
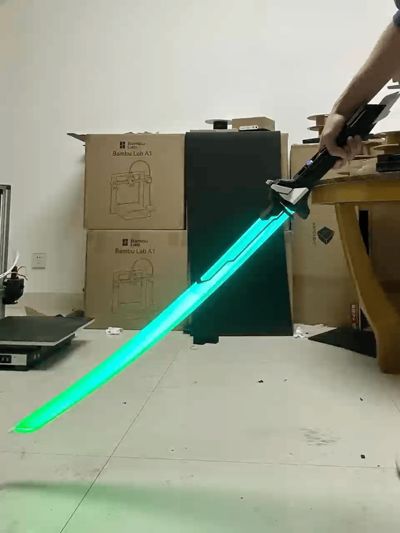
- April 16 Motion-sensing sound and light version: [Sound and light kit 02-ZC010 / 256GB 5050LED - KA010 / Diameter 5mm*1m transparent keel / M3*6 hex socket screws ]
April 16 Major Update ————
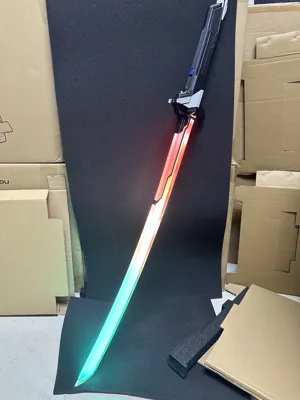
- Ray Cut v2 is now available, with the new blade featuring a keel and motion-sensing sound and light kit. After the update, two different print configurations are now offered: the COB monochrome LED strip version and the motion-sensing sound and light version. Everyone can choose according to their own needs.
- Accessory parameters and connection instructions are included in the document at the end of the article. Those who choose not to add lights can also simply print either of the two versions.
- Assembly instructions have also been updated, with more detailed and complete installation steps.

April 10 2 Updates ————
- (Connection strength revised, the gap between the blade and the handle has been adjusted, the connecting pin has now been changed. Manually set the pin to 100% infill. After adhering the upper and lower parts of the blade, insert the square pin, apply glue, and then snap it into the handle.)
- The original cylindrical pin can be discarded directly. If you have already printed the original parts, you can use glue to directly secure it to the handle.
- The new keel version will be compatible with the Bambu Lab motion-sensing sound and light kit. This version will be updated in a few days, ultimately presenting two different print configurations: a monochrome version and a version adapted for the sound and light kit, which everyone can choose from.
April 4 Update ————
- [Version 1.2] Appearance update. To achieve visual fidelity, a cover trim strip has been added. Considering that replicating the game's notch would make the tail connection too thin and prone to breaking, a cover strip was made instead and has been updated in the file (slightly trim the edges and apply glue to fit it onto the surface, or it can be left uninstalled). This is an optional part.

March 30 Update ————
[Version 1.0 Luminous] After several days of testing, positions and hand-painted supports are set and require no changes. You only need to manually switch to your commonly used parameters when changing filament.
Because the COB monochrome blade version has many disassembled parts, it is still generally user-friendly. Friends with mini printers can also download and try it. Among all components, only the handle is taller. If the handle exceeds the height limit, you can manually cut it again in the slicing software.
Before printing tall, slender parts, make sure to clean the build plate and apply glue, do not print too fast, increase skirt size, transparent blade 0 infill, and appropriately add some Z-lift. If the nozzle collides with a part, you can manually adjust the part's position and print them one by one separately. (This section is for A1 models); other models can try arranging them together. The subsequent assembly process is generally simple, with no significant difficulty.
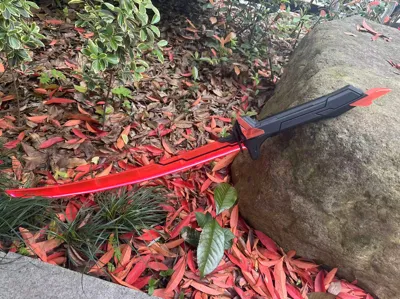
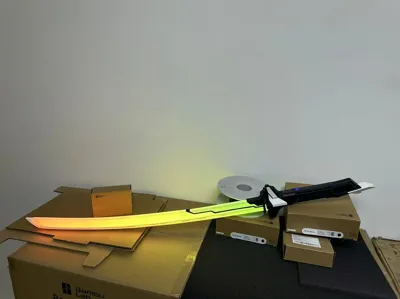
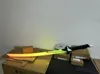
Filament reference: [Here I chose PETG transparent red + PLA black; metallic colors are also recommended for a more premium feel]. (The four brilliant colors in the game can be freely matched using different transparent filaments and LED strip colors.)

- The general wiring and layout are relatively simple. Wiring can be soldered or connected with heat shrink tubing.
- ——Detaileddual-version assembly steps instructions and hardware accessories are all in the PDF document, you can check it yourself→→→

Conclusion————
Regarding the COB version's transparent blade, if a fiberglass keel is not installed inside, will it be unstable? If it's just for posing and normal swinging, it's generally not a big problem.
Because when I made the monochrome version, I chose a 400 beads/meter monochrome COB LED strip, everyone can also try replacing it with a colorful chasing LED strip and control circuit. I won't go into too much detail here. Finally, I wish everyone successful prints without spaghetti or stringing!!
Documentation (3)
License
You shall not share, sub-license, sell, rent, host, transfer, or distribute in any way the digital or 3D printed versions of this object, nor any other derivative work of this object in its digital or physical format (including - but not limited to - remixes of this object, and hosting on other digital platforms). The objects may not be used without permission in any way whatsoever in which you charge money, or collect fees.
Comment & Rating (0)