Gearshift Lever Mecanicskull


Print Profile(1)
Description
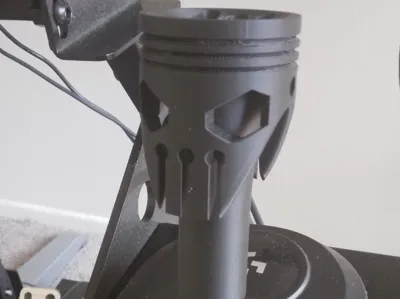
If you are worried about fine details, use supports when printing on critical parts, but If you want to save material don't use them, both have the same strength and function.
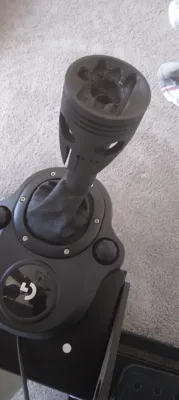
For fast manual shifters I'll highly recomend you this model, it has a higher lever and grip than the original gearshift lever, making it faster and precise to shift during the moment of change.
Instructions:
How to install the MechanicSkull Gearshift Lever?
1. Remove the gray cap from the original gearshift knob.
2. Using a Phillips screwdriver, remove the screw located inside the hole of the now-uncapped knob.
3. Remove the entire knob assembly.
4. Align the flat side of the MechanicSkull's mounting cylinder with the flat side of the metal shifter shaft.
5. Insert the unit firmly, pushing downward until it can go no further.
6. Insert the same screw you removed from the original knob into the screw hole located on the head of the MechanicSkull.
7. Tighten the screw using the same screwdriver you used to remove the original knob.
License
You shall not share, sub-license, sell, rent, host, transfer, or distribute in any way the digital or 3D printed versions of this object, nor any other derivative work of this object in its digital or physical format (including - but not limited to - remixes of this object, and hosting on other digital platforms). The objects may not be used without permission in any way whatsoever in which you charge money, or collect fees.
Comment & Rating (0)