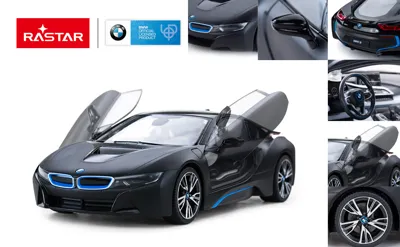
Rastar BMW i8 RC Propeller Modification


Print Profile(1)
Description
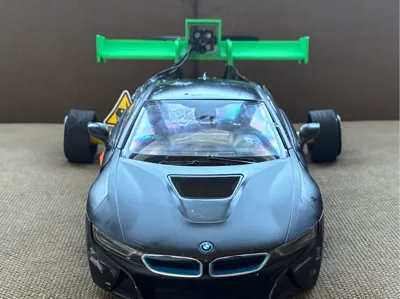
Do you happen to have a slow, boring BMW i8 RC car from Rastar lying around? Do you want to upgrade it? Fear not, for here is a package of printed parts to help you mount a spare RC motor to it. For mine, I used a spare hobbyzone motor, but any motor up to ~3 cm in diameter should fit well.
Parts Include
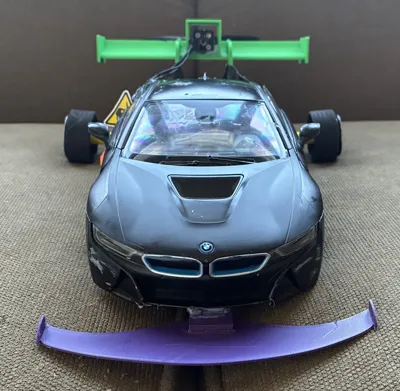
Rear wing, initial design by Alex89rm (https://makerworld.com/en/models/2014214-toyota-supra-gt-wing-rc-1-10?from=search#profileId-2170105). This design is modded to fit the car, as well as include the motor mounting area.
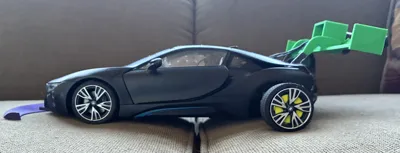
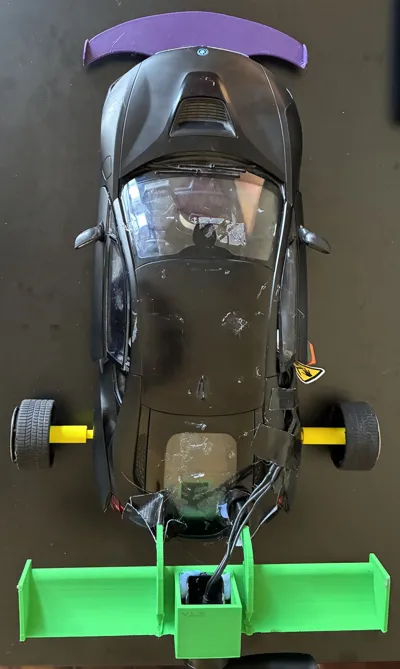
NOT NEEDED - Rear Wheel Spacers, designed by me, these are built for when your rear tires inevitably fly off as the cheap plastic meant for 2 km/h is subjected to 30. This seemingly unfortunate event gives you the opportunity to extend your wheelbase, making the car more stable.
Display stand, designed by me slots right in front of your rear wheels to take the load off of the spacers which are somewhat brittle when they aren't in use. It just props up the back.
Front Splitter, designed by MeinDing (https://makerworld.com/en/models/1216516-tamiya-tt-02-front-spoiler-splitter?from=search#profileId-1567190) is resized to fit the car model. You can just hot glue it to the front, providing absolutely zero advantage but 100% looks improvement.
Assembly
First things first, make sure to print the spacers and rear wing in PETG or better. Both of these parts will be carrying tons of force. Once printed, feed the motor cables through the hole in the wing, before gluing the motor to the casing well, with a strong glue. I stuffed the ESC and receiver inside the back seats, with the battery in the front when installed. To mount the wing to the car, line it up and use the strong glue to adhere it to the vehicle on the very back. You can tape it up for extra measure.
Once dried, you can optionally put the spacers on. Pull the rear wheels off, and feed the thin end through the hole in the plastic (the wheel front casing pulls off). You may have to increase the diameter of the hole depending on the model with whatever method is suitable. Now you can use the stand if need be!
Then, just glue the front wing with hot glue, doesn't really matter, and you're off to the races.
Operation
The torque of the motor if it's strong will pull the car one way. adjust the preset thing on the bottom to offset this. It takes time. Have fun and enjoy!
Comment & Rating (0)