Search models, users, collections, and posts

Artemis II: The SLS Moon Journey Model

Print Profile(3)

All
H2C
A1
H2D
H2S
H2D Pro
P2S
A2L

0.16mm layer, 2 walls, 15% infill
Designer
13.5 h
3 plates
4.9(7)

h2C
h2C
Designer
23.7 h
3 plates
4.7(3)

0.16mm layer, 2 walls, 15% infill
Designer
7.3 h
1 plate

Open in Bambu Studio
Boost
261
681
26
16
808
237
Released 

Description

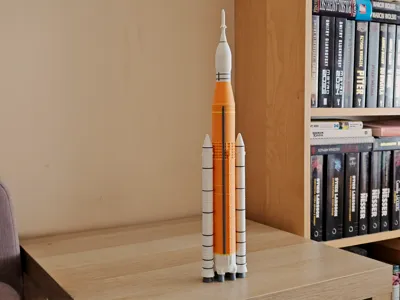
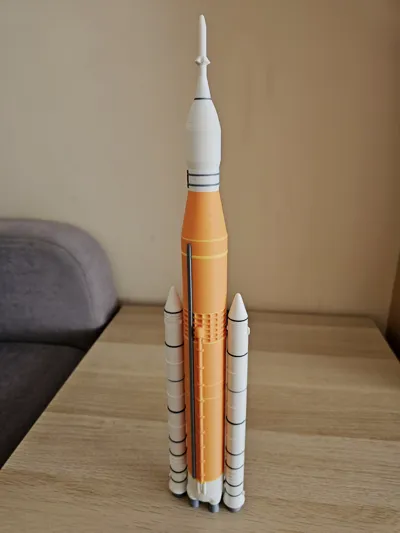
This highly detailed 3D model replicates NASA’s Space Launch System (SLS) for the historic Artemis II mission, the first crewed flight of the Orion spacecraft. Designed with precision and scale in mind, it captures the iconic orange core stage, the powerful twin Solid Rocket Boosters, and the Orion crew capsule perched atop the Interim Cryogenic Propulsion Stage. Whether you are a space enthusiast or a 3D printing hobbyist, this model serves as a perfect educational display piece that celebrates humanity's return to the Moon.

Assembly Instructions

Follow these quick steps to bring your Artemis II rocket to life:

  1. Core Stage: The main orange rocket body consists of two primary sections. Apply a small amount of plastic glue to the connecting rims and align them carefully to ensure a seamless vertical join.
  2. Booster Preparation: Locate the connector pins on Plate Number 3. If the mounting holes on the core stage feel too tight, use a small screwdriver to gently ream the openings and loosen the tolerances.
  3. Final Attachment: Insert the pins into the boosters and press them firmly into the core stage. This requires some physical force to ensure a secure, "snap-fit" connection.

Comment & Rating (26)

(0/1000)

fantastico
3
Reply
bro printed on a p2s 😂somehow
1
Reply
Replying to @3dprintingdude1 :
😂😂 it was divided into pieces
Show original
1
Reply
Does it work on P2S
Show original
1
Reply
Loved the print! Thank you! I couldn't get the boosters attached with the 3d printed pins so I superglued toothpicks in and attached them that way. It is holding up well that way.
2
Reply
Fantastic Print! Came out even better using copper instead of orange
0
Reply
Would it be possible to give us access to a better resolution model? This would be great, thanks. we will work on the colors.
2
Reply
Newbie question...how can i scale this to be 78cm tall? I have the A1 combo
0
Reply
The a1 should be big enough, the tallest price in the h2c print profile is 240cm tall. But if you do want to scale it down, go into the bambu slicer, select the part and on the top part there should be a sizing feature to shrink it.
0
Reply
Print Profile
0.16mm layer, 2 walls, 15% infill
perfect! easy to print, good quality!
Show original
0
Reply
Print Profile
0.16mm layer, 2 walls, 15% infill
Just fantastic
0
Reply
make version for a-1 mini pls?
0
Reply
Boosted
Connecting pins do not print. Even with several attempts on different plates. Up to 65c•
0
Reply
Anyone want to design the launch pad?!
0
Reply

License

This user content is licensed under a Standard Digital File License.

You shall not share, sub-license, sell, rent, host, transfer, or distribute in any way the digital or 3D printed versions of this object, nor any other derivative work of this object in its digital or physical format (including - but not limited to - remixes of this object, and hosting on other digital platforms). The objects may not be used without permission in any way whatsoever in which you charge money, or collect fees.