Search models, users, collections, and posts

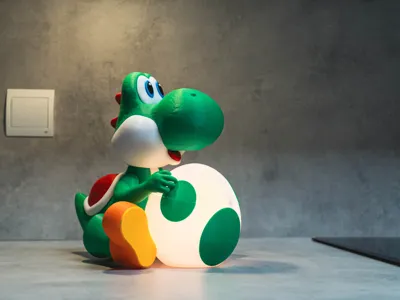
Yoshi Popcorn Bucket Lamp

Print Profile(3)

All
P2S
A1
X1
P1S
P1P
X1 Carbon
X1E

P2S
P2S
Designer
34.7 h
14 plates
4.9(10)

A1
A1
Designer
52.8 h
14 plates
5.0(2)

X1C
X1C
Designer
50.6 h
13 plates
5.0(2)

Open in Bambu Studio
Boost
514
1382
73
41
635
137
Released 

Bill of Materials

Maker's Supply Kits and Parts
Select all
D6x2 mm Round Magnet (20PCS) - CA004
16-color RGBW (2pcs) - KC007
Bambu Filaments
Select all
Jade White (10100) / Filament with spool / 1kg
Red (10200) / Filament with spool / 1kg
Bambu Green (10501) / Filament with spool / 1kg

Description


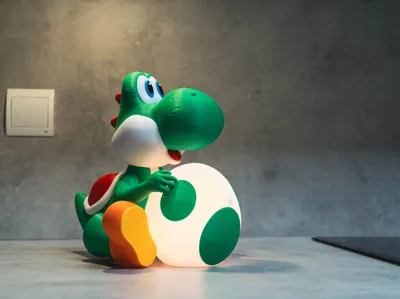
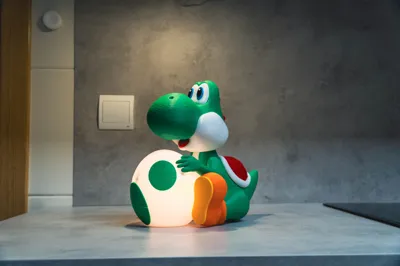
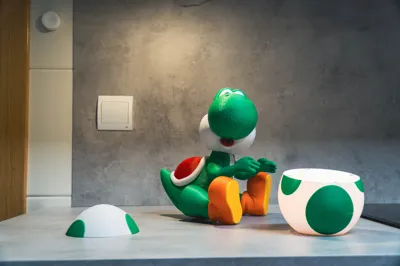
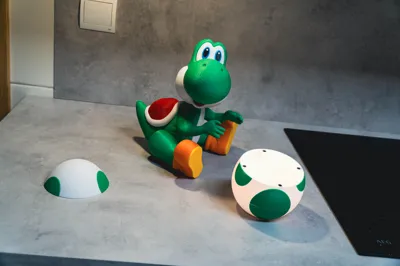
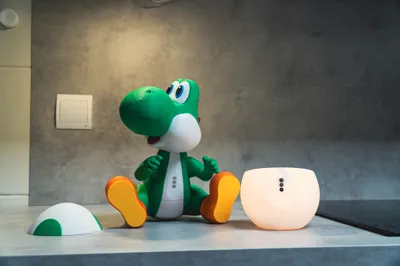
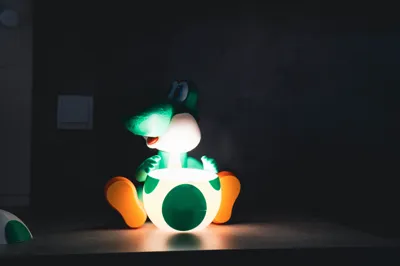
A multicolor split model inspired by a popular Yoshi-style popcorn holder. It’s designed to be very easy to assemble and its head and feet can articulate. The egg mechanism is still a work in progress and needs further testing and refinement, especially around the opening system. An alternative version with magnets (6x2mm, listed in the BOM) has also been developed, allowing the egg to attach securely to the figure. This version can double as a small lamp or be used to hold items like pistachios or peanuts.


Keep in mind that 3D printers and filament are not inherently food-safe, regardless of what you might read online. Even materials like PETG can go through unknown manufacturing processes, brass nozzles are a big NO and printed parts can harbor bacteria. Avoid using this, or any 3D-printed object, for direct food contact without proper precautions such as sealing it with proper sealant. The warning is there, what you do with it is your choice.


Boost Me (for free)


Assembly notes:

Assembly is pretty straight forward, you will need superglue or a two component resin glue. The legs and arms are shaped so that there is no wrong way to assemble it

There are two body options, split and whole. I tried to print the whole version, and the tip of the tail failed, so I made the split version for easier printing

Make sure you align the green part of the egg correctly to the edge of the shell. Otherwise, it will not close properly. If you do make a mistake, you can simply shave it off. 

I glued it bad and had to cut it off with a trimmer. 
DO NOT use a cutter!!!!!!! 
You can injure yourself pretty bad, grab a proper trimming tool. You can get it on BambuLab store or aliexpress, BL stuff is generally much better quality:

https://eu.store.bambulab.com/es/products/maker-s-supply-professional-trimming-tool-kit


Grab him as a shoulder buddy here!


Other models you may want to check out :)


NO Ams switch Pro Controller Holder

Comment & Rating (73)

(0/1000)

Need advice as I am a newbie at this. I printed the egg parts first and everything printed perfectly. And now I'm starting to print from the head but it keeps on failing. it is already my 2nd attempt to print this part. the back of the head keeps on detaching. what should I do? 😭 Using the A1 print profile. My filament is Bambu PLA matte Grass Green.
(Edited)
The designer has replied
0
Reply
Hi, when I used to own the A1, this is where most prints fail due to me touching the plate and leaving grease on the plate. Give it a wash, move the model more down and once the print starts set the printer to silent
0
Reply
Replying to @theStonefox :
I actually wash the plate every time I finish printing tho because I don't like grease on the plate. 😭 Aboit moving the print more down, how do I do that exactly? Sorry, I didn't understand that part.
(Edited)
0
Reply
Replying to @munemunekyun13 :
That's not necessary and you are making it worse. I haven't washed a plate in a month now 😂 Alcohol doesn't work that well either. If the plate is clean, try the other steps. Adding a bit of glue to the plate will make sure it sticks
0
Reply
Print Profile
A1
Finally able to boost and rate! My daughter is super happy about the results! She also really loves that the head and feet can be moved and the egg can be fully removed. Plate # 3 with the green head parts really is tricky, that is the only plate that gave me failed prints. Had to watch it print until layer 90 something to pause and glue the back part that keeps on getting detached. Overall still printed well. Parts fit well,I didn't have to sand down anything at all. 🤩
The profile uploader has replied
profile
1
Reply
Hope your daughter enjoys it :)
0
Reply
Print Profile
X1C
great
The profile uploader has replied
0
Reply
Thanks!
0
Reply
This is awesome. Clicked together and I didn't even need to glue it.
The designer has replied
0
Reply
Great to hear! Especially because I had to glue mine :S
0
Reply
Boosted
Yoshi made very well. It would be beautiful to have the egg like the original one!!!
(Edited)
Show original
designer
1
Reply
Boosted
Thank you very much, magnificent project, I had so much fun with it😁
Show original
designer
1
Reply
Boosted
Hi, by any chance are you thinking of making an openable egg version like the original one? Anyway, this file is worth it, I'm almost tempted to try printing it. I tried downloading the file to see the plates and everything. How come plate 9 tells me the piece is too tall and would risk a collision? I have a Bambulab A1. Thank you very much
(Edited)
The designer has replied
Show original
designer
1
Reply
The plate is print by object, since the profile is made for the P2S you need to right click and select arrange, that should clear the issue. Or wait a bit, I will make the profile for all printers. If you are using the A1, consider slowing the speed and using glue for the tall and tricky parts of the model. Yes I am currently working on the mechanism for the classic door with the hinges, however it will take some time. Like this egg, It will be magnetically attached and compatible with this yoshi
2
Reply
Boosted
Replying to @theStonefox :
Perfect, thank you very much
Show original
0
Reply
Boosted
Replying to @theStonefox :
Hello, I saw that you put the profile for the A1 and I'm starting to print it. Why on some plates did you split the print by object? Can some plates with the same color be merged into a single plate? Thank you very much
Show original
0
Reply
very cool, I have almost finished it
Show original
0
Reply
Boosted
Print Profile
P2S
A great print file, it takes a while for everything to be finished, but it's worth it Yoshi is not yet complete, the magnets and the lamp are still missing, then he will also light up I didn't have to sand anything, it fits great, I glued almost everything
Show original
0
Reply
Print Profile
A1
The slightly dangling butts are a bit pathetic
Show original
0
Reply

License

This user content is licensed under a Standard Digital File License.

You shall not share, sub-license, sell, rent, host, transfer, or distribute in any way the digital or 3D printed versions of this object, nor any other derivative work of this object in its digital or physical format (including - but not limited to - remixes of this object, and hosting on other digital platforms). The objects may not be used without permission in any way whatsoever in which you charge money, or collect fees.