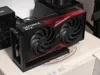
oculink/tgx graphics card dock


Print Profile(2)
Description
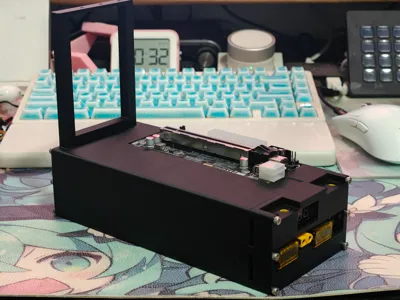
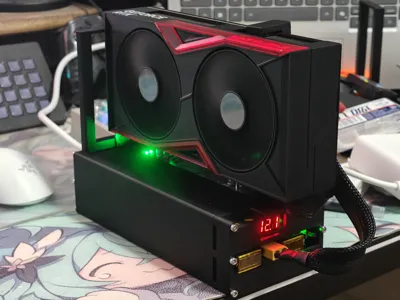
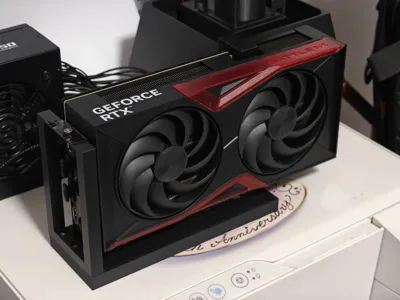
There are two versions: a mini version without a power supply that only supports two-slot bracket graphics cards, and another version with a power supply that supports Dell 495/750W server power supplies and three-slot bracket graphics cards
Bill of materials:
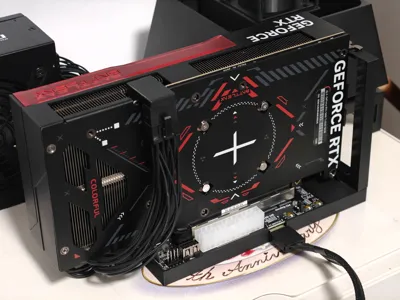
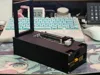
1, Hou Chi Technology expansion board, as shown in the figure below, available on both Taobao and Pinduoduo

2, Hardware:
Mini version: requires 4 M3*5 screws to fix the expansion board, 3 M3*10 screws to connect the base and the graphics card bracket
Power supply version: 4 M3*5 screws to fix the expansion board, 11 M3*25 screws to connect the graphics card bracket-main body-back cover
The graphics card is fixed with M3 screws
3, Power supply:
I am using a Dell 750W server power supply; the 495W size should be the same, but I am not sure if other power supplies can be used
You can directly buy a power supply with modified 12V output, or buy an original one and solder a power distribution board yourself (more powerful features)
4, Power distribution board (optional):
Compared to a modified power supply, it offers more powerful functions, with a switch and voltage display, and more output ports
Power distribution board link:Link
There is a specially designed back cover, which makes the overall look more aesthetically pleasing
Welding is required, but the difficulty is not high (it was my first time soldering too)
5, Power cables:
For power supplies with modified 12V output, buy Y-type/U-type terminal to 8pin graphics card cables
The power distribution board can use an XT60 to 8pin graphics card cable (I personally use an XT60 to dual 8pin, one connected to the expansion board and one to the graphics card)
Please pay attention to the direction during assembly. To prevent incorrect insertion, one of the four sides has no chamfer. Please ensure the four corners align correctly
License
You shall not share, sub-license, sell, rent, host, transfer, or distribute in any way the digital or 3D printed versions of this object, nor any other derivative work of this object in its digital or physical format (including - but not limited to - remixes of this object, and hosting on other digital platforms). The objects may not be used without permission in any way whatsoever in which you charge money, or collect fees.
Comment & Rating (0)