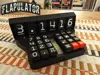
Flapulator - The World's Most Tactile Calculator


Print Profile(1)
Description

Intro
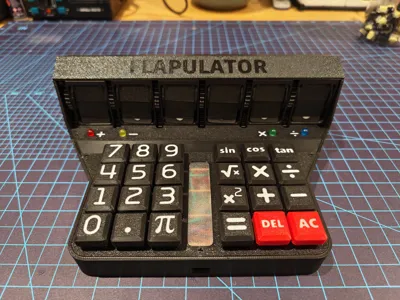
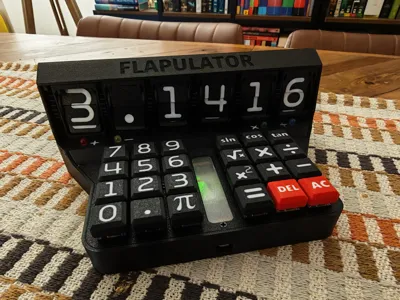
Meet the Flapulator, the “form over function” calculator. No more do you have to sit in silence as you calculate. Sit back and enjoy the clacks of a mechanical keyboard, as your display gently clicks its way to the next digit. Questionable accuracy, slow calculation speed, but maximum tactile pleasure.
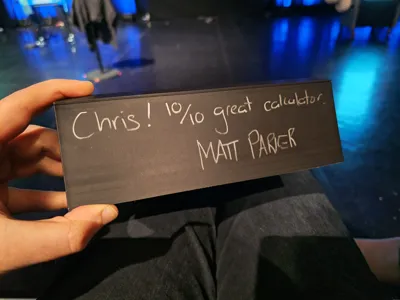
This was a small passion project which I've been working on for a few evenings and weekends over the last month. I found out one of my favourite Mathematicians/Comedians/YouTube-maths-community-personalities: Matt Parker was going to be doing a show in my hometown, and he is known for his signing of calculators. Upon discovering this at the start of March I then had four weeks to design and build a novel calculator which offered something no calculator has done before, and thus the Flapulator was born.
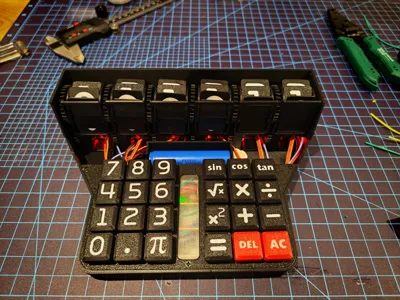
The concept was to create the most over-engineered calculator which had an analogue feel, but still with a digital brain. After exploring some ideas with flip dots, I eventually settled on split flaps as my display choice. The clack of big wheels of characters turning in airports has always been a sensory pleasure of mine, so I wondered how tough it would be to build a vastly smaller, but fully functional 3D printed version from scratch. Turns out it was fun and also quite a challenge!
Features
- 6 Digit Split Flap Calculator Display (where the decimal point, or negative sign also require 1 digit)
- Automated Calibration and Homing of Servo motors through Hall sensors
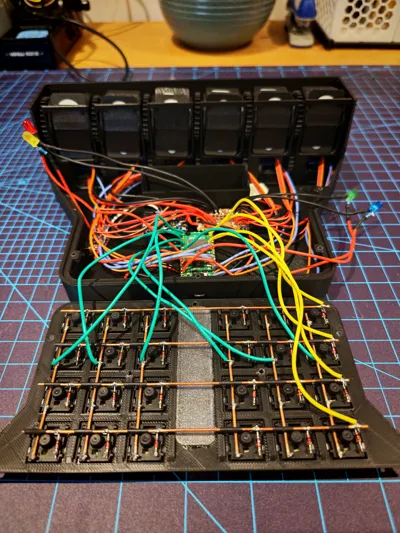
- Handwired Mechanical Keyboard with 24 keys (customisable functions can be written into the code)
- Battery Powered (around 4 hours of calculation time on a fully charge)
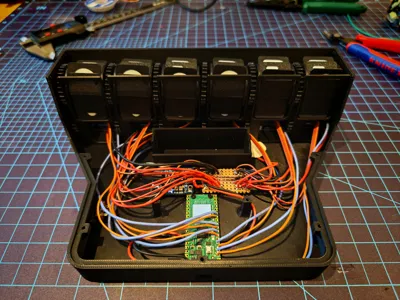
- Raspberry Pi Pico Controlled (with full custom code available to download as part of this project)
- LED Illumination to keep track of current mathematic operation
Now the following might not be classed as “features”, but certainly “characterful bugs/side effects”:
- Varying display accuracy depending on temperature, friction and servo thermals (classic out-by-one errors are a semi-common occurrence)
- Unable to process new keyboard inputs whilst display is updating (probably could be mitigated with some extra work put into the code)
- No battery charging/passthrough (although battery can be removed and charged separately)
Bill of Materials
Electronics
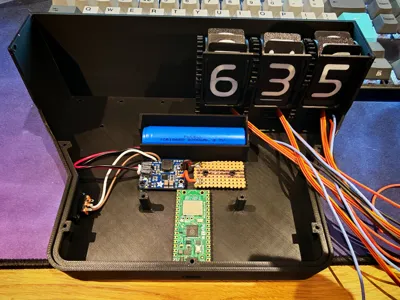
- 1 x Raspberry Pi Pico 2 (W version optional) - Main controller
- 1 x Adafruit Power Boost 1000 Basic - Battery Management and 5V Boosting
- 1 x Perforated Board (cut to 31.5mm x 21mm) - Power Distribution
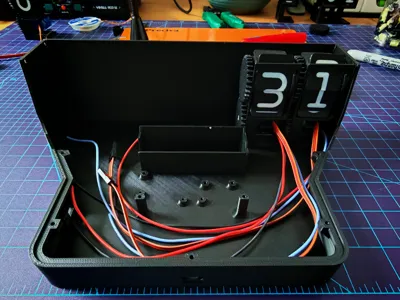
- 1 x 18650 Lithium Ion Battery (with protection and JST connector) - Power Supply
- 1 x Two Position SPDT Micro Slide Switch - Power Switch
- 6 x Continuous Rotation Servos (FS90R) - Split Flap Drivers
- 6 x Digital Output Hall Sensors (KY-003) - Split Flap Position Detection
- 24 x Gateron KS-33 Low Profile Mechanical Switches - Keyboard Keys
- 24 x 1N4148 Diodes - Keyboard N-Key Rollover (probably optional)
- 4 x 5mm LED - Operation identification (I used Red, Yellow, Green and Blue)
- 4 x 220 Ohm Resistors - Led resistors (330 Ohm resistors would also work)
- 1 x Schottky Diode - Power Protection (probably optional, but recommended)
Sundries
- 12 x 2mm Machine Screws (6mm to 8mm length) - Hall sensor
- 6 x 2mm Machine Screws (4mm length) - Pi Pico and Power Switch
- 4 x 2.5mm Machine Screws (4mm length) - Powerboost and Perf Board
- 27 x 2.5mm Machine Screws (5mm length) - Shell and Servo
- 12 x 3mm Self-Taping Screws (6mm length) - Split Flap Digits
- 6 x 4mm Diameter, 2mm Depth Neodymium Magnets - Homing Detection
- 26 AWG Wire - Hall sensor, LED, Power, Keyboard and Switch connections
- 16 AWG Bare Copper Wire - Mechanical Keyboard connections
- Heatshrink Tubing/Insulating Tape - General insulation and safety
Build Guide
The full build guide with 3D renders and photographs, step by step instructions and wiring diagrams is included as the “Flapulator - Build Guide” PDF which can be downloaded below.
I hope you enjoy this niche little side project, and even if you can't find a direct use for the full Flapulator, I've also included all the raw model files for the split flap mechanism, the keyboard caps and overall shell, so you may able to repurpose some of these elements into your own projects.
Code
The full code base can be found here on my GitHub
Boost Me (for free)
If you do like this model, please leave me a boost as it really helps me have the freedom to keep working on new projects.
Documentation (1)
License
You may create derivative works based on this object, provided that all such derivative works are published exclusively on the MakerWorld platform and include proper attribution to the original creator. You may not share, upload, host, distribute, or publish this object—or any derivative work of this object—on any other digital platform, marketplace, or distribution channel. Commercial use of this object and any derivative works is strictly prohibited. This includes, but is not limited to, selling, renting, sublicensing, or using the object in any context in which you receive monetary compensation or other financial benefits.
Comment & Rating (13)