VESA Monitor Tablet Mount – Sim Racing


Print Profile(1)
Description
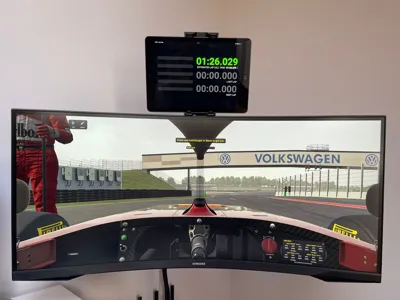
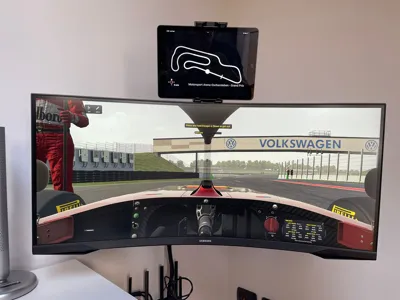
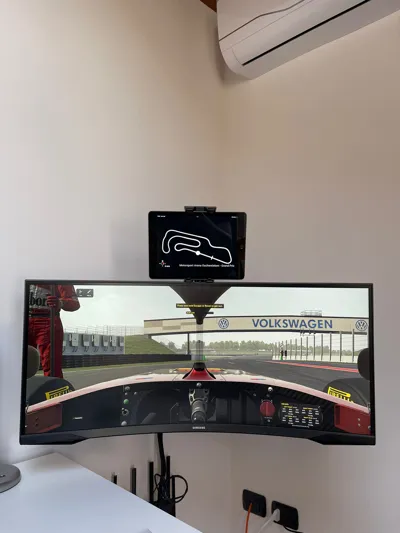
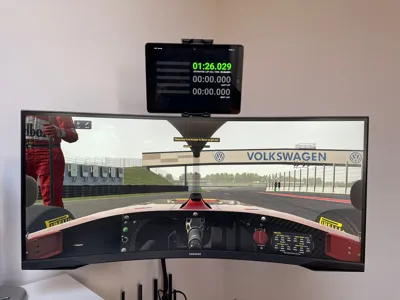
A clean and functional tablet holder designed to mount directly to your monitor using the VESA interface.
Originally designed for sim racing setups, this mount allows you to place a tablet right above your screen to run apps like SimHub dashboards, telemetry, or custom displays.
However, it’s also perfect for:
- Productivity setups (second screen)
- Streaming control panels
- Smart home dashboards
- Workshop or studio use
The design focuses on minimalism, rigidity, and easy installation, without compromising the aesthetics of your setup.
This is
🎯 Features
- VESA-compatible mounting (standard 75x75)
- Stable and rigid structure (no wobble during intense sessions)
- Optimized viewing angle for seated setups
- Clean, minimal design (no visual clutter)
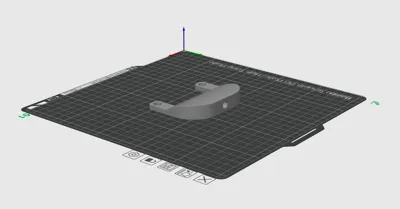
- Easy to print (no supports required – depending on version)
🖥️ Ideal Use Cases
- Sim racing dashboards with SimHub
- Flight simulators (instruments / maps)
- Stream Deck alternative (tablet UI)
- YouTube / Spotify control panel while gaming
- CAD / design reference screen (perfect for workflows like AutoCAD)
📏 Compatibility
- VESA: 75x75 mm
- Tablet size: Designed for standard tablets (tested with ~10–11” devices)
- Monitor: Any monitor with rear VESA mount
🛠️ Assembly
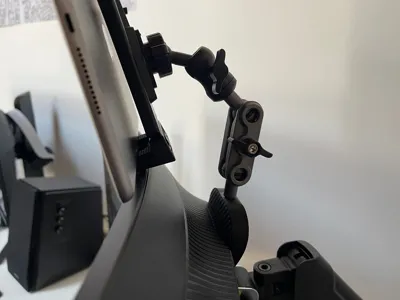
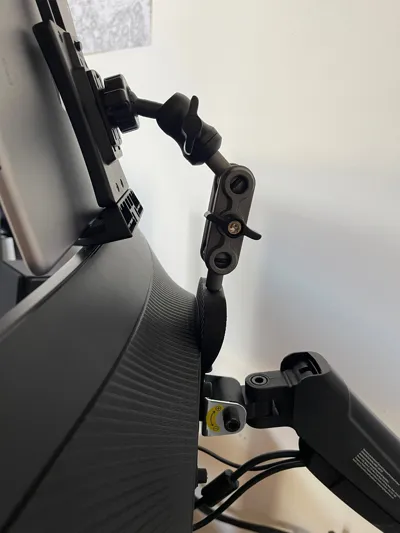
- This mount is designed to work with a separate adjustable tablet holder, connected via a threaded insert embedded in the 3D print.
- I personally used this tablet holder:
👉 Amazon tablet holder https://www.amazon.it/dp/B0CRQZQVPN?ref=ppx_yo2ov_dt_b_fed_asin_title - This allows:
- Adjustable angle
- Better grip on different tablet sizes
- A more professional and flexible setup
Installation:
- Print the part
- Insert the heat-set insert using:
- Soldering iron (recommended)
- Let it cool down completely
- Screw in your tablet holder
💡 Notes
- Depending on your monitor thickness, you may need longer screws or spacers
- For heavier tablets, consider increasing infill or printing in PETG
- You can easily remix the design to fit different tablet sizes or angles
🚀 Why I Made This
I designed this mount to improve immersion in my sim racing setup using SimHub, but quickly realized it’s incredibly versatile for everyday use.
License
You shall not share, sub-license, sell, rent, host, transfer, or distribute in any way the digital or 3D printed versions of this object, nor any other derivative work of this object in its digital or physical format (including - but not limited to - remixes of this object, and hosting on other digital platforms). The objects may not be used without permission in any way whatsoever in which you charge money, or collect fees.
Comment & Rating (1)