SKADIS Mount for Wire Shelf – Adjustable Hooks


Print Profile(1)
Description
This is a set of mounting hooks for attaching an IKEA SKADIS-compatible pegboard to a wire shelf (commonly known in Japan as “metal rack”).
--------------------------------
■ Bolt Adjustable Type
--------------------------------
Includes:
- Upper Hook
- Lower Hook (Board Hook + Wire Hook)

Features:
- The board is positioned directly above or below the shelf wire
- The board must fit within the shelf height (clearance required)
- Fine adjustment is possible by bolt tightening
- Easy to understand lower hook structure with separate board hook and wire hook
- The pegboard surface can be aligned flush with the front edge of the shelf
Mounting Direction:
- The hooks can be installed either inward or outward.
- Choose the direction based on your shelf layout and surrounding clearance.
Installation:
- The lower board hook is mounted downward
- Apply slight downward tension when tightening to improve stability and reduce wobbling
- Hand-tightening is usually sufficient. Do not overtighten.
- M6 hex nut
- M6 bolt (length depends on your setup)

Available versions:
- For 6mm shelf wire

- For 4.8mm shelf wire

--------------------------------
■ Screw Fixed Type
--------------------------------

Includes:
- One-piece Upper Hook
- Adjustable Lower Hook
Features:
- Redesigned upper hook as a one-piece structure
- Greatly increased strength
- Reduced assembly time
- Clearance can be adjusted continuously within the slot range
- Improved compatibility with shelf spacing that could not be fitted before
- Clearer and simpler structure
Mounting direction:
- Inward: Board stays inside the shelf → Must fit within shelf height
- Outward: Board extends outside → No height limitation
- Outward mounting is commonly recommended, especially if shelf boards or liners are already installed.
Hardware required:
- 4mm x 12mm self-tapping flat head screws

- Two screws are required for each lower hook assembly
- If you install one lower hook on both left and right sides, four screws are required in total
Assembly:
- Hook the upper hook onto the top shelf
- Hook the lower hook onto the lower shelf wire
- Adjust the lower hook position as needed
- Attach the pegboard and secure firmly
Available versions:
- For 6mm shelf wire
- For 4.8mm shelf wire
--------------------------------
■ Plates
--------------------------------
- Each plate contains one set (Upper + Lower)
- Print 2–4 sets depending on your board width
Plate 1 – Bolt Adjustable Type (For 6mm Wire)
Plate 2 – Bolt Adjustable Type (For 4.8mm Wire)
Plate 3 – Screw Fixed Type (For 6mm Wire)
Plate 4 – Screw Fixed Type (For 4.8mm Wire)
--------------------------------
■ Extra Support / Middle Shelf Use
--------------------------------
(For Screw Fixed Type only)
Using an additional lower hook on a middle shelf greatly increases rigidity.
Recommended setup:
- Hook the wire side from above onto the middle shelf wire
- Use the upward-facing board hook side for the pegboard
Even one middle support hook provides a noticeable improvement.
--------------------------------
■ Important
--------------------------------
- Measure your shelf wire diameter before printing
- Check your shelf height (clearance) before installation
- 6mm / 4.8mm refers to the outer diameter of the front edge wire of the shelf
🔧 Assembly Instructions(Detailed)
🔩 Bolt Adjustable Type
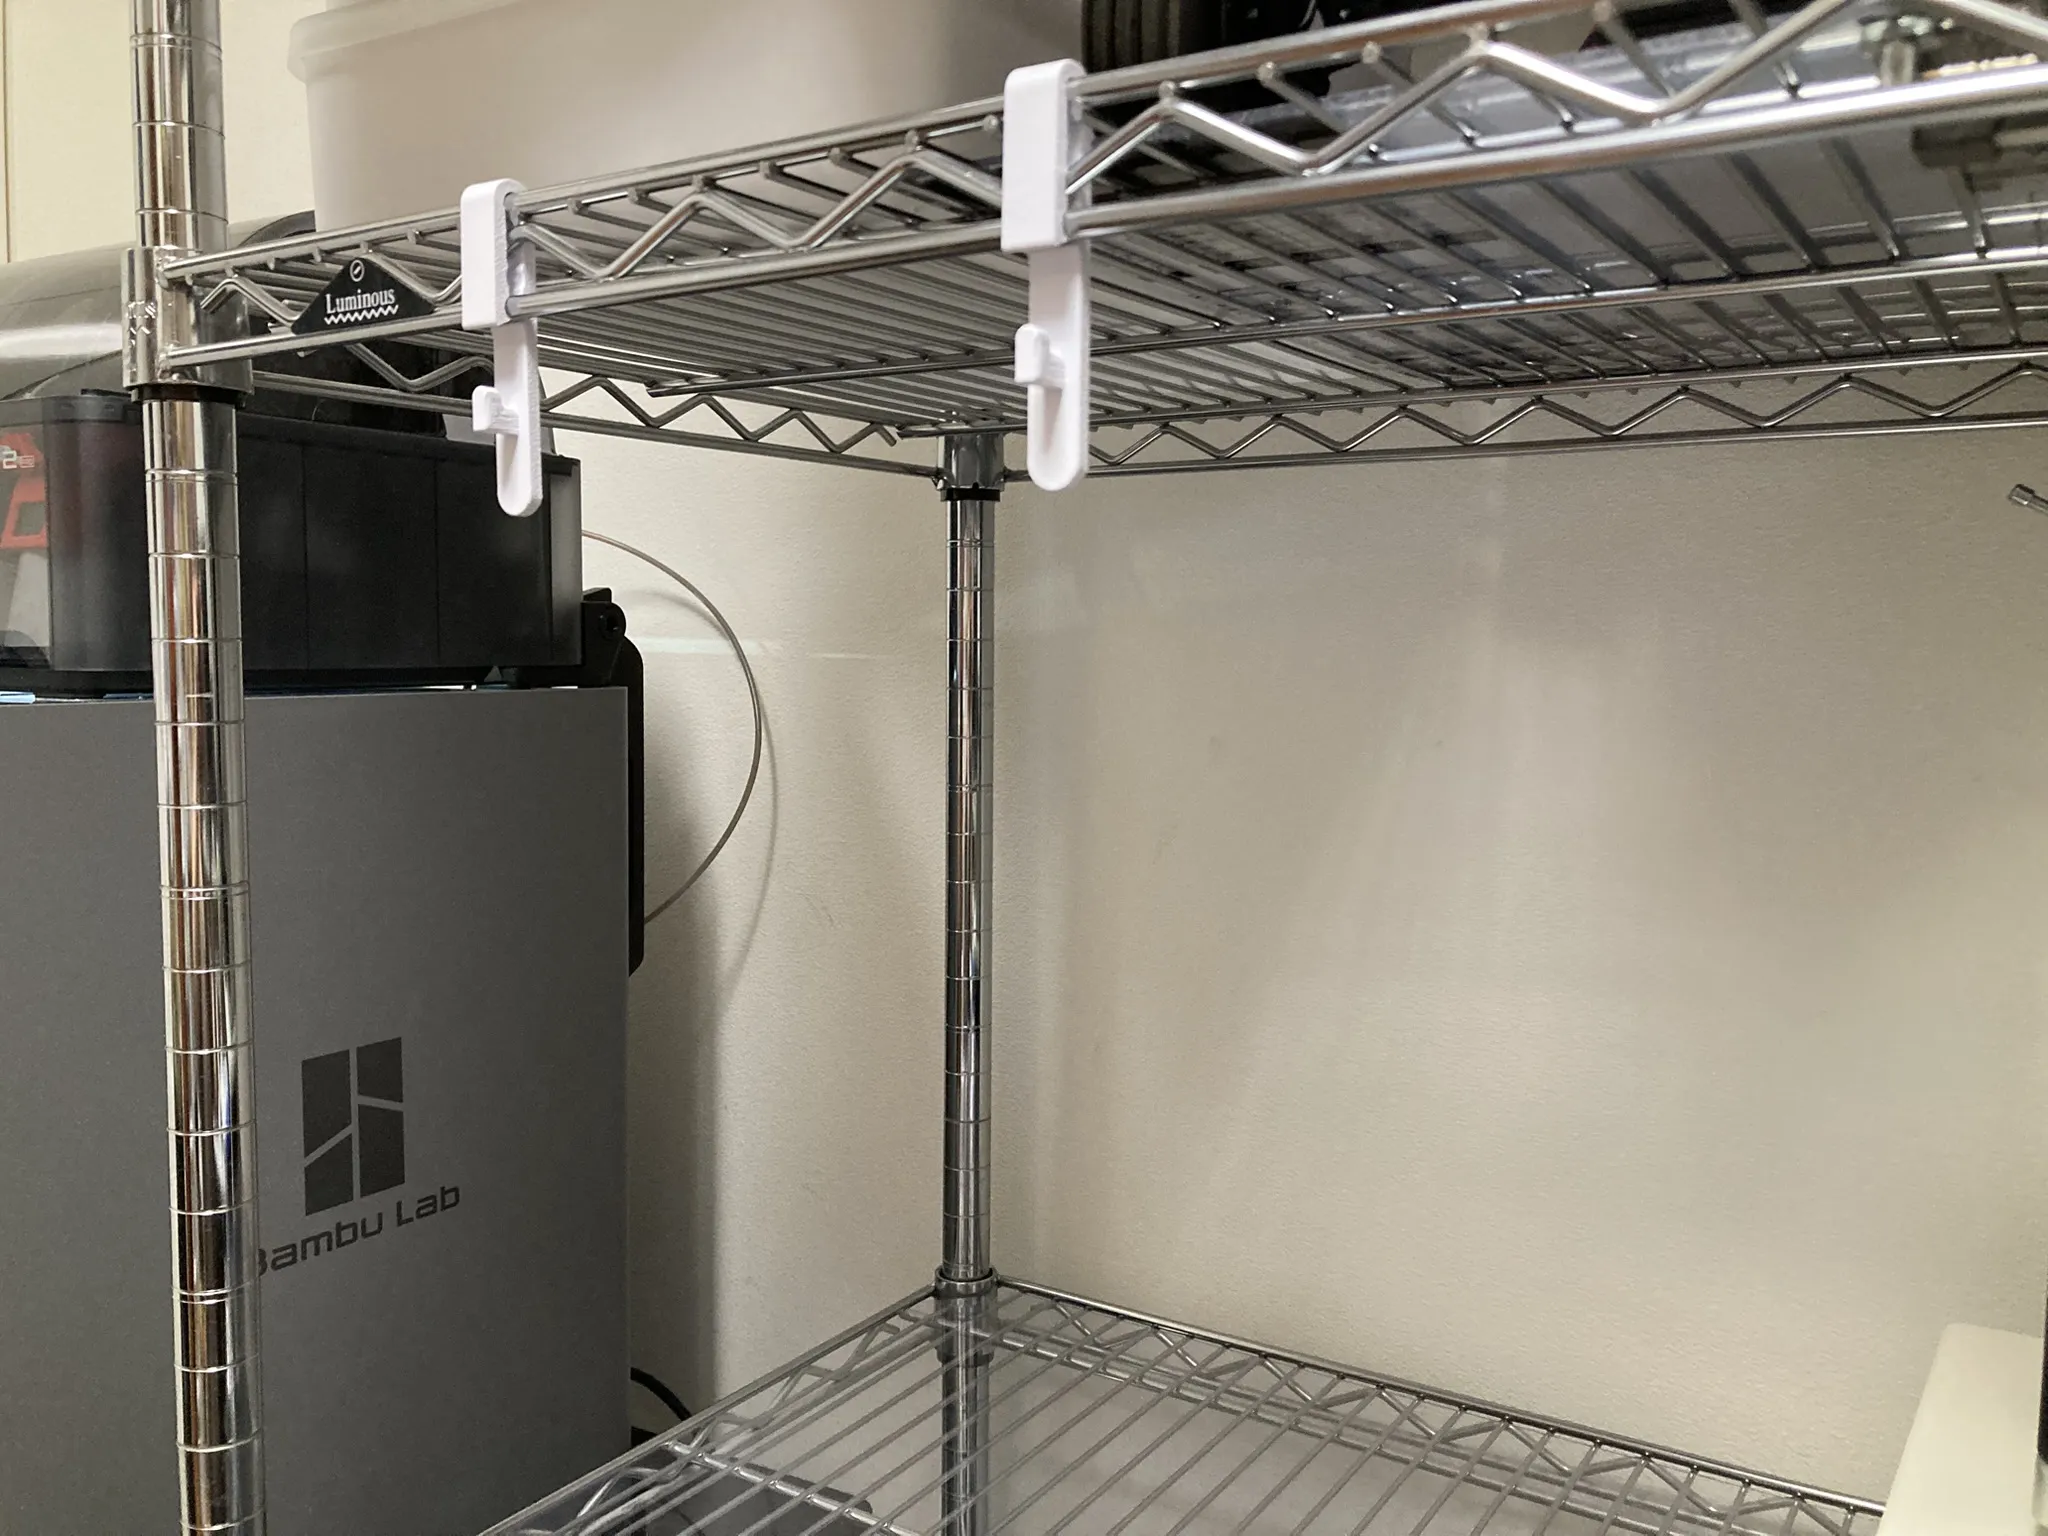
Insert a M6 hex nut into the wire hook of the lower hook.

Hook the upper hook onto the edge of the top shelf.

Hang the pegboard onto the upper hook.

Hook the wire hook from bottom to top onto the shelf wire.

Attach the board hook of the lower hook to the pegboard.

Connect the board hook and wire hook using a M6 bolt.
Use a bolt length that properly reaches both parts.
Apply slight tension to remove looseness, then tighten.

🪛 Screw Fixed Type
1. Attach the one-piece upper hook to the top shelf by hanging it downward from above.

2. Hang the pegboard onto the upper hook.

If possible, engage both board hooks for maximum stability.
3. Take the lower wire hook part and hook it onto the lower shelf wire from below.

4. Take the lower board hook part and attach it downward to the pegboard.
Engage at least one of the two board hooks.

5. Adjust the vertical spacing between the two lower parts.

6. Secure the two lower parts using two 4 x 12 mm flat head screws.

Optional: Middle Shelf Reinforcement
If you install a tall pegboard that extends beyond the shelf spacing and the board flexes due to insufficient rigidity, an additional lower hook can be used to secure the board to a middle shelf.
How to use:
- Install it in the opposite up/down orientation compared to the standard lower hook setup, depending on your layout


The reversed orientation may support vertical load more effectively.
Even one support point near the center of the board can noticeably improve rigidity and reduce flexing.
🧩 Use Cases
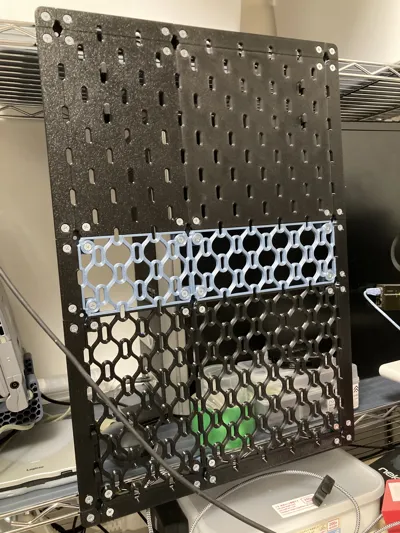
Modular Mixed Layout
Solid panels + lightweight lattice panels can be combined freely.

🖥 Behind the Board Mount

Monitor mounted behind the pegboard.
Keeps the front clean while hiding cables and hardware.
🖥 Front Mount Setup

Monitor mounted on the front side of the pegboard.
Easy access and flexible positioning for daily use.
The monitor mount shown in the images is not included in this model.
It is a separate design by another creator:
[LINK HERE]
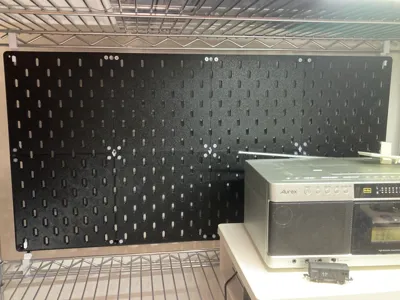
📏 Extended Height Setup

The board extends beyond the shelf spacing.
Allows installation without being limited by shelf height.
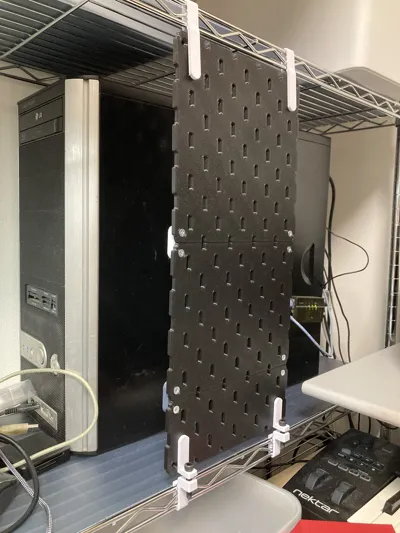
🔄 Double-Sided Setup
Accessories can be mounted on both front and back sides of the pegboard.
Useful when you want to maximize storage in limited space.


🪶 Lightweight Single Board Setup
For a small and lightweight pegboard, two upper hooks installed on the left and right sides may provide enough support without using the lower hook.
This applies when all four board hooks are engaged (two hooks on each upper hook).
Suitable for light accessories only.

📐 Three-Side Pegboard Layout
Pegboards can be installed on multiple sides of the shelf.
Useful for creating a wraparound storage workspace.

License
You may create derivative works based on this object, provided that all such derivative works are published exclusively on the MakerWorld platform and include proper attribution to the original creator. You may not share, upload, host, distribute, or publish this object—or any derivative work of this object—on any other digital platform, marketplace, or distribution channel. Commercial use of this object and any derivative works is strictly prohibited. This includes, but is not limited to, selling, renting, sublicensing, or using the object in any context in which you receive monetary compensation or other financial benefits.
Comment & Rating (9)