Search models, users, collections, and posts
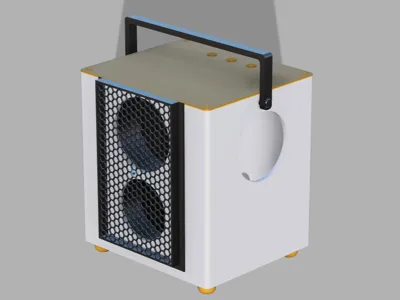
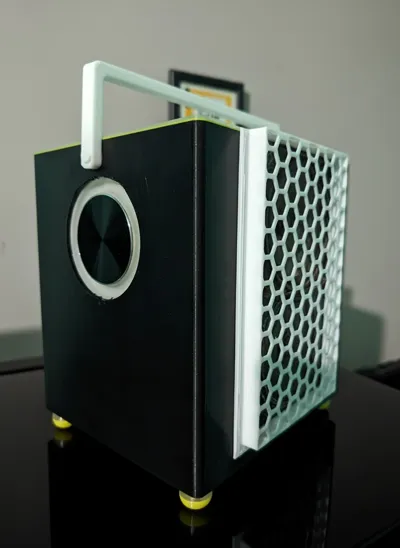
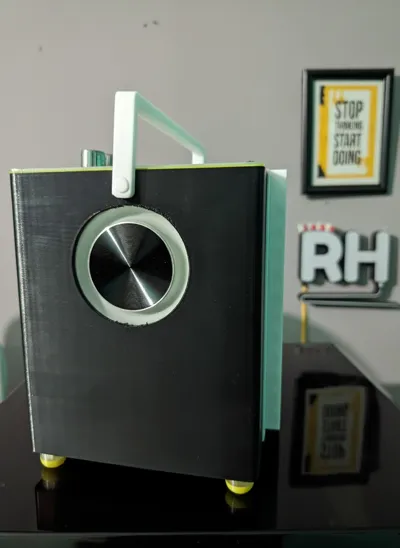
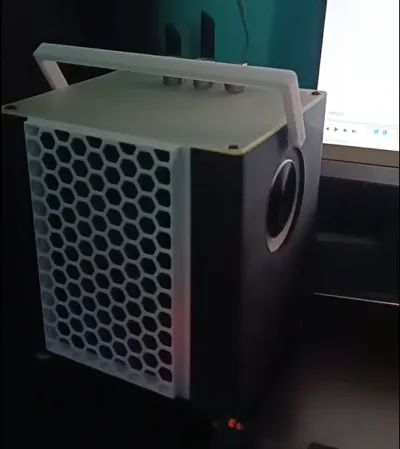
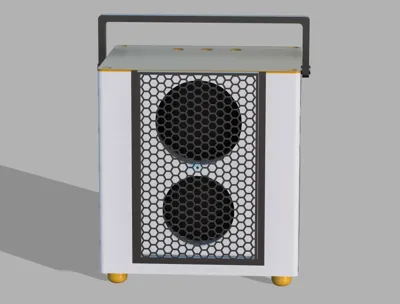
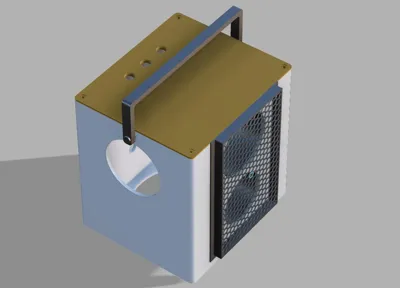
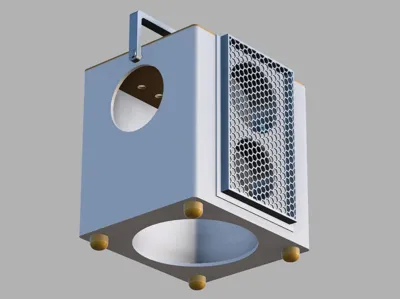
Portable Speaker Box with Bass Radiator
IP Report


Print Profile(1)
0.2mm layer, 2 walls, 15% infill
Designer
9.2 h
4 plates
Open in Bambu Studio
Boost
5
14
0
0
6
0
Released
Bill of Materials
Maker's Supply Kits and Parts
Select all
Bambu Filaments
Select all


List other parts
- 65mm Passive Bass Radiator x 1:
- 4-inch Subwoofer x 1:
- 2.4-inch Speakers x 1:
- 2-inch Speakers x 1:
- Xinyi Sini Audio XY-E30H Amplifier Board x 1: https://www.aliexpress.com/item/1005003526371556.html
Description
Boost Me (for free)
🔊 DIY Portable 2.1 Speaker Box with Bass Radiator
A compact and powerful 3D printable speaker enclosure designed for clean sound and deep bass.
This build combines a 4-inch subwoofer + dual full-range speakers + passive radiator, delivering a balanced and punchy audio experience.
Perfect for DIY audio lovers, makers, and electronics enthusiasts.
⚡ Features
- 🔊 2.1 Audio System Design
- 🔥 Deep Bass with Passive Radiator
- 🎧 Clean front honeycomb grill design
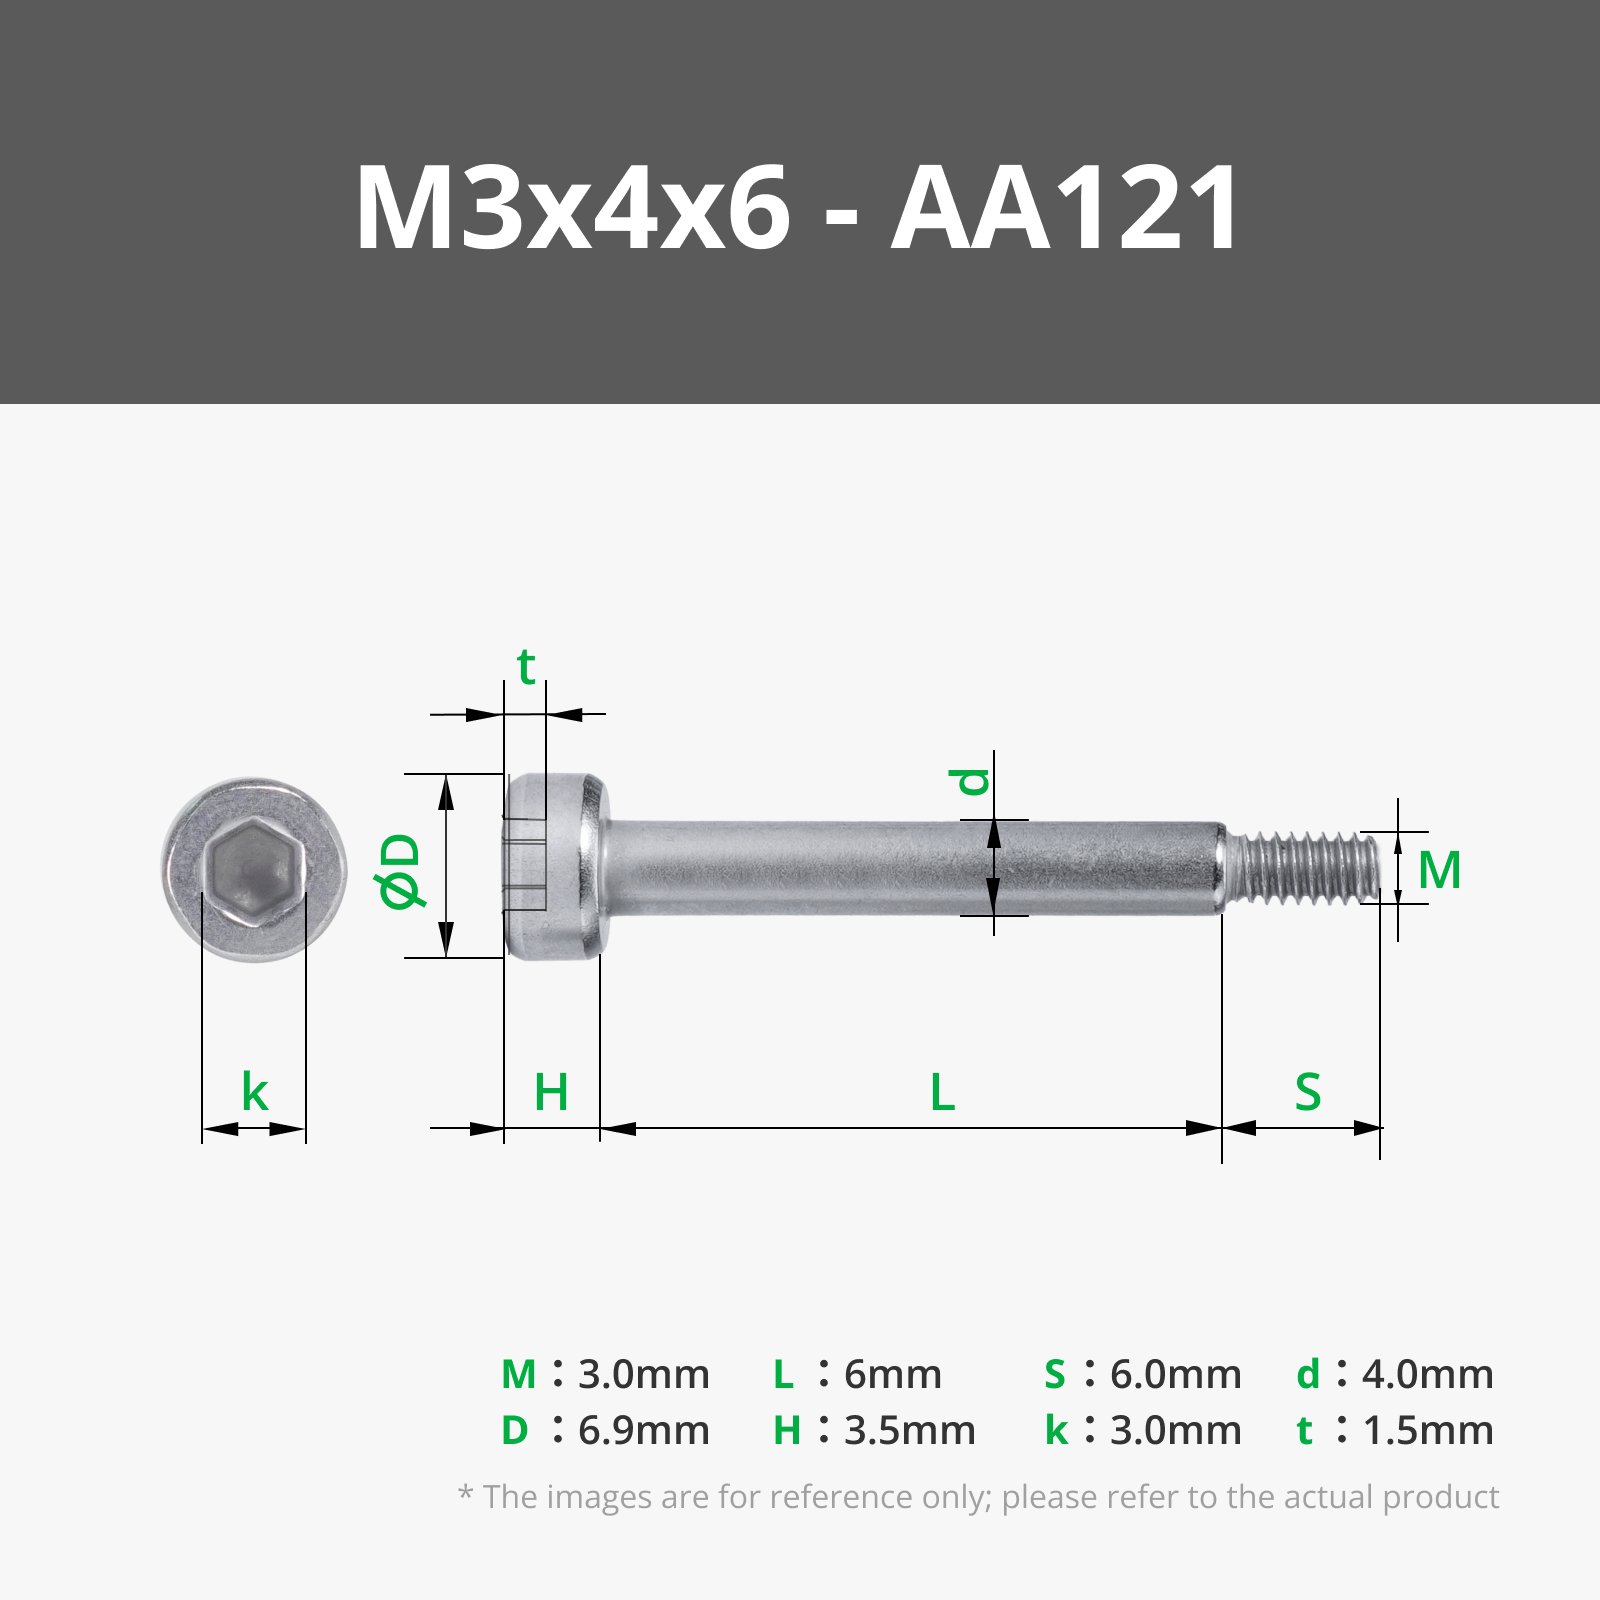
- 🧰 Easy assembly with M3 screws
- 🪶 Portable with integrated handle
- 🎨 Customizable colors (body, grill, feet)
🧩 Components Used
- 65mm Passive Bass Radiator
- 4-inch Subwoofer
- 2.4-inch Speakers
- 2-inch Speakers
- Xinyi Sini Audio XY-E30H Amplifier Board
- M3 Screws
🛠️ Assembly Notes
- Ensure airtight sealing for best bass performance
- Use foam or gasket around speakers
- Secure amplifier inside with proper insulation
- Front grill is removable for maintenance
🖨️ Print Settings (Recommended)
- Layer Height: 0.2mm
- Infill: 15–25%
- Walls: 3–4
- Supports: Yes (for handle & openings)
- Material: PLA / PETG
💡 Tips
- For stronger bass → increase enclosure sealing
- For better durability → print with PETG
- Add rubber feet to reduce vibration
Assembly Guide
- Print all parts
- Install subwoofer in main chamber
- Install 2.4” speakers in front panel
- Mount passive radiator securely
- Install amplifier board inside
- Connect wiring (check polarity)
- Close enclosure with M3 screws
Wiring
- Amplifier → Subwoofer + Speakers
- Ensure correct channel output (L/R/Sub if supported)
Notes
- Keep enclosure sealed for best performance
- Avoid air leaks around radiator
License
This user content is licensed under a Standard Digital File License.
You shall not share, sub-license, sell, rent, host, transfer, or distribute in any way the digital or 3D printed versions of this object, nor any other derivative work of this object in its digital or physical format (including - but not limited to - remixes of this object, and hosting on other digital platforms). The objects may not be used without permission in any way whatsoever in which you charge money, or collect fees.
Comment & Rating (0)