Harman Kardon SoundSticks Mount | MultiBoard


Print Profile(1)

Description
The Design
The Harman Kardon SoundSticks are, in my opinion, one of the iconic designs from the early 2000s. I bought a pair of the first generation models for my studio when I started it and, even after nearly losing them in a fire, they're still a piece of design I love (albeit now slightly sooty). They've since moved to the workshop (sometimes really loud music is the only way to get some peace and quiet). In that space, though, they're frequently in danger of either being knocked over, spilled on, or having me run over them on my wheeled work chair while I reach for a fire extinguisher to put out my latest project. It made sense to finally find a way to keep them safe but still enjoy the music… and the aesthetic.
This mount is designed to integrate the speakers directly into the MultiBoard ecosystem, freeing up desk space while maintaining the speakers' unique adjustable geometry. I've tried to balance low material use (and print time) with structural strength and a style that bridges the speaker's Bauhaus design with the geometry of the MultiBoard System.
Features I've taken into account
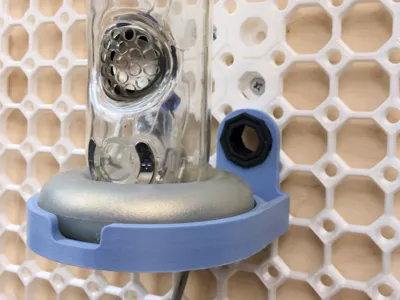
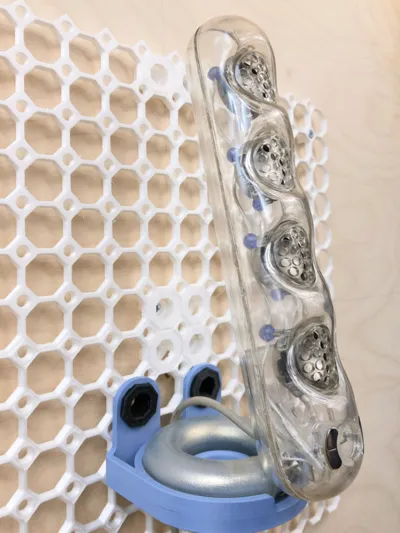
- Dual-Position Support: The geometry is designed to hold the SoundStick in both its collapsed (where it sits snugly on its doughnut base) and extended (forward-leaning) configurations.
- Cable Management: Features a dedicated rear recess, allowing the speaker cable to be routed neatly behind the mount and along the MultiBoard channels. These are some great cable guides that I use to run cables along my Multiboard wall
- Efficient Print: Optimized to print in a little over an hour and twenty minutes without supports, using 39g of filament.
- Secure Mounting: Designed to be secured using two standard MultiBoard 13mm thread nuts for a flush, wiggle-free fit.
Print Settings
- Filament: PLA
- Supports: None
- Walls: 3 Walls
- Infill: 15% (I prefer cubic for its strength/filament/print time balance)
- Print Time: ~1h 24m.
- Material Usage: ~39g.
Other prints you'll need
- The Multiboard wall
- 2 x the 13mm (or whichever works best for your wall setup) Multiboard large thread
- I highly recommend this tool for inserting and tightening the threads as well as for inserting the snap covers on your Multiboard. This thing has made my life infinitely easier (only in relation to Multiboard—I still battle with tying my shoe laces)
Installation
- Position the mount over two of the larger MultiBoard holes.
- Route the speaker cable through the rear recess before securing with the threads. Or secure the threads, spot what you've done wrong, undo the threads, put the speaker cable through, and redo the threads. As I do every single time.
- Secure using two MultiBoard 13mm thread nuts from the front.
License
You may create derivative works based on this object, provided that all such derivative works are published exclusively on the MakerWorld platform and include proper attribution to the original creator. You may not share, upload, host, distribute, or publish this object—or any derivative work of this object—on any other digital platform, marketplace, or distribution channel. Commercial use of this object and any derivative works is strictly prohibited. This includes, but is not limited to, selling, renting, sublicensing, or using the object in any context in which you receive monetary compensation or other financial benefits.
Comment & Rating (0)