Meshtastic/MeshCore Solar Node RAK 1Watt RAK3401


Print Profile(1)
Description
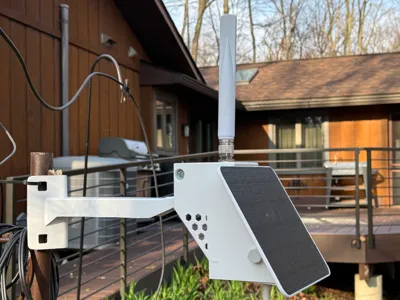
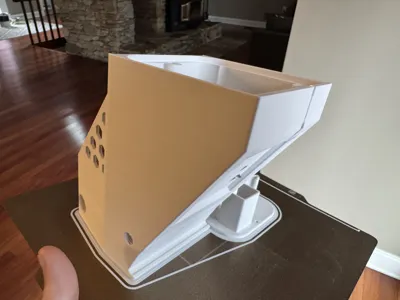
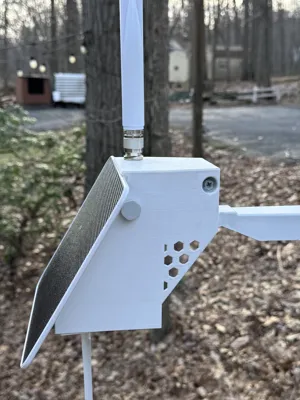
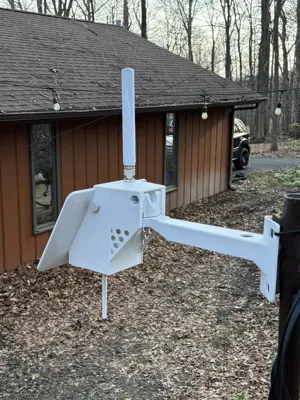
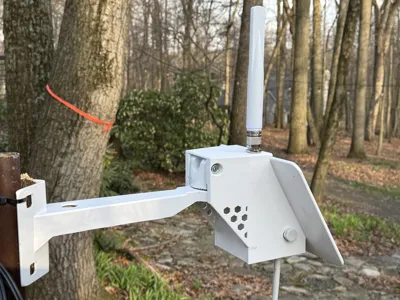
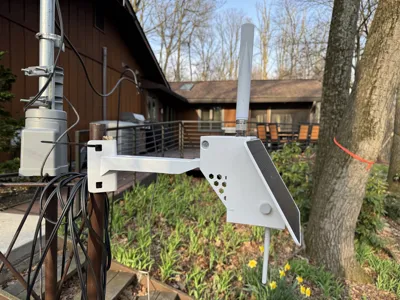
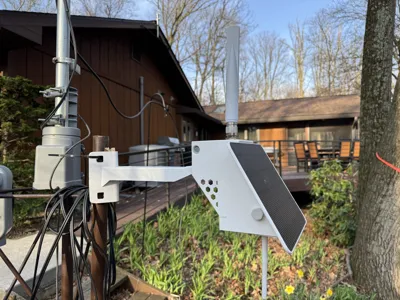
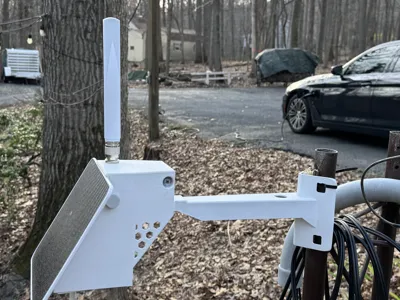
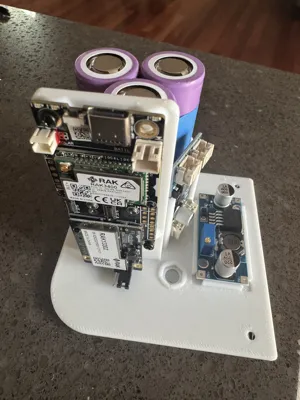
Meshtastic or MeshCore new RAK 1 watt Tower Mounted Solar Node 6 Watt Panel Enclosure and mount all on one unit.
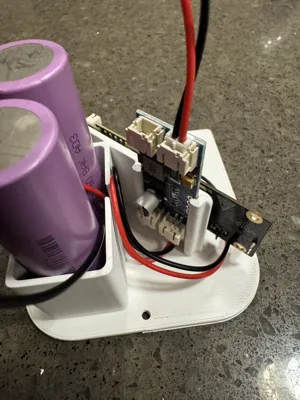
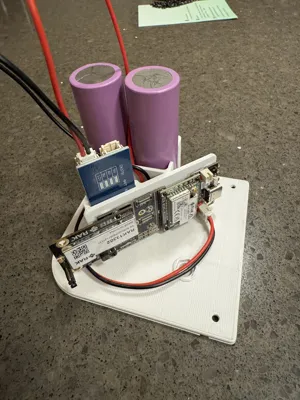
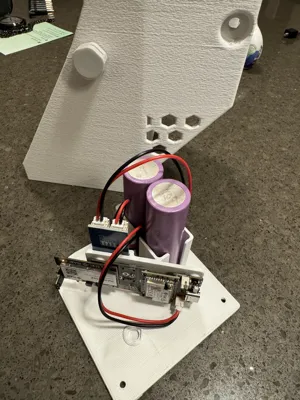
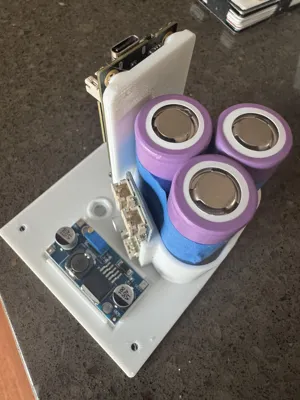
UPDATE 5/25/2026 Added V2 Base Plate for 3 21700 Cells 15,000 mAh, MPPT & 5v Boost to power node via 5v. Will lose the battery leverl if powered this way, but the board functions best on 5v.
Several people on our svmesh.net Meshtastic Group have been using this $13 solar panel successfully for the past few years. I wanted to design and build an all-in-one enclosure that has in integrated pole mount, can fit at 2 2170 5000 mAh batteries, is vented with waterproof vents for accurate weather telemetry, and has the capability to house the new RAK 1 watt boards.
Please give me a boost since this cost a lot of time and filament to create and test these prints. I am not looking to sell the design. I only want to help other Meshtastic & MeshCore users. Honestly, I never get boost's so I might not be posting more here on MakerWorld.
This base plate even includes an SMA antenna hole on the battery plate to use external Bluetooth antennas for OTA firmware updates. This is really useful if you mount it on a tower that is out of reach. All my similar nodes use the same size base plates, so they are interchangeable. This base plate is specifically for this node and this housing.
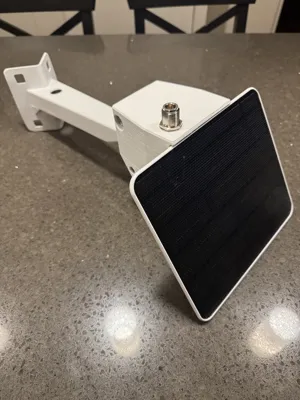
Solar panel used https://a.co/d/63unm1U UPDATE!!! 9/12/25 9pm. Manufacture changed to a new panel design so hole will not line up since new panel is wider so check you dimensions as the sellers sometimes change the panels without letting anyone know. This mount fits the newest model for the rectangular panel currently shipping from amazon seller. Check panel measurements prior to printing. New panel is slightly rectangular and old panel was square. The mounting on the back is slightly different on the old panel.
Install video
Long N female connector https://a.co/d/cod1EHD Confirmed a 6" cable will work as well.
RAK 13301 Coming Soon: WisMesh 1W Booster Starter Kit- with nRF52840, SX1262, an – Rokland
Heat inserts https://a.co/d/3Js44fj
CCTV Mount https://a.co/d/at6TR9F
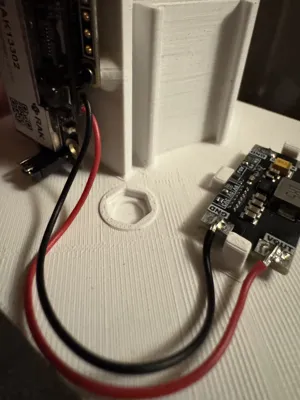
Optional CN3163 MPPT for faster charging 1 amp max charging double the speed of a RAK baseboard internall charging circuit.
Optional low power 5v boost converter. Enables you to power board through 5v input. Move jumper to power this way.
M10x1.5-10 Waterproof breather vents (Housing is threaded for 2 of these vents) https://a.aliexpress.com/_mKOyW4D
External Solar Charge Controller CN3791 https://a.co/d/08gy1xK2
This external charge controller is HIGHLY recommended to the power needed for this new high power LoRa radio. Also I wold suggest a full sun location since this board charger the batteries 3 times faster than the internal charge controller.
21700 2P battery pack. 18650 2P can also be used but is a bit small for this board.
I build my own here is a video of me building one.
1/4x20 bolt to secure panel to the enclosure required!!! it will help lock everything in place while the silicone dries. Make sure to put the silicone between the mount and panel to seal out the weather and lock the panel in place. I have some of these out for months and they are tough!
Also note there are water weep channels and holes if water enters behind the panel between the panel and the enclosure. These were added on as a precaution.
This is best printed in ASA. I test printed in ABS since it was half the cost of ASA. Profile worked for both types of filament.
It is required to use silicone to seal the node enclosure prior to mounting the panel and screwing in the ¼”x20 screw.
License
You shall not share, sub-license, sell, rent, host, transfer, or distribute in any way the digital or 3D printed versions of this object, nor any other derivative work of this object in its digital or physical format (including - but not limited to - remixes of this object, and hosting on other digital platforms). The objects may not be used without permission in any way whatsoever in which you charge money, or collect fees.
Comment & Rating (7)