


Print Profile(1)
Bill of Materials


Description
Thanks for checking out my model! Interested in supporting my work or selling prints?
Support Crew – Show some love and help keep the projects flowing
Galactic Maker Foundry – Sell physical prints of my original designs
Foundry License+ – Sell prints and use my photos for listings
🎉 Supporter-only Discord coming soon – get early access, tips, and sneak peeks!
Membership
Join here to support or get a license
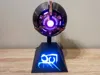
A few people have asked to make a Servitor to go along with my Destiny Ghost shells, so here it is. And a shout out and a Thank You to @BigMackPrints for the idea.
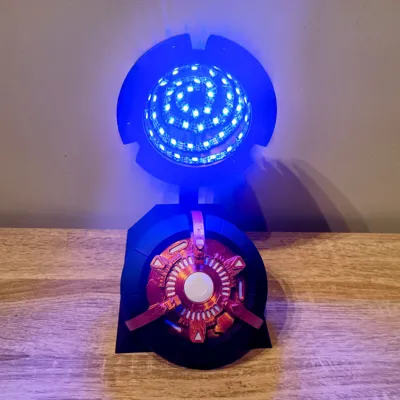
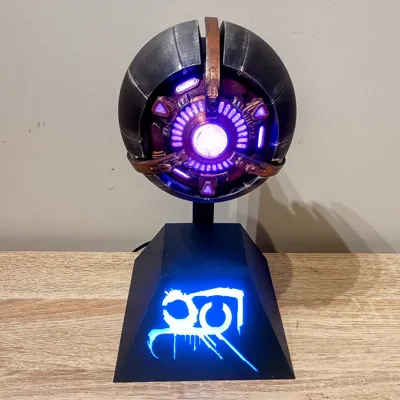
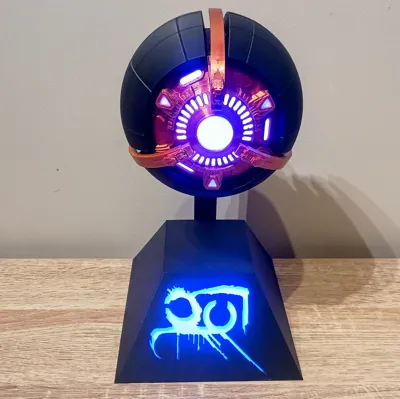
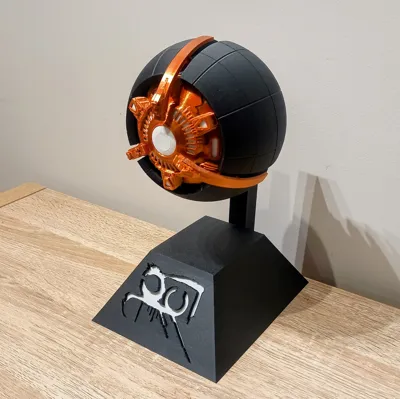
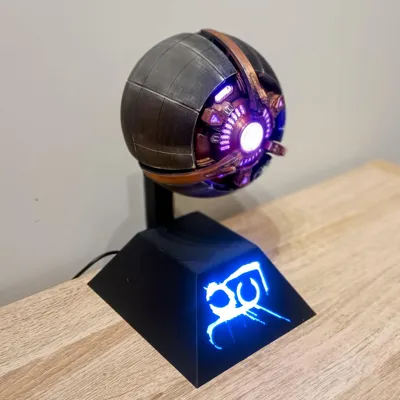
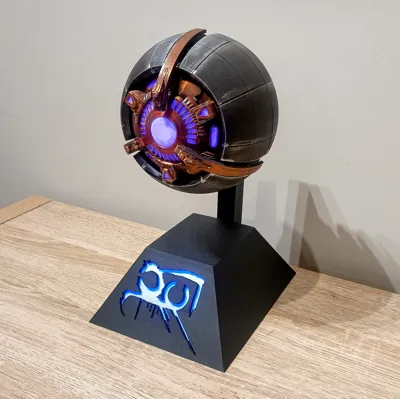
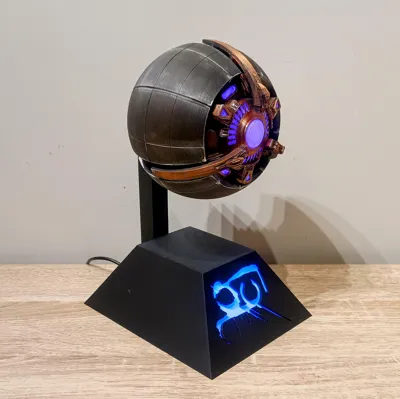
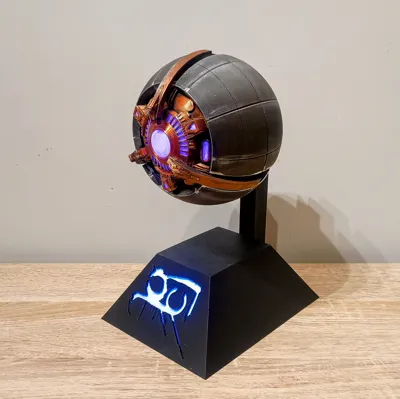
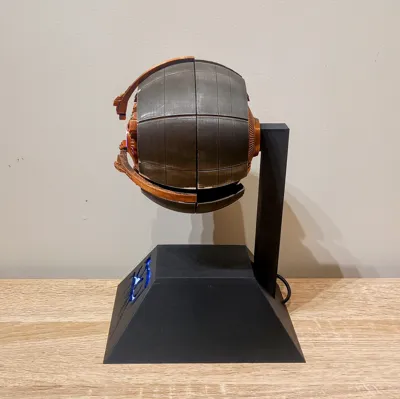
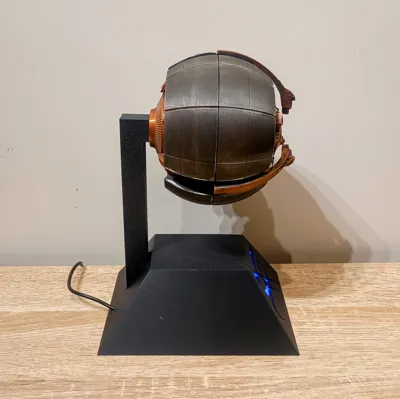
This build follows a very similar design style to my Ghost models, with separate front and rear outer shells, front and rear inner shells, and an illuminated display base. There are two base versions included: one with the support arm coming from the rear, and another with the support in the middle so you can show off more of the rear detail.
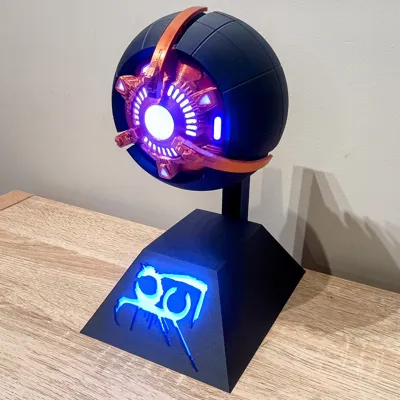
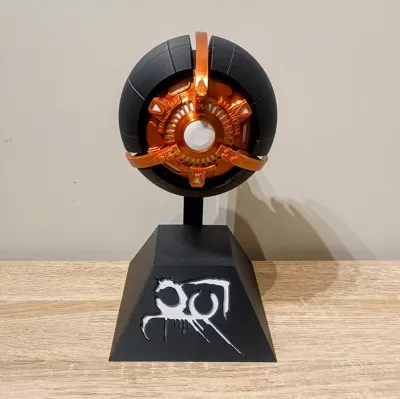
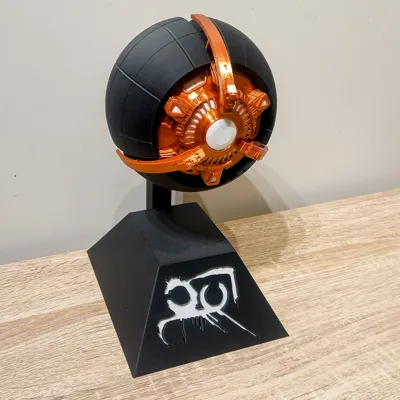
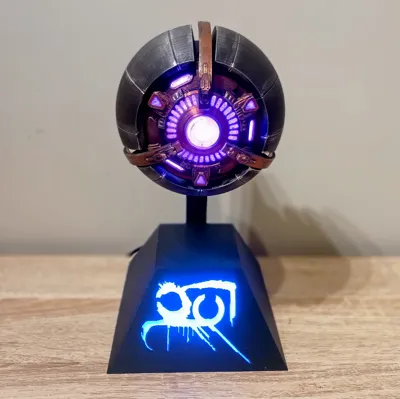
For filament choice, I decided to go with a copper silk from Sunlu for the inner shell parts, the closet Bambu colour would be Rose Gold Silk or perhaps the PLA Metal Copper Brown Metallic. Matte Black/Charcoal for the outer shell, which gives the Servitor a really nice contrast once assembled and lit up. For the front inner shell, I have included white diffuser windows for the large center eye as well as the six smaller outer windows. If you want, you could print them in colour and use white LEDs or no LEDs at all.
For the base, I used the Fallen symbol instead of the standard Destiny logo, because using a symbol usually associated with Guardians and the Light felt a bit wrong for a Fallen Servitor. If there are other logos people would like, like Fallen House symbols, let me know and I can make some alternate bases.
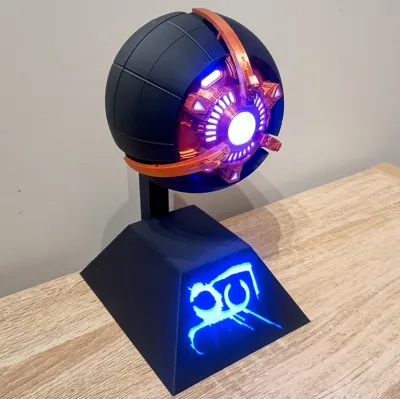
This came out as a fun companion piece to my Destiny Ghosts, and looks especially good lit up on display.
Give your desk a little piece of the Fallen, minus the whole hostile alien death ball part.
Shell Assembly
- Glue the diffuser windows into the front inner shell.
There is 1 large center diffuser and 6 smaller diffusers. - Glue the front inner shell into the front outer shell.
- Glue the rear inner shell into the rear outer shell.
- Glue the magnets into the shell parts.
Make sure you pay attention to the polarity before gluing them in.
Servitor LED Wiring
- Cut a strip of LEDs for the Servitor.
I used 50 LEDs. - Solder a length of wire to the LED strip, long enough to run from the shell, through the support, and into the base. I usually leave the wires a bit longer to start with and trim them at the end, as it is easier to cut some off than have to add extensions later.
- I used black for GND, yellow for Data/Signal, and red for +5V.
Make sure you solder the wires to the Data In / DI side of the strip. - Stick the LED strip into the rear inner shell.
- Thread the wires through the support and glue the support in place.
- Thread the wires through the base and glue the support into the base.
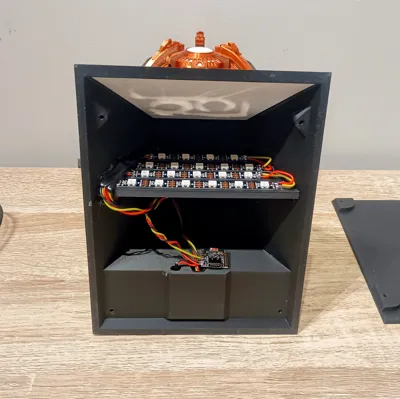
Base LED Wiring
- Cut the LED strips for the base.
I used 4 rows:
- 1 strip of 4
- 2 strips of 5
- 1 strip of 6
- Join the base LED strips together using about 30mm lengths of wire between each row.
- I made the row of 4 LEDs the start of the strip, so it is the first in the chain and sits towards the top of the base, then the 2 rows of 5, then the row of 6.
- Make sure each strip connects DO / Data Out into DI / Data In.
- Stick the base LEDs to the wall in front of the diffuser.
- Solder the Servitor LED wires to the DO / Data Out of the base LED strip.
Controller and Power Setup
- Flash your D1 Mini or ESP32 Super Mini using the WLED installer at install.wled.me.
- Strip the red and black wires from your USB cable.
- Twist the black LED wire together with the black USB wire, then tin and solder them together. Do the same with the red LED wire and red USB wire.
- Solder these combined wires to the 5V and GND pins on the microcontroller.
I do it this way so the LEDs are powered from the USB cable and not directly through the microcontroller, which can be too much for the voltage regulator depending on what board you use. - Solder the yellow data wire to D4 on a D1 Mini.
- If you are using an ESP32 Super Mini C3, change the Data GPIO in WLED from GPIO2 to GPIO4, as GPIO2 can cause boot issues.
You can change this in Config > LED Preferences > Data GPIO. - With the wiring finished, do a quick test before tidying anything up.
- Once everything is working, tidy the wiring. I stick the D1 Mini / Super Mini down with double-sided foam tape, and tack the wires down with a little hot glue.
Final Assembly
- Once the wiring is done and testing is finished, glue the 3 front wings into the front shell.
- Add the base bottom covers and secure them with a few M3 screws up to 10mm long.
WLED Segments and Control
- The key to getting different colours and patterns for the Servitor LEDs and base LEDs is using segments in WLED.
I used:
- 1 segment of 20 LEDs for the base
- 1 segment of 50 LEDs for the Servitor
- Once WLED is set up, you can control it through the app, connect it to your home Wi-Fi, use any browser to control it, or even add it to Home Assistant.
Finishing
- I finished mine off with a little weathering using a black wash, a bit of brown, and then some silver highlights with Silver Leaf Rub ’n Buff.
I really hope you guys like it. I have honestly been blown away by how much people seem to enjoy my models. Having over 3000 followers is still pretty crazy to me, and all the boosts, likes, downloads, and prints really do help keep the filament coming in for testing and designing new ideas. So thank you again for all the support, I really do appreciate it. If anyone has ideas or suggestions for other props or models, feel free to send me a message or leave a comment. In the meantime, enjoy your new alien purple glowing death ball.
Bill of Material (BOM)
Item | Quantity | Links |
| D1 Mini (or ESP32) | 1 | https://www.aliexpress.com/item/1005006235653025.html? |
| ESP32 SuperminiC3 (or D1 Mini) | 1 | https://www.aliexpress.com/item/1005006599545782.html? |
| WS2818B DC5V RGB LED (60 IP30) | 2 Meters | https://www.aliexpress.com/item/1005006766819624.html? |
| 10mmx2mm Round Magnets | 12 | https://www.aliexpress.com/item/1005009166794091.html? |
| M3 8mm Screw | 4 | https://www.aliexpress.com/item/32969042589.html |
USB cable (At Least 100 cm) | 1 | https://www.aliexpress.com/item/1005008045179029.html |
| Wire 26 AWG Red, Black, Yellow | as needed | https://www.aliexpress.com/item/4001283806251.html |
| Soldering Iron | 1 | https://www.aliexpress.com/item/1005007099216072.html |
| Solder | as needed | https://www.aliexpress.com/item/1005008695639704.html |
| CA Glue | as needed | https://www.aliexpress.com/item/1005008249812950.html? |
| Hot glue | as needed | https://www.aliexpress.com/item/1005008055271799.html? |
License
You shall not share, sub-license, sell, rent, host, transfer, or distribute in any way the digital or 3D printed versions of this object, nor any other derivative work of this object in its digital or physical format (including - but not limited to - remixes of this object, and hosting on other digital platforms). The objects may not be used without permission in any way whatsoever in which you charge money, or collect fees.
Comment & Rating (1)