Dual channel bench power supply


Print Profile(1)

Description
They are a lot of DIY bench power supply's out there, but I think I bring a different take on the matter. My design goal is the smallest possible footprint. I have a very limited working space and I want to be able to remove my equipment relatively easily if I have to. For the main power supply I went with an enterprise Cisco POE+ power supply unit that I found on eBay. The DELTA EDPS-715ab is a 715W 56V at 12A redundant power supply that is used with the Cisco 3560X/3750X POE+ switches. I wasn't able to find the pinout on the web so I tried to figure it out by myself.
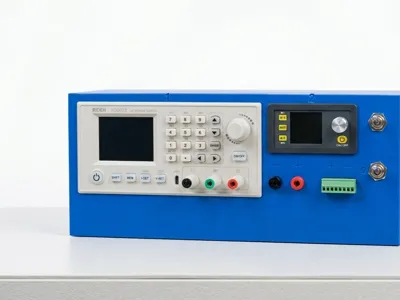
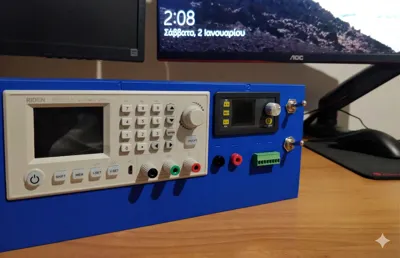
With this model is essentially a case for hosting both a RD6012 and a DPS5015 modules.
The max voltage with this setup is 48V at 10-12A
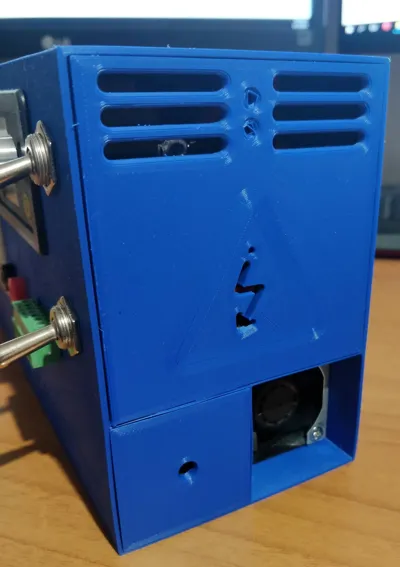
Main power supply


Turn on pinout

Some notes on the Delta's behavior:
After initial power ON the fan ramps up and about a minute is slowing down to a more reasonable noise level, my needs for cooling are quite low so I didn't bother to control the unit.
The first unit is the RD6012, it has a lot of features and very good firmware support with new releases almost every month that expand its capabilities even more, also it can charge batteries, so it's a plus for me.

The second unit is the DPS5015 is more rough power unit with a bit of less control, but again it has voltage limiting and current limiting capabilities. I'm going to use it for things that don't need good precision.

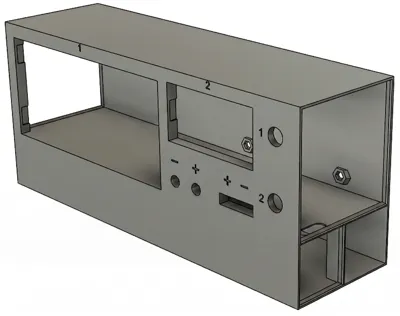
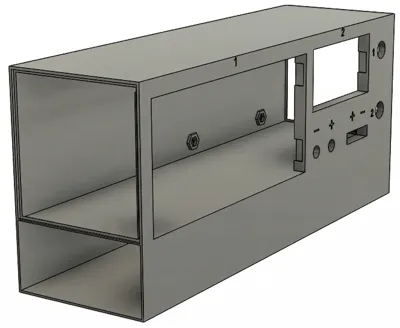
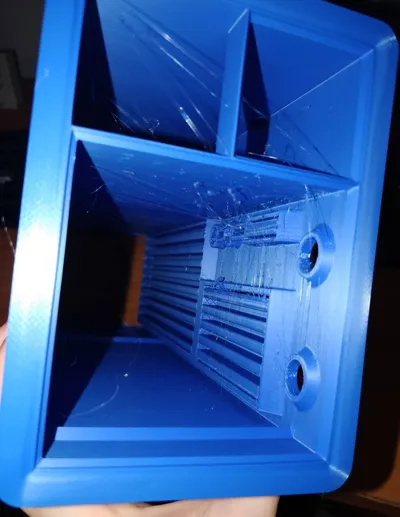
Case design and fitment
It's Fusion 360 time. Again my goal here is to compact everything together and use as little space as possible. I came up with this design. Measuring dimensions 29.5cm x 10cm (w/ terminals) x 12.8cm
It's designed to be printed with minimal supports. Supports are needed on the front face only, in order to support the two rectangular windows for the displays. The main PSU is secured in place with a small rectangular piece that is on purpose a press fit on the mains side and has a small hole on top it's if you like to put some glue. All the other sides have a clip style mount for a more clean appearance.


Wiring
The unit turn's on by just pluging mains power, and with the toggle switches you can power up/down the channels individually. A small head also was added for smaller cables.


Boost Me (for free)
If you find my model a tiny bit helpful consider giving me a boost 😀
License
You shall not share, sub-license, sell, rent, host, transfer, or distribute in any way the digital or 3D printed versions of this object, nor any other derivative work of this object in its digital or physical format (including - but not limited to - remixes of this object, and hosting on other digital platforms). The objects may not be used without permission in any way whatsoever in which you charge money, or collect fees.
Comment & Rating (0)